什么是 Stable Diffusion
注意:这篇博客中的图片存在 AI 生成的图片!
Stable Diffusion是2022年发布的深度学习文本到图像生成模型。它主要用于根据文本的描述产生详细图像,尽管它也可以应用于其他任务,如内补绘制、外补绘制,以及在提示词(英语)指导下产生图生图的翻译。
为什么我说“面向你的朋友的”?
面向公网的 Stable Diffusion 服务可能会被巨大的计算需求量塞爆,以至于你和你的朋友根本没法用。。。
所以比较理想的解法是加个密码,只允许几个好朋友大家一起共享你的算力。大家一起快乐的玩你的绘画平台!
这样显卡就没白买啦!
决策使用消费级硬件还是企业级硬件
消费级硬件便宜简单,但是负载能力弱。管理功能差。
企业级硬件稍微麻烦一点点,但是容易Scale和Manage。
消费级硬件?
使用消费级硬件很难 Scale out,没有BMC。使用体验极差。在资金较少,负载不大的情况下,自己消费级硬件也能承载。
显然,要运营一个 AI 绘画系统,你需要有一些设备。
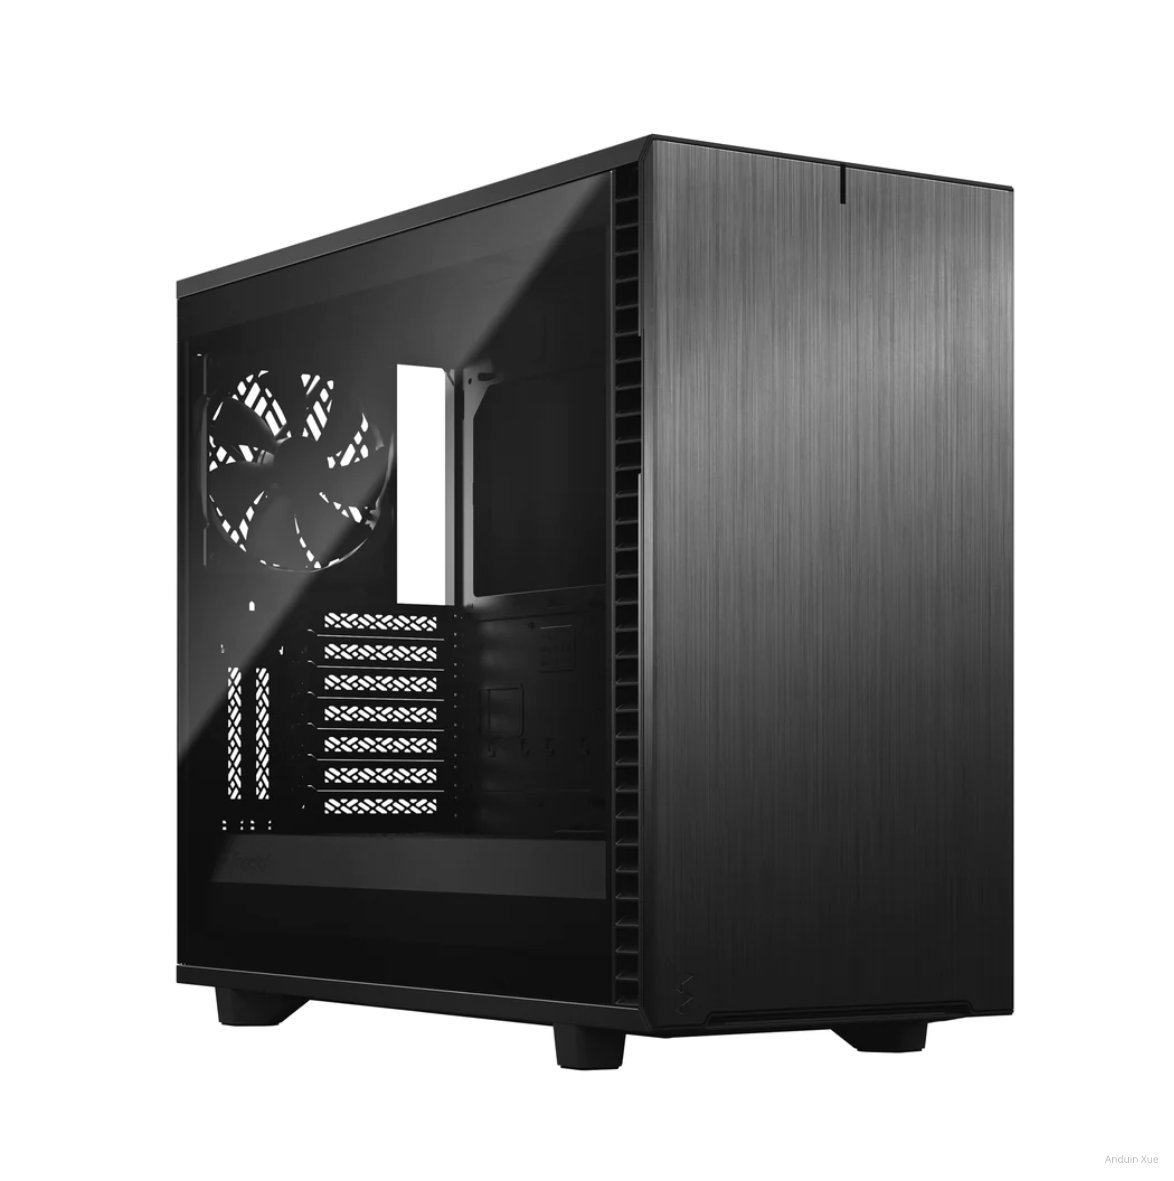
这里你可以参考我的硬件:
- ASUS TUF Gaming GeForce RTX™ 4090 24GB GDDR6X
- ROG STRIX Z790-A GAMING WIFI
- Intel® Core™ i9-13900KS Processor
- SAMSUNG 990 PRO PCIe® 4.0 NVMe™ SSD 1TB
跑起来妥妥的,没啥毛病。
适当超频一下。参考教程:https://anduin.aiursoft.cn/post/2023/2/12/pc-tune
这篇教程是基于消费级硬件构建的。
我非常建议你为了运行 Stable Diffusion 专门购买一台设备! Stable Diffusion 非常需要显存!即使我使用 The NVIDIA® GeForce RTX™ 4090 ,仍然日常爆显存。家里富裕还是买 A100 吧。
企业级硬件?
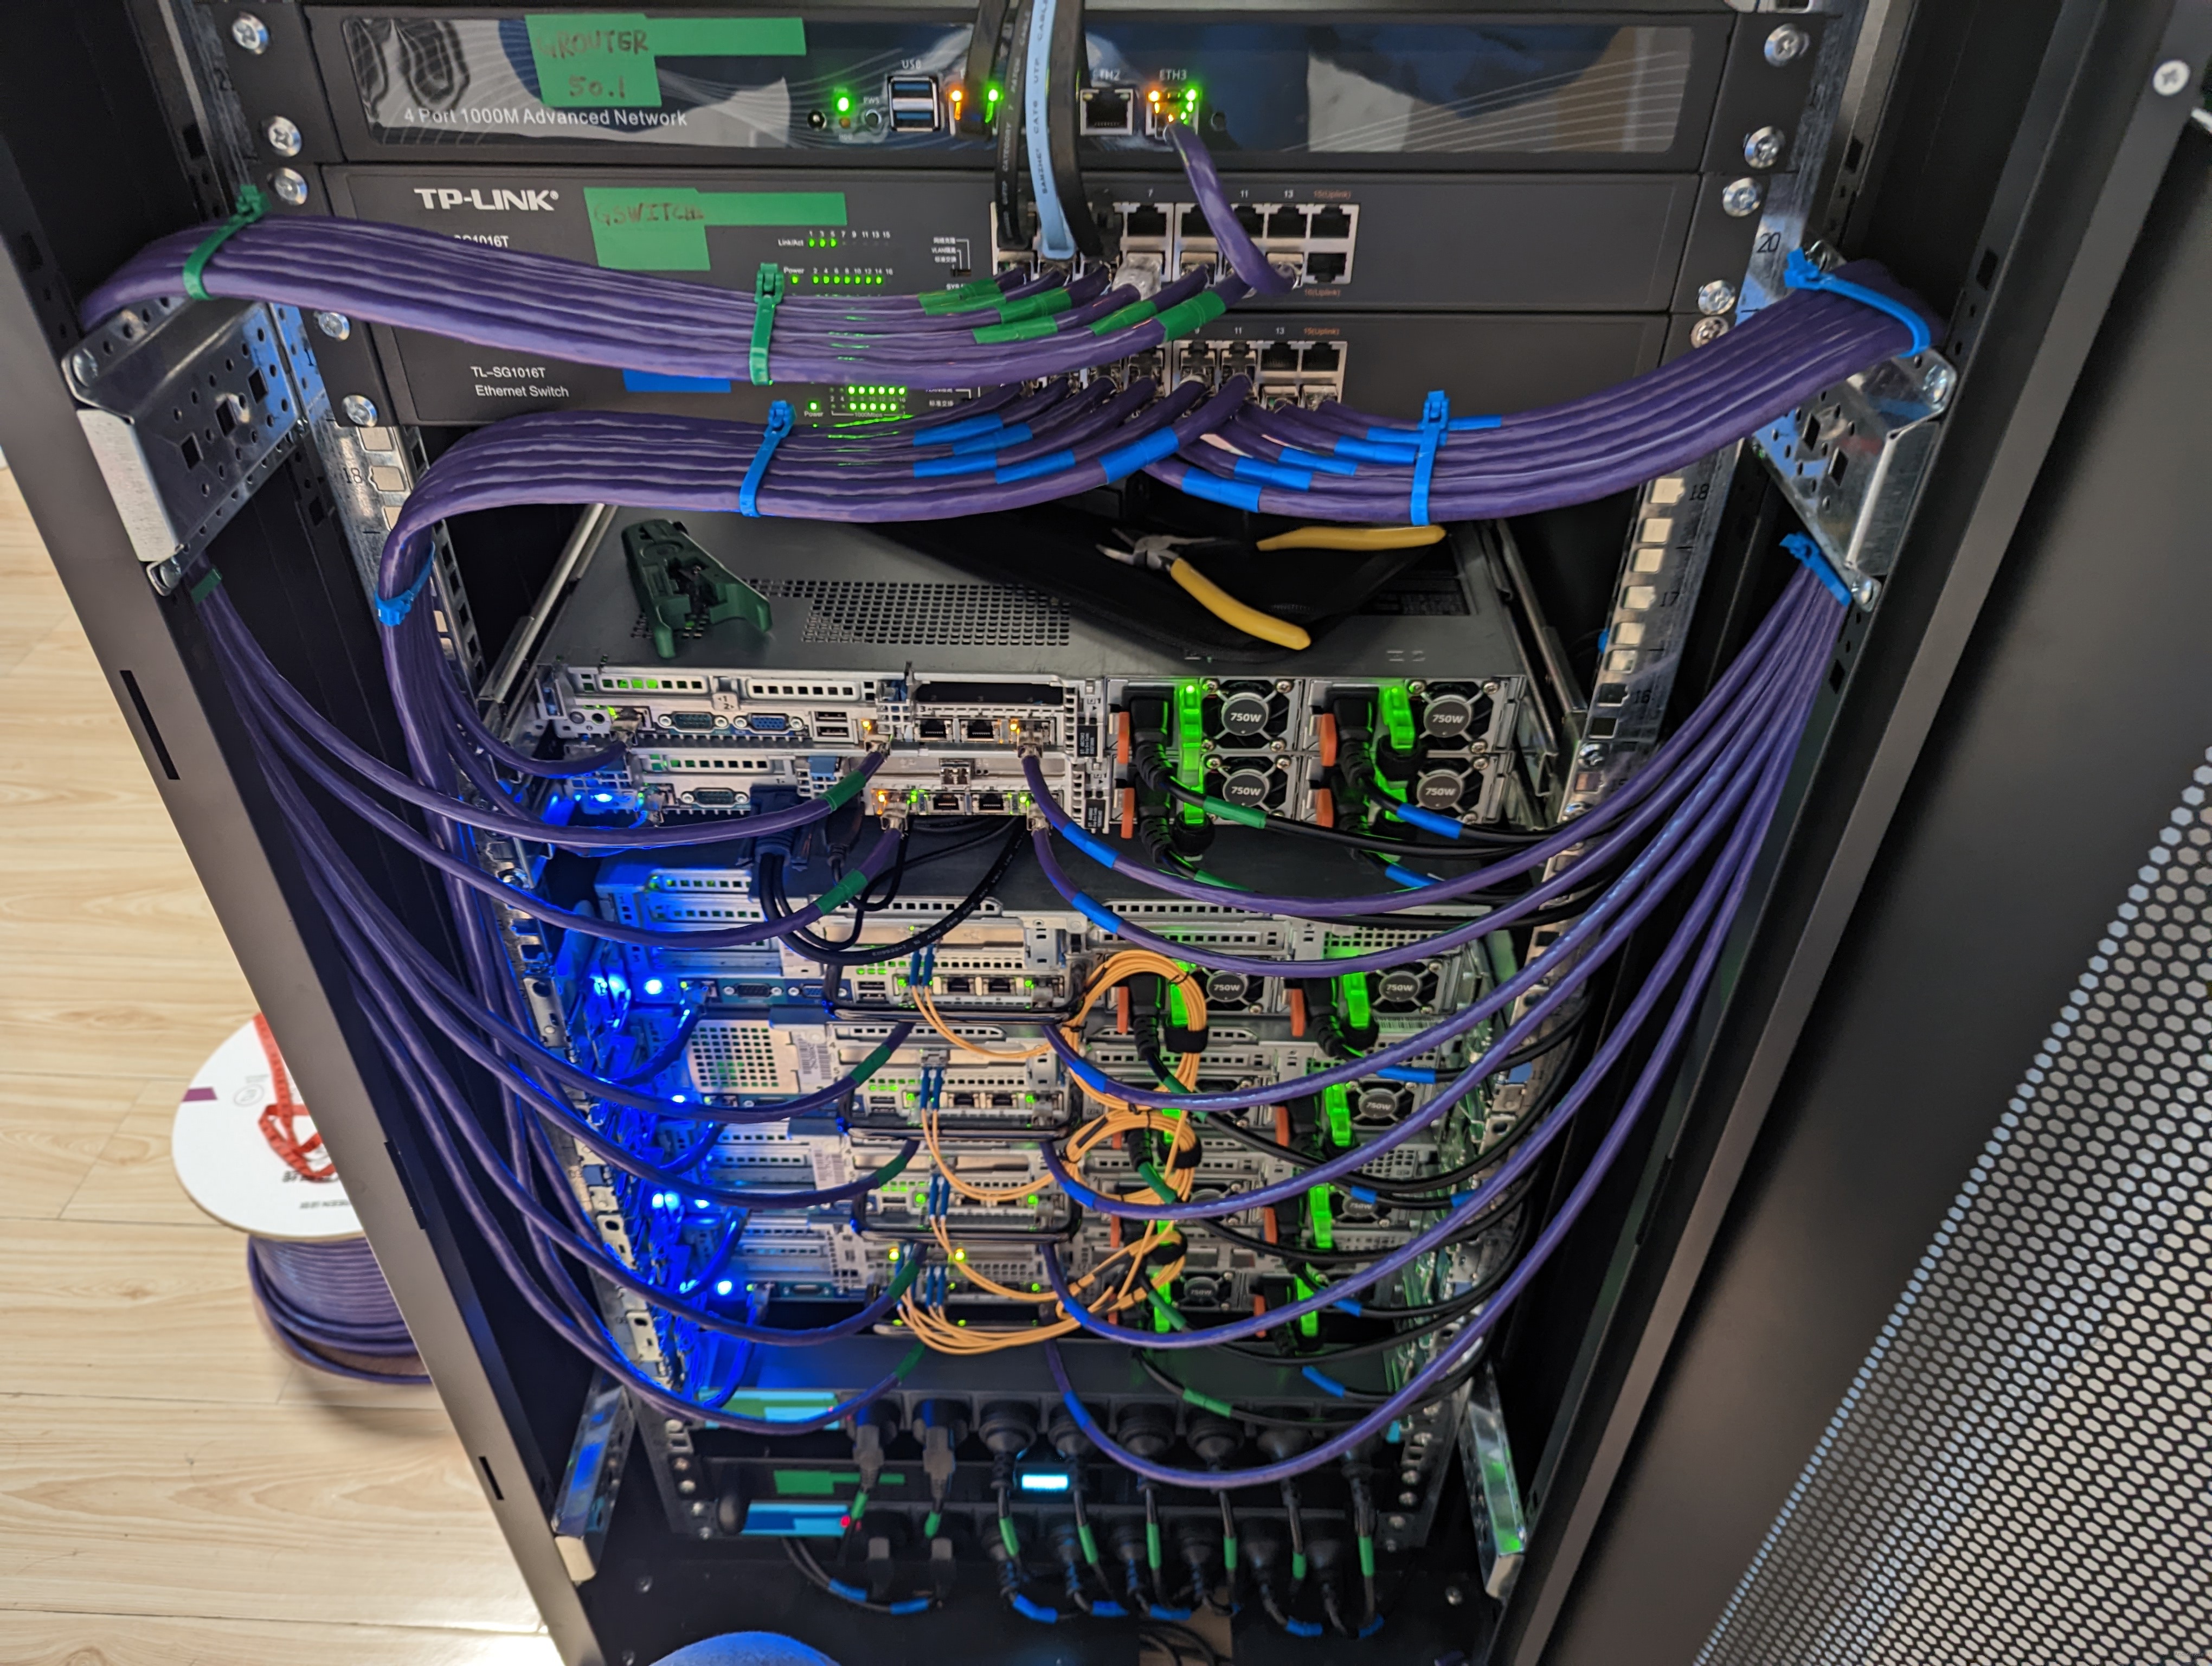
企业级硬件可以选择购买大量便宜的服务器(例如 Dell R740),然后购买一些计算卡,例如 P40,A100。
在服务器上安装 ESXI,构建VSphere计算集群。注意构建vSAN。
注意配置vMotion(虚拟机动态迁移)支持,注意开启DRS(动态资源负载均衡)、HA(高可用性)、DPM(动态电源管控)。
购买 Nvidia vGPU的License。使用VCenter Lifecycle Manager 将驱动和管理Daemon批量部署到服务器上。
在服务器上开一些Linux的虚拟机,将vGPU挂载给计算卡。构建一个GPU农场。
在虚拟机里安装Nvidia的驱动,激活计算卡授权。安装好Stable Diffusion。
在外层使用反向代理和负载均衡来平衡你的计算压力。构建一个前端 App。
构建 GPU 算力农场的方法我已经写了博客: 为你的数据中心增加GPU算力
安装 Stable Diffusion
前置条件
可以使用Ubuntu(推荐)或Windows Server。可以使用虚拟机,把vGPU或物理GPU穿透进去。
可以安装 google-perftools。这有助于提高性能。
sudo apt-get install google-perftools
可能需要安装OpenGL(如果遇到缺失 libgl 的错误):
sudo apt-get install -y libgl1-mesa-glx
需要Python & Git:
sudo apt install python3 python-is-python3 python3-pip git
需要安装 Python 3.10.*。
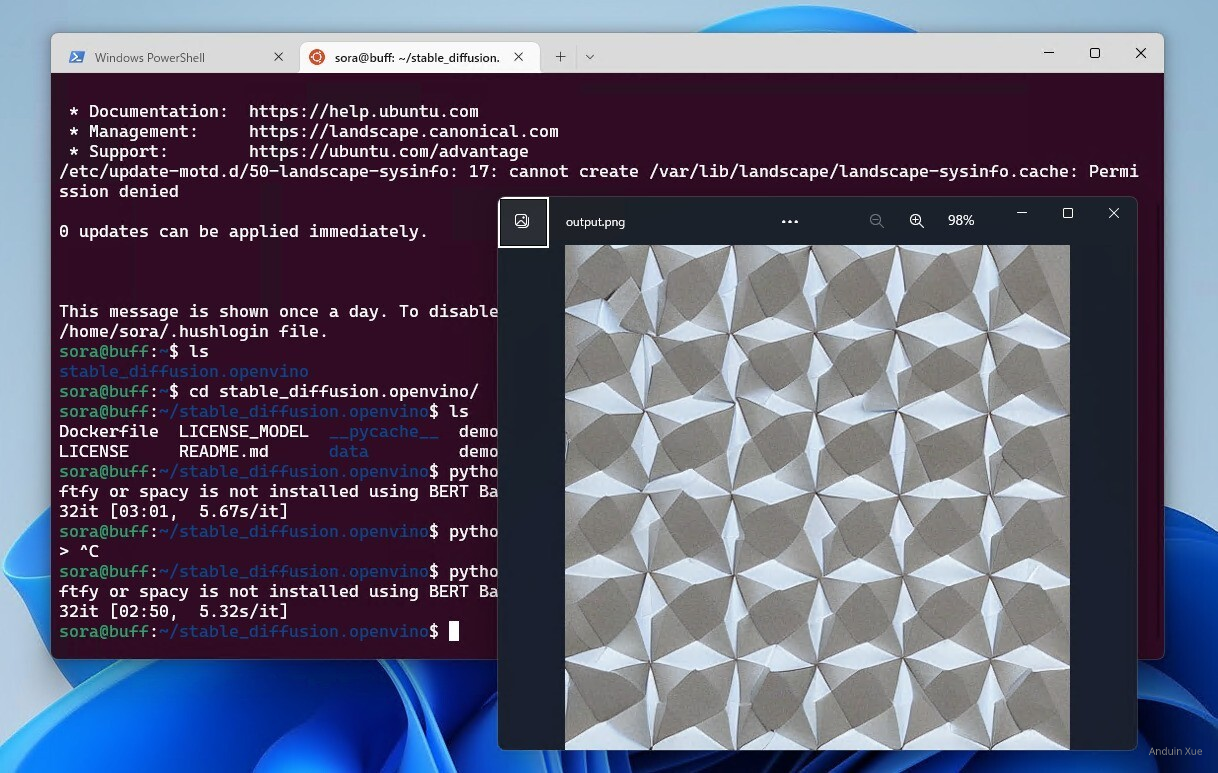
下载 Stable Diffusion WebUI
可以直接 Clone https://git.aiursoft.cn/PublicVault/stable-diffusion-webui
下载完成后,直接运行 webui-user.bat 就完事儿了。
它会默认运行在 127.0.0.1:7860。可以直接双击打开。
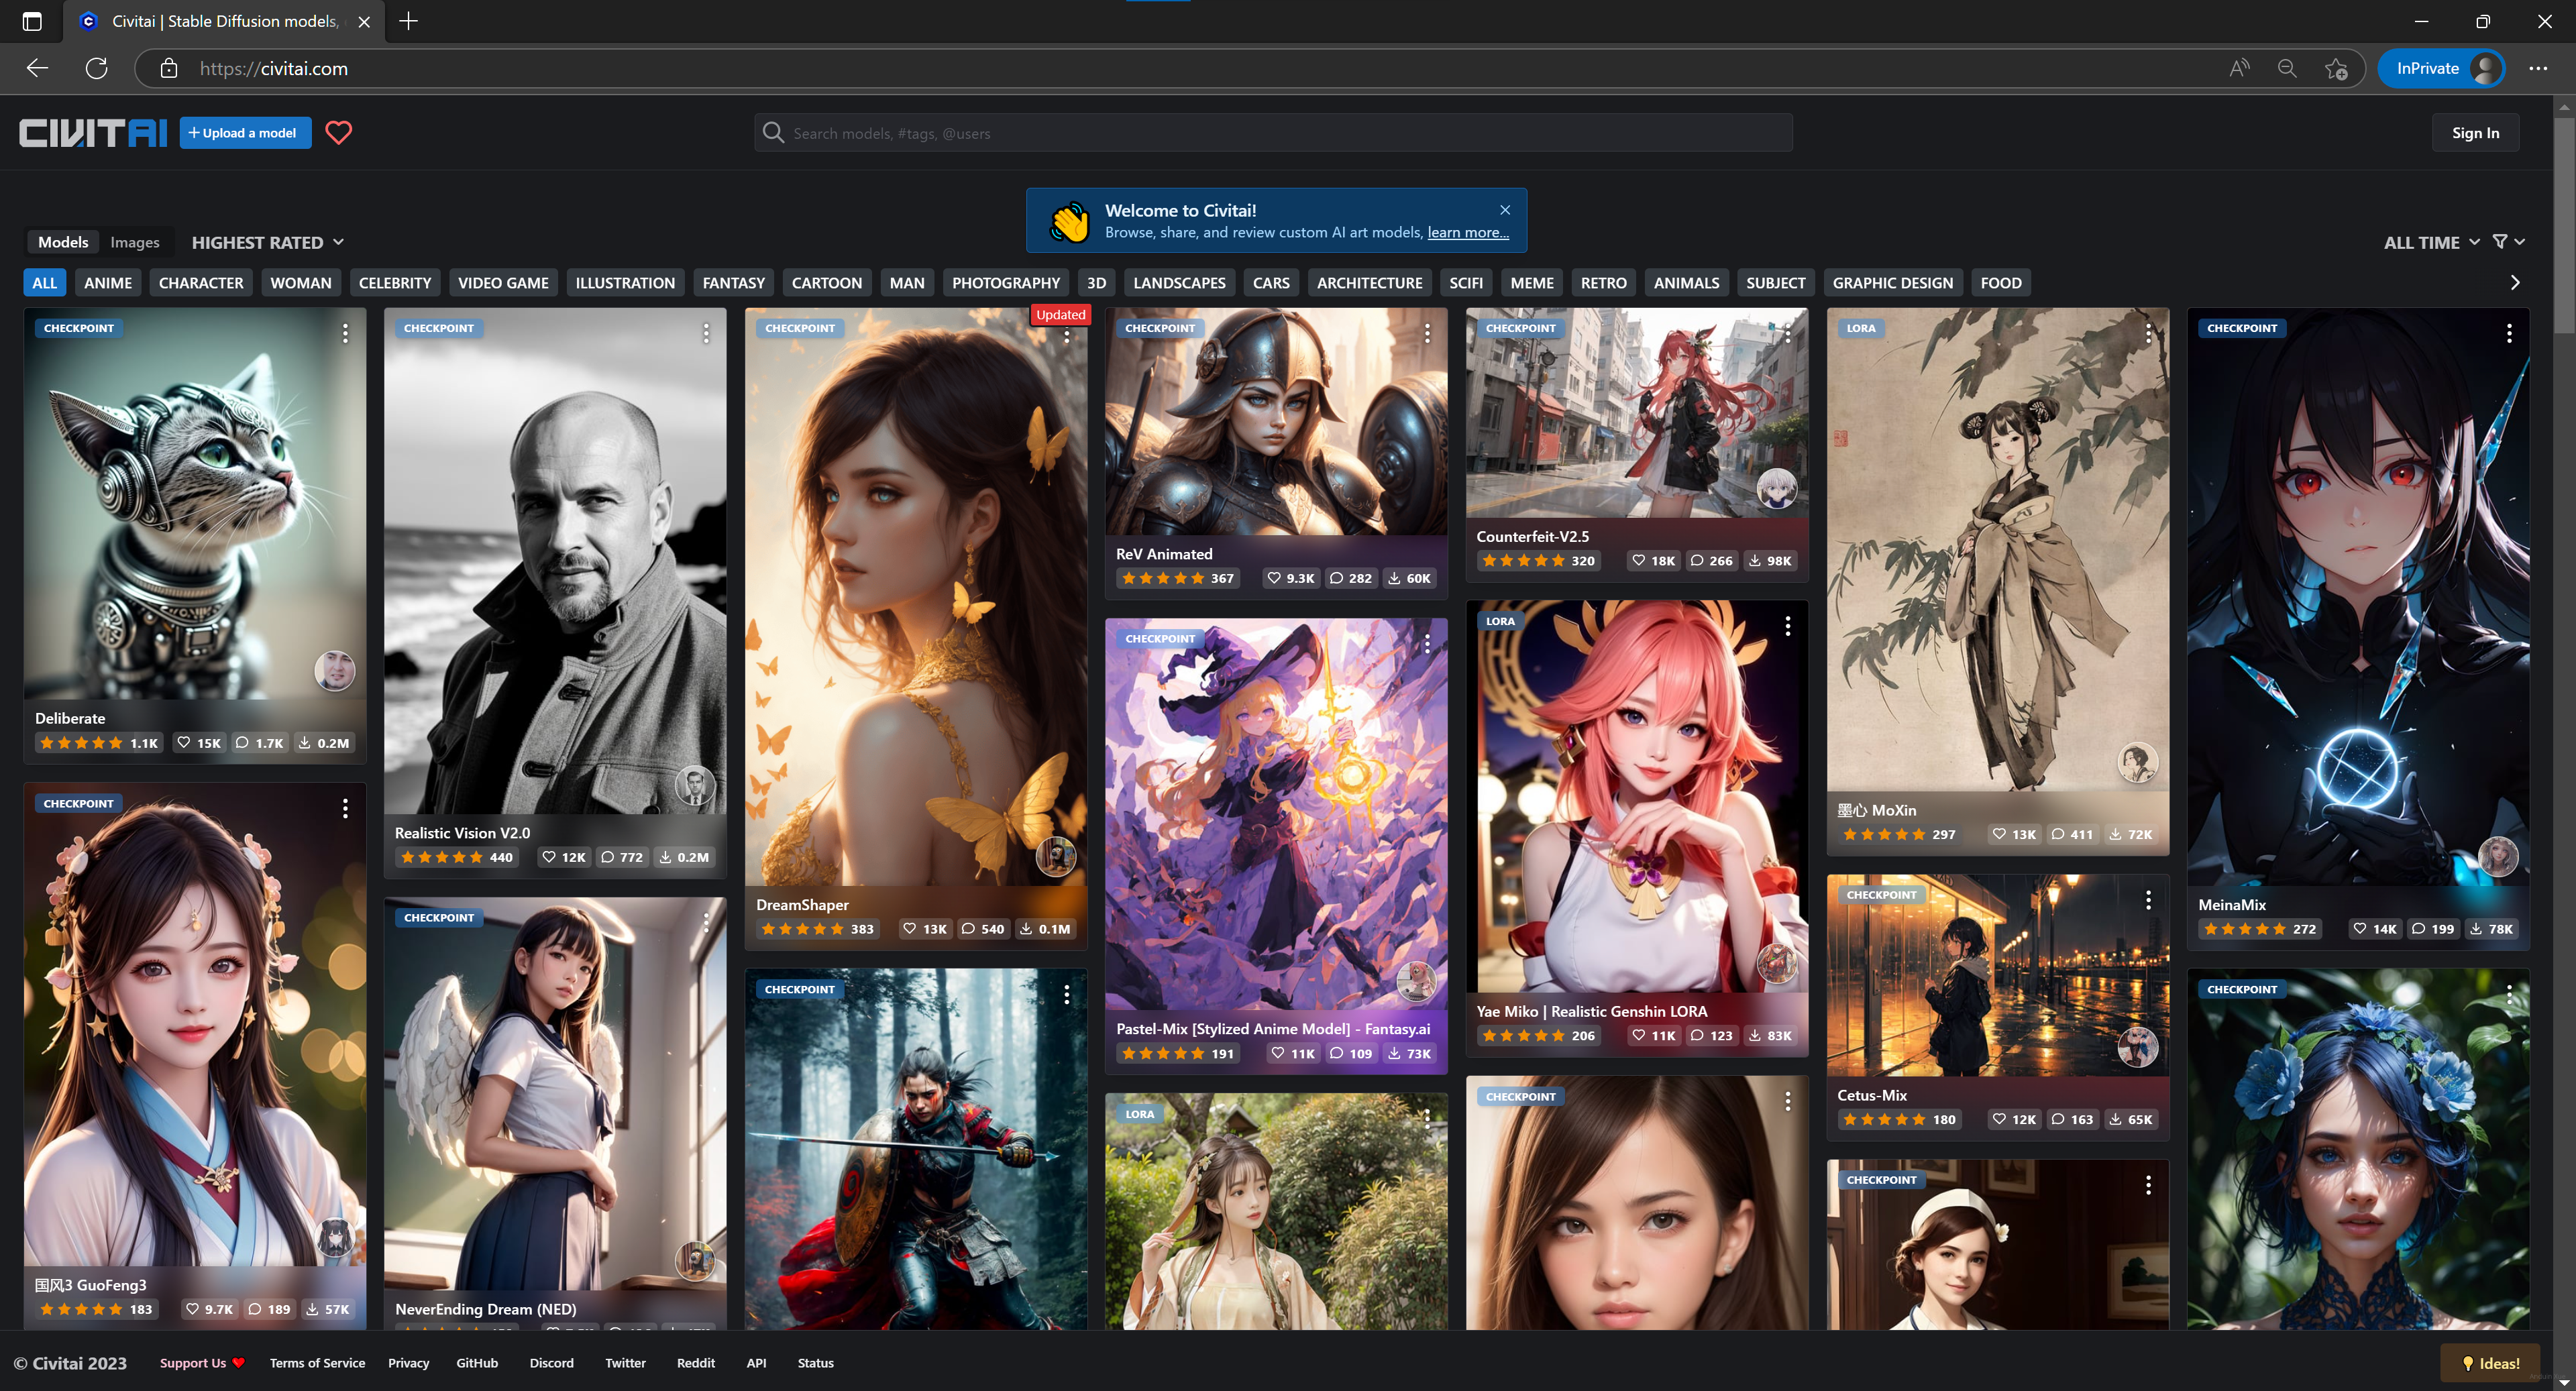
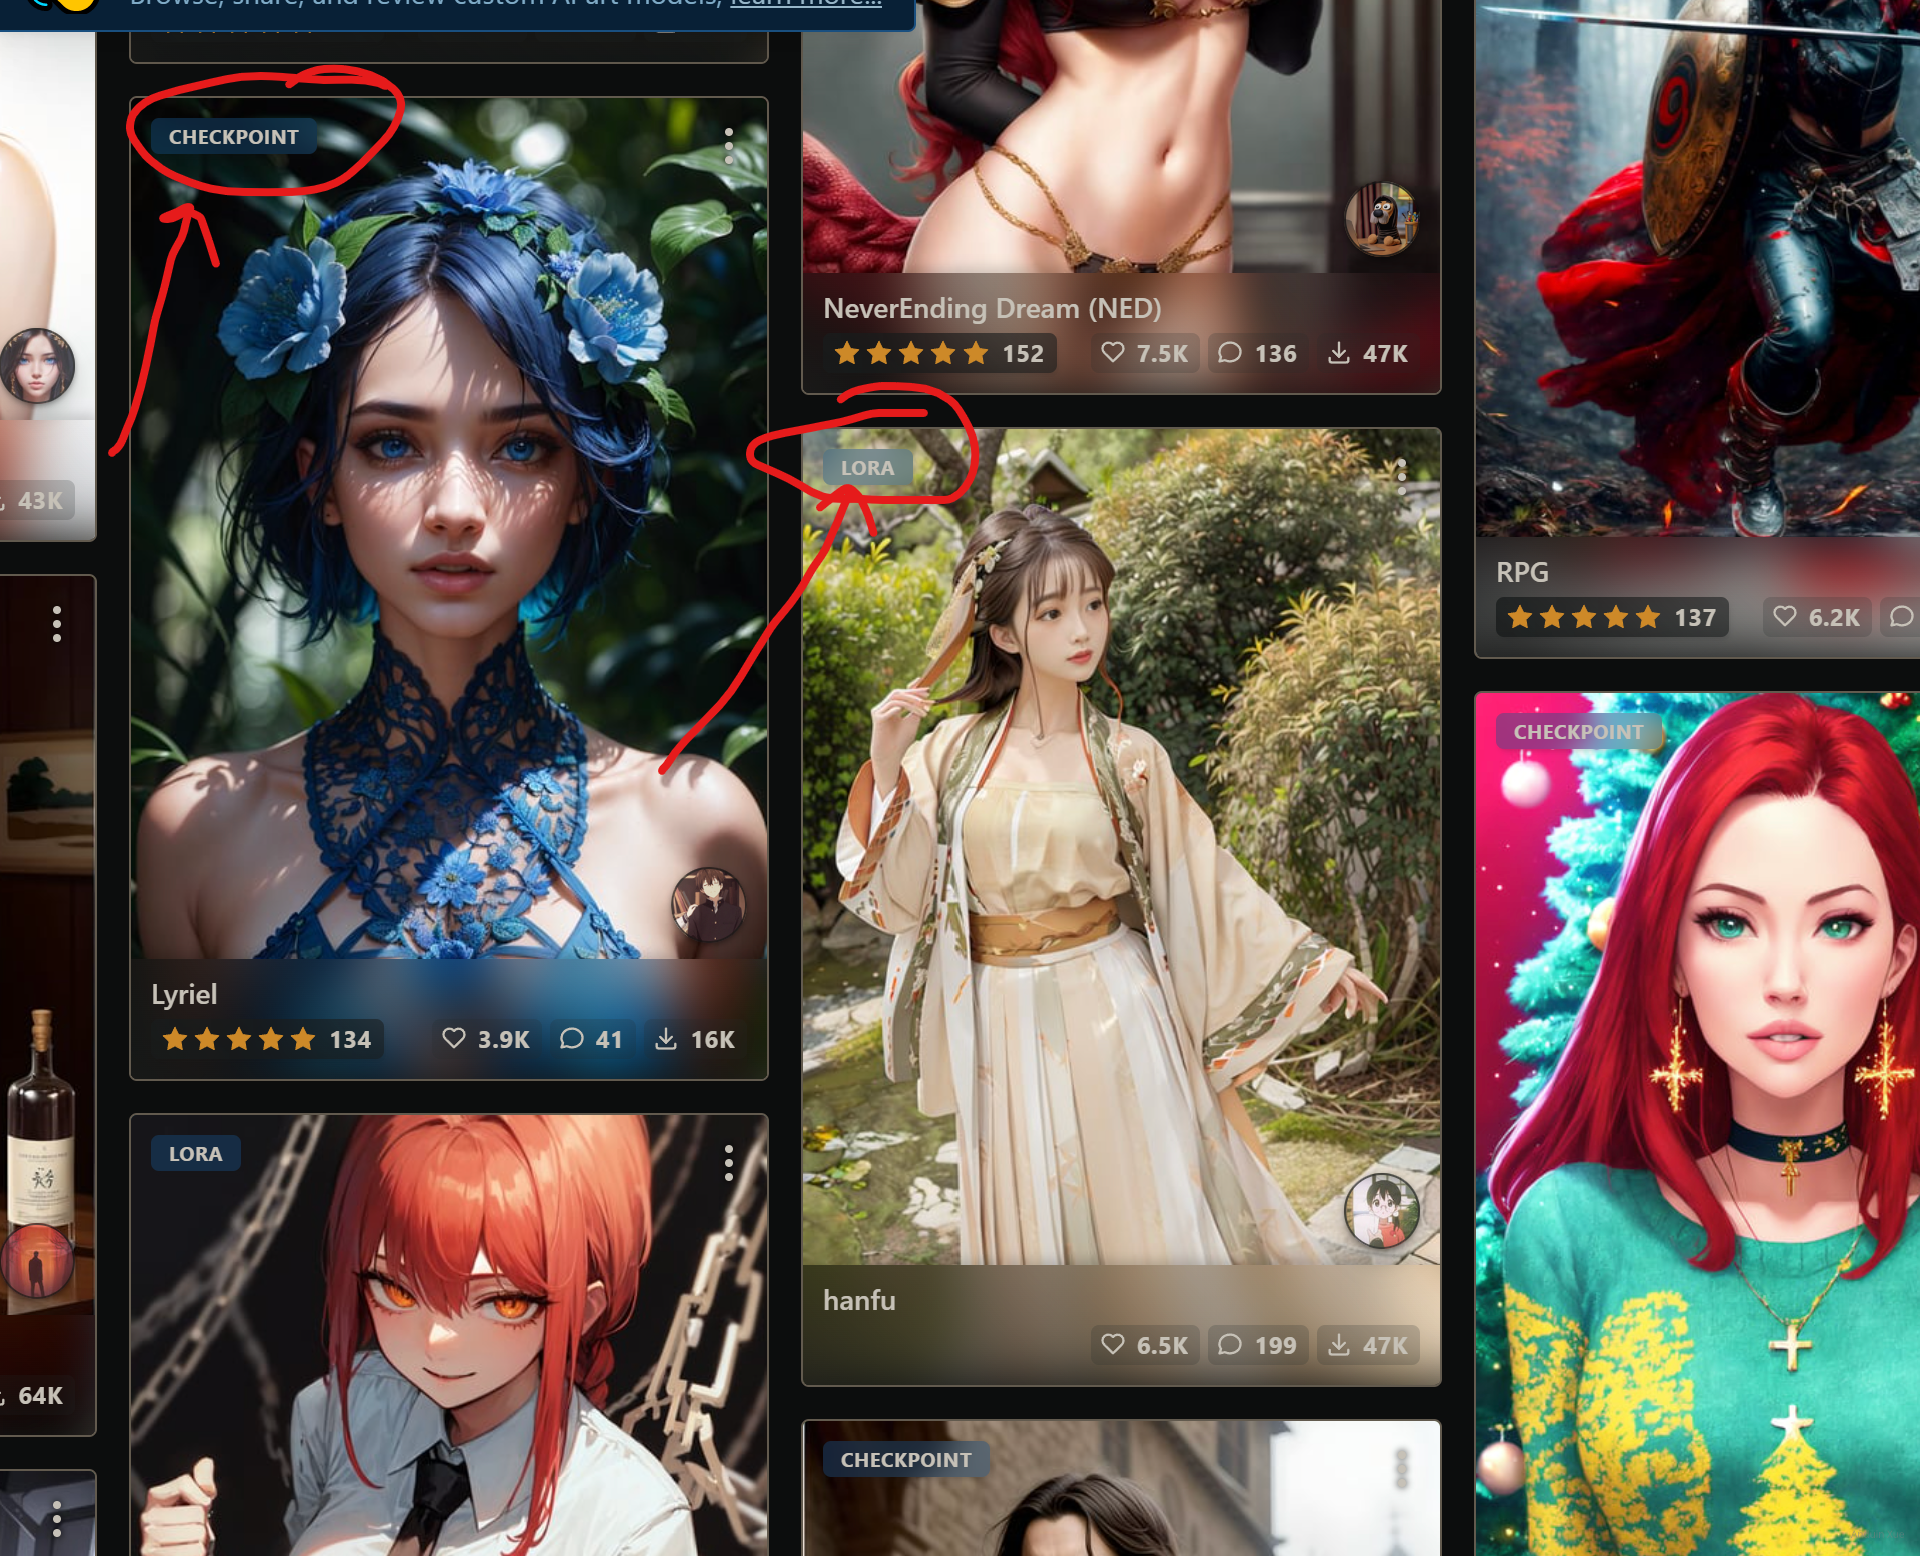
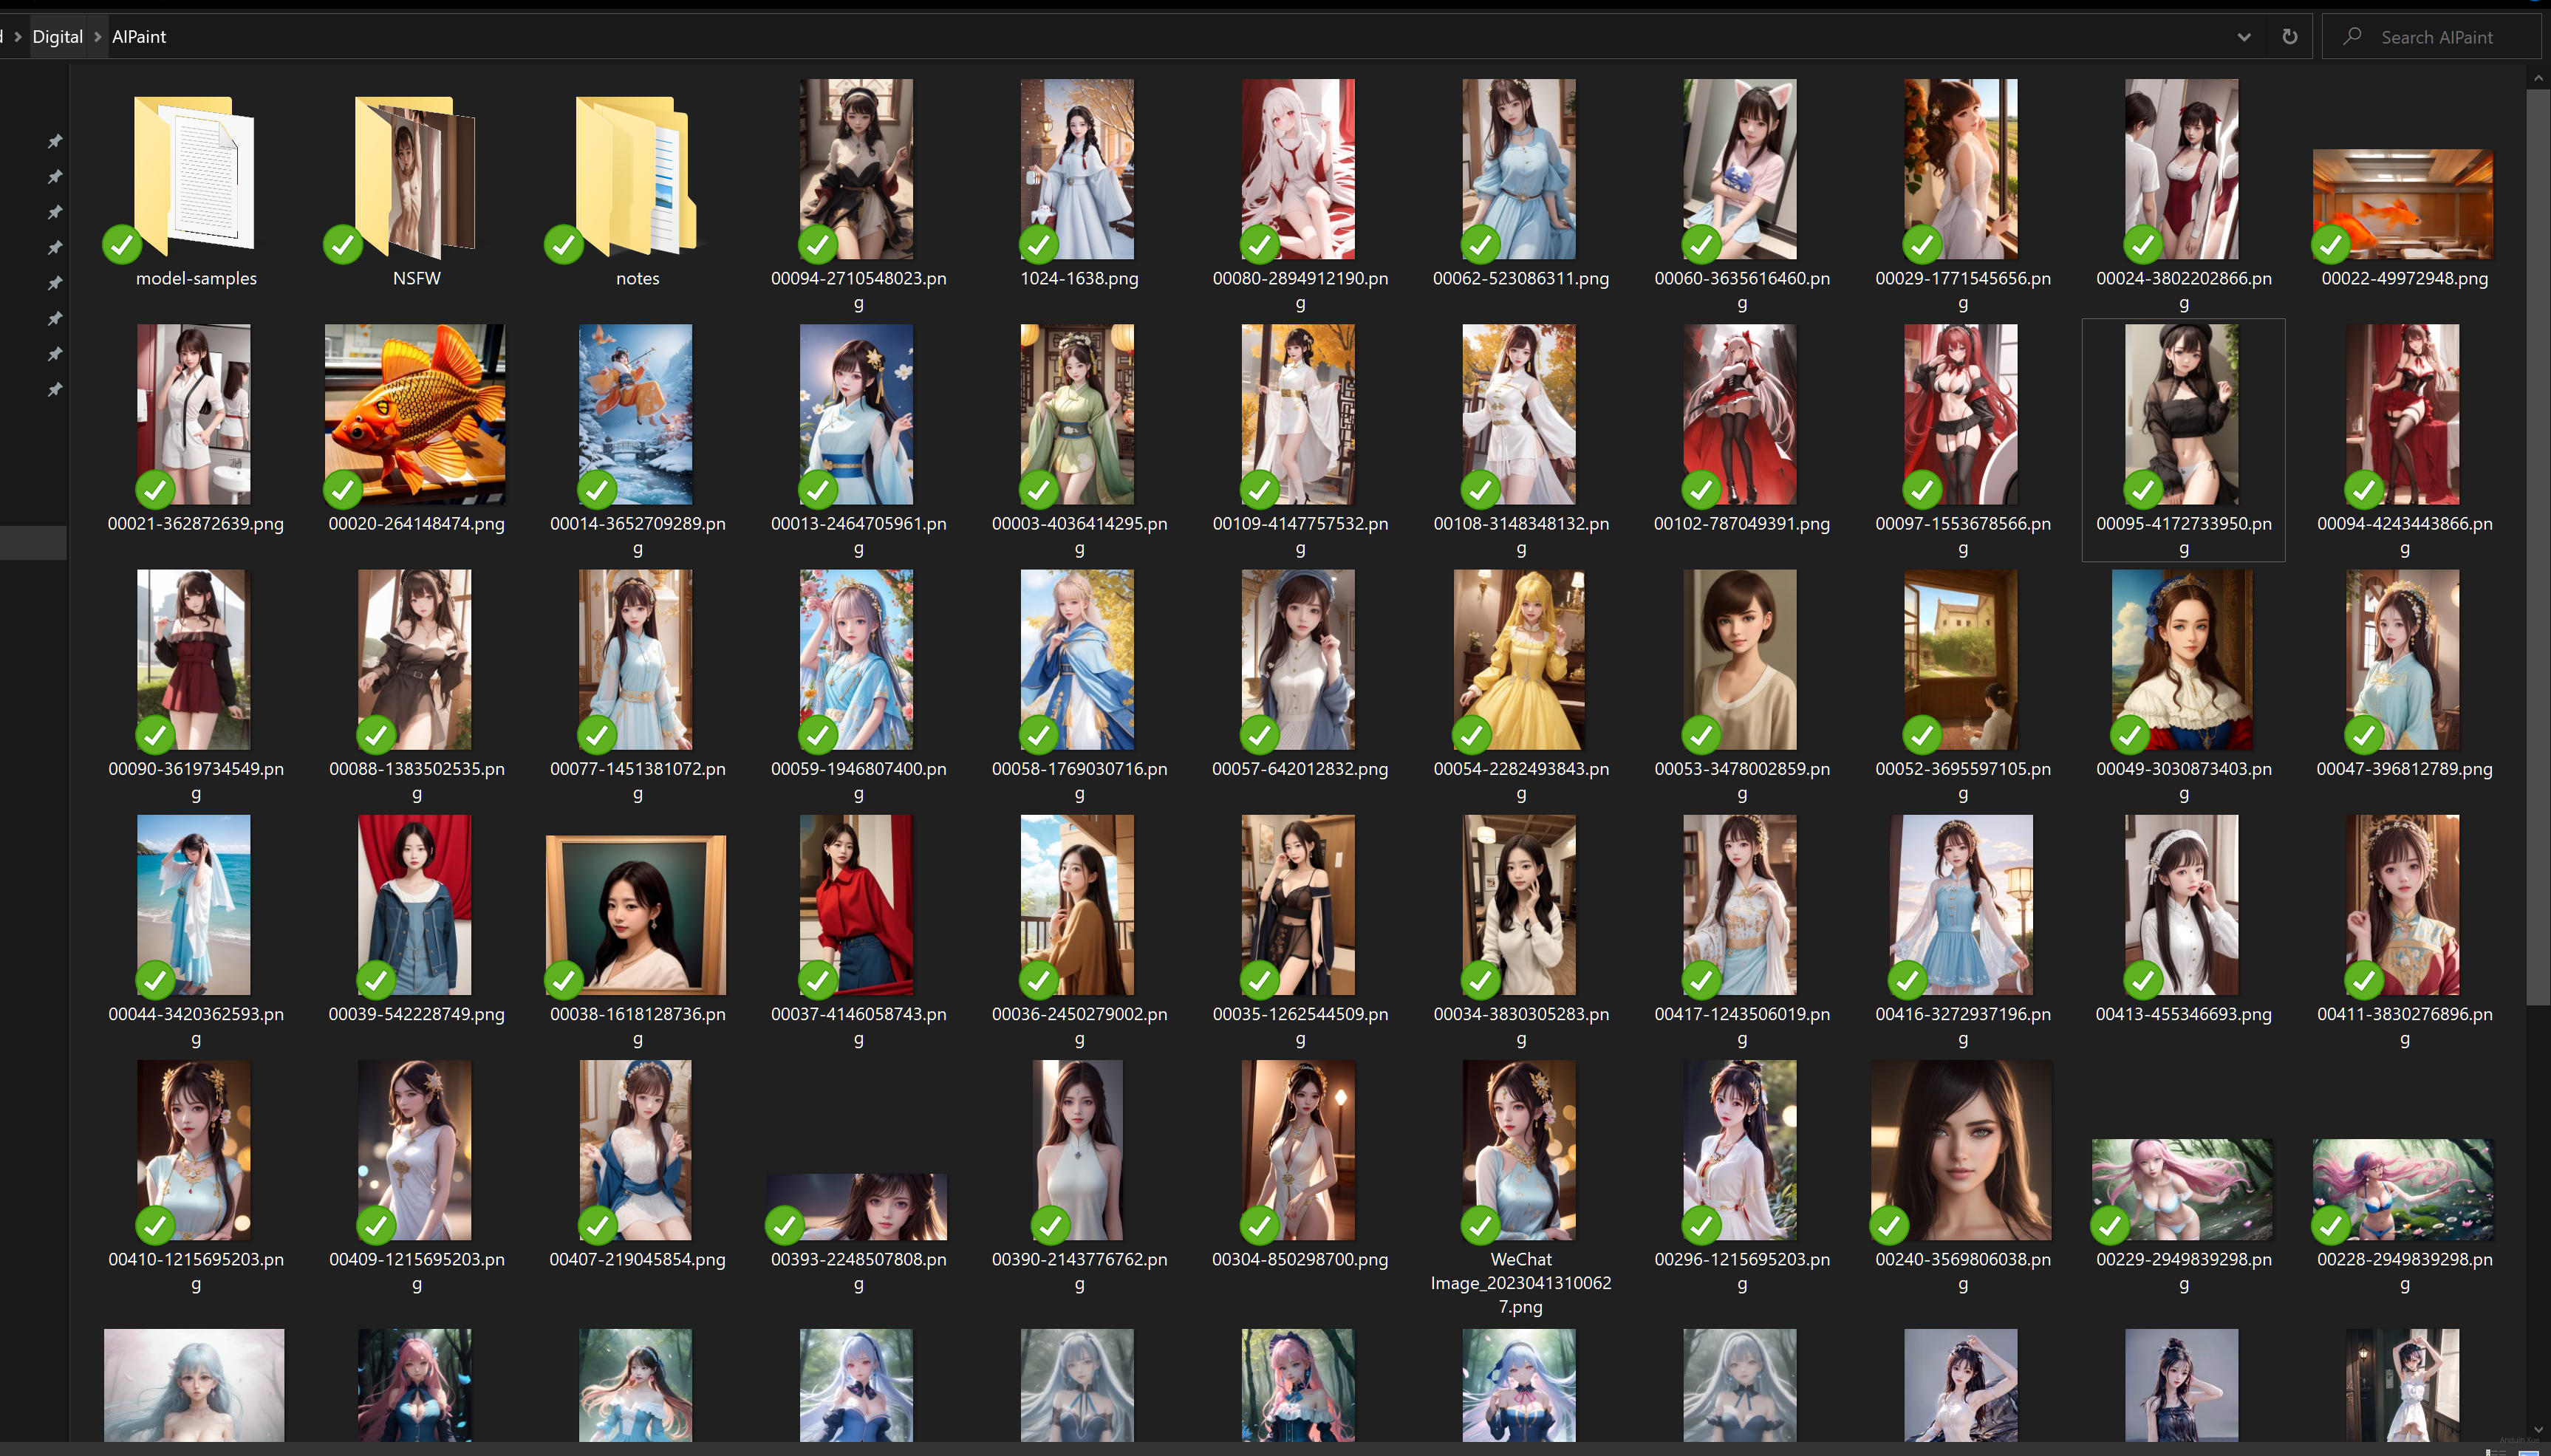
下载一些 Checkpoint 和 Lora
有一些网站收录了不少模型,例如:
注意:这可能会看到色情和暴露内容!!!未成年人请不要访问。
登录以后,可以筛选 Checkpoint 和 Lora。
在每次绘制时,你只能选择使用一个 Checkpoint。但是 Lora 可以同时搭配使用多个。
使用不合适的Lora组合可能会画出匪夷所思的东西。
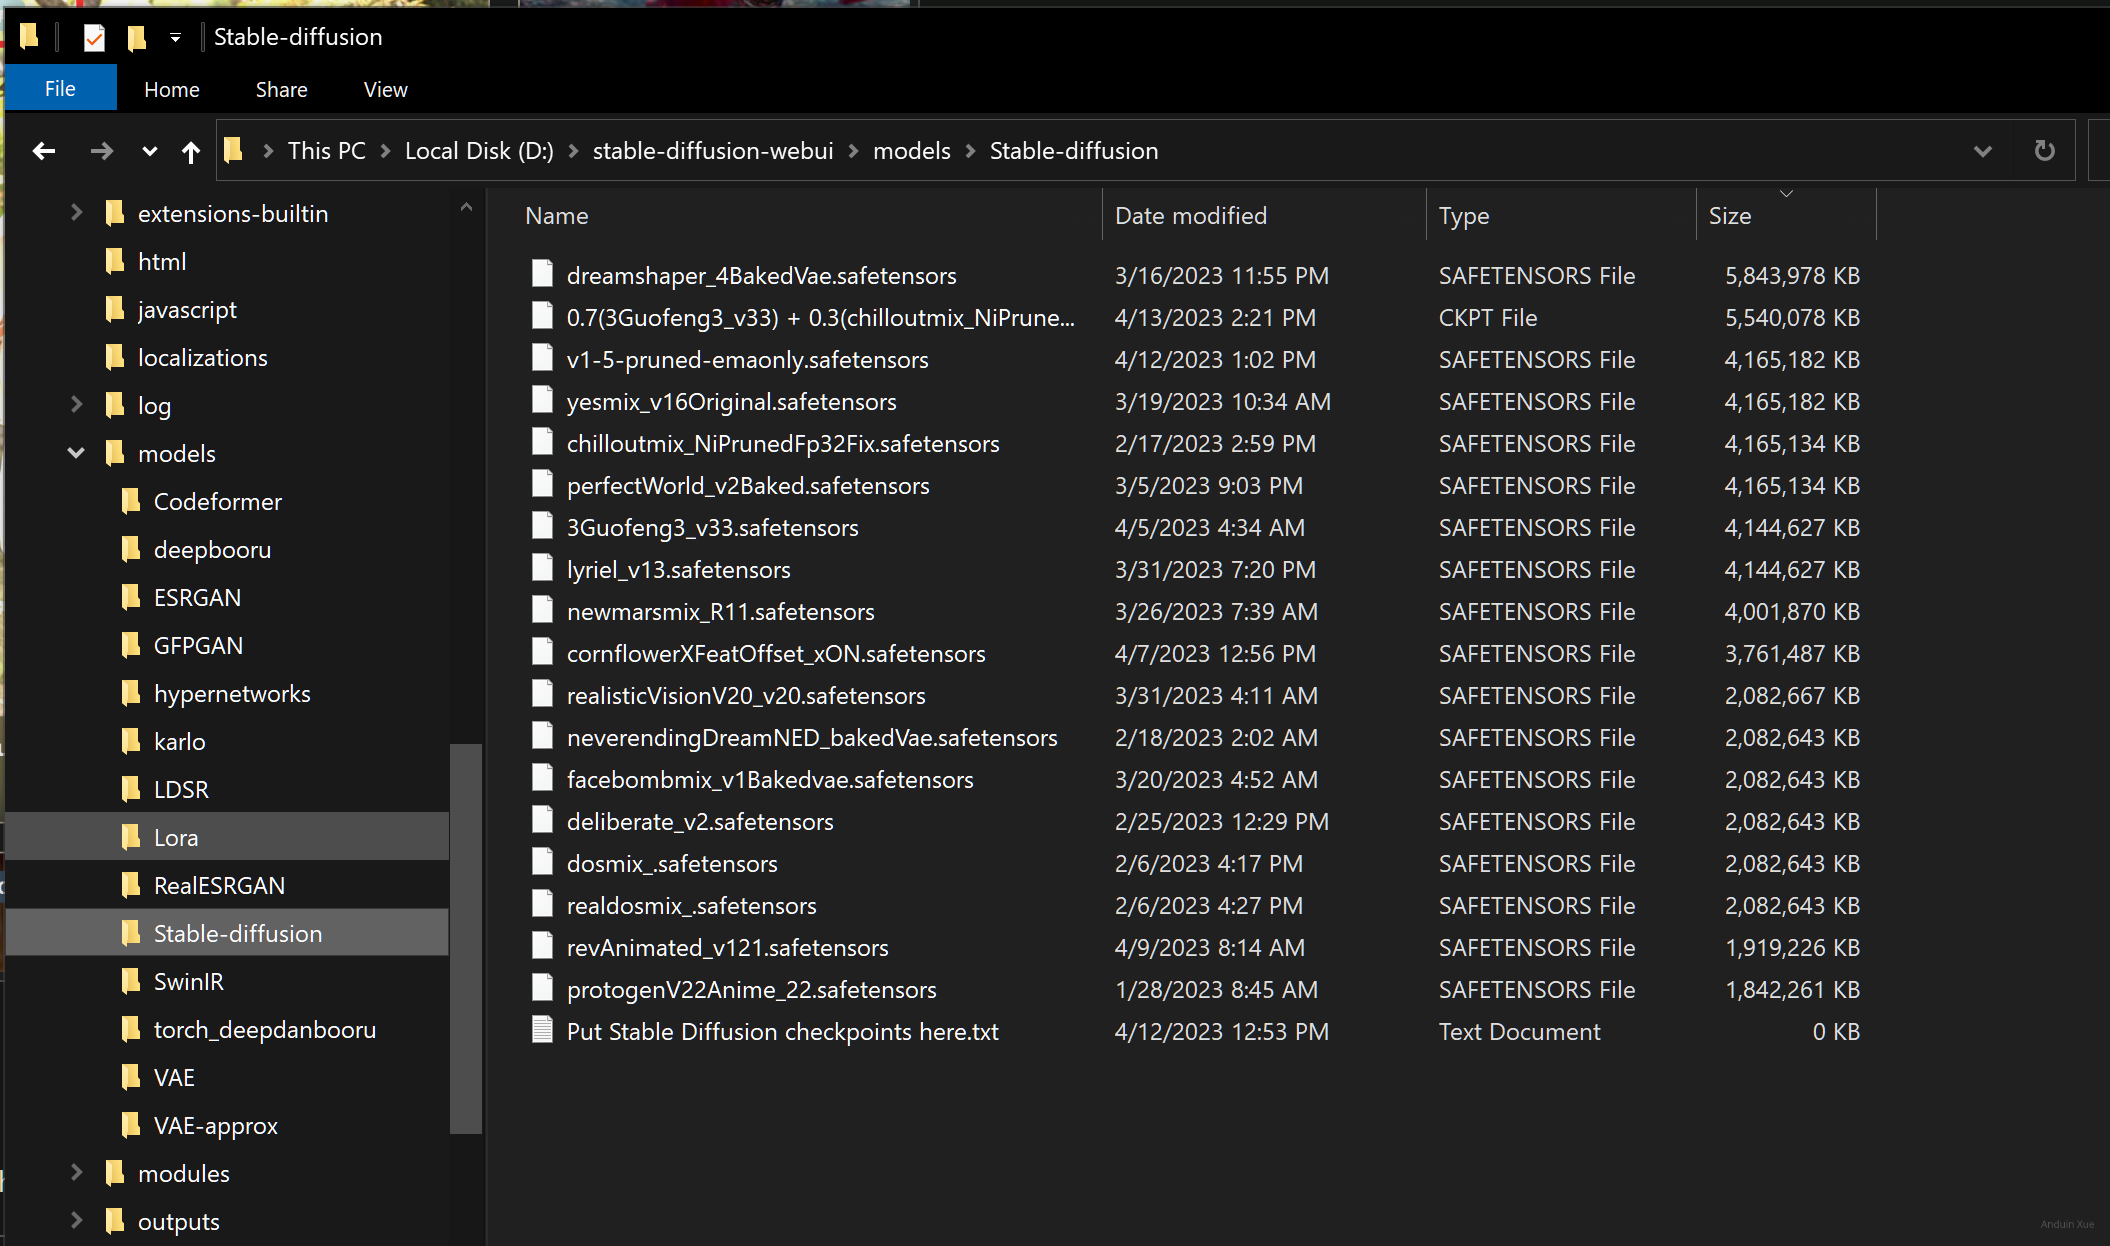
将 Checkpoint 和 Lora 分别放在 /models/Stable-diffusion 路径 和 /models/Lora 路径。
使用现成的数据练练手
试图重现网上的经典作品
可以找一张别人现成的生成数据。在这里复制这些数据。
例如,我这里随意挑选一张图:
在网站上,它的预览是这样的,复制它的生成数据。
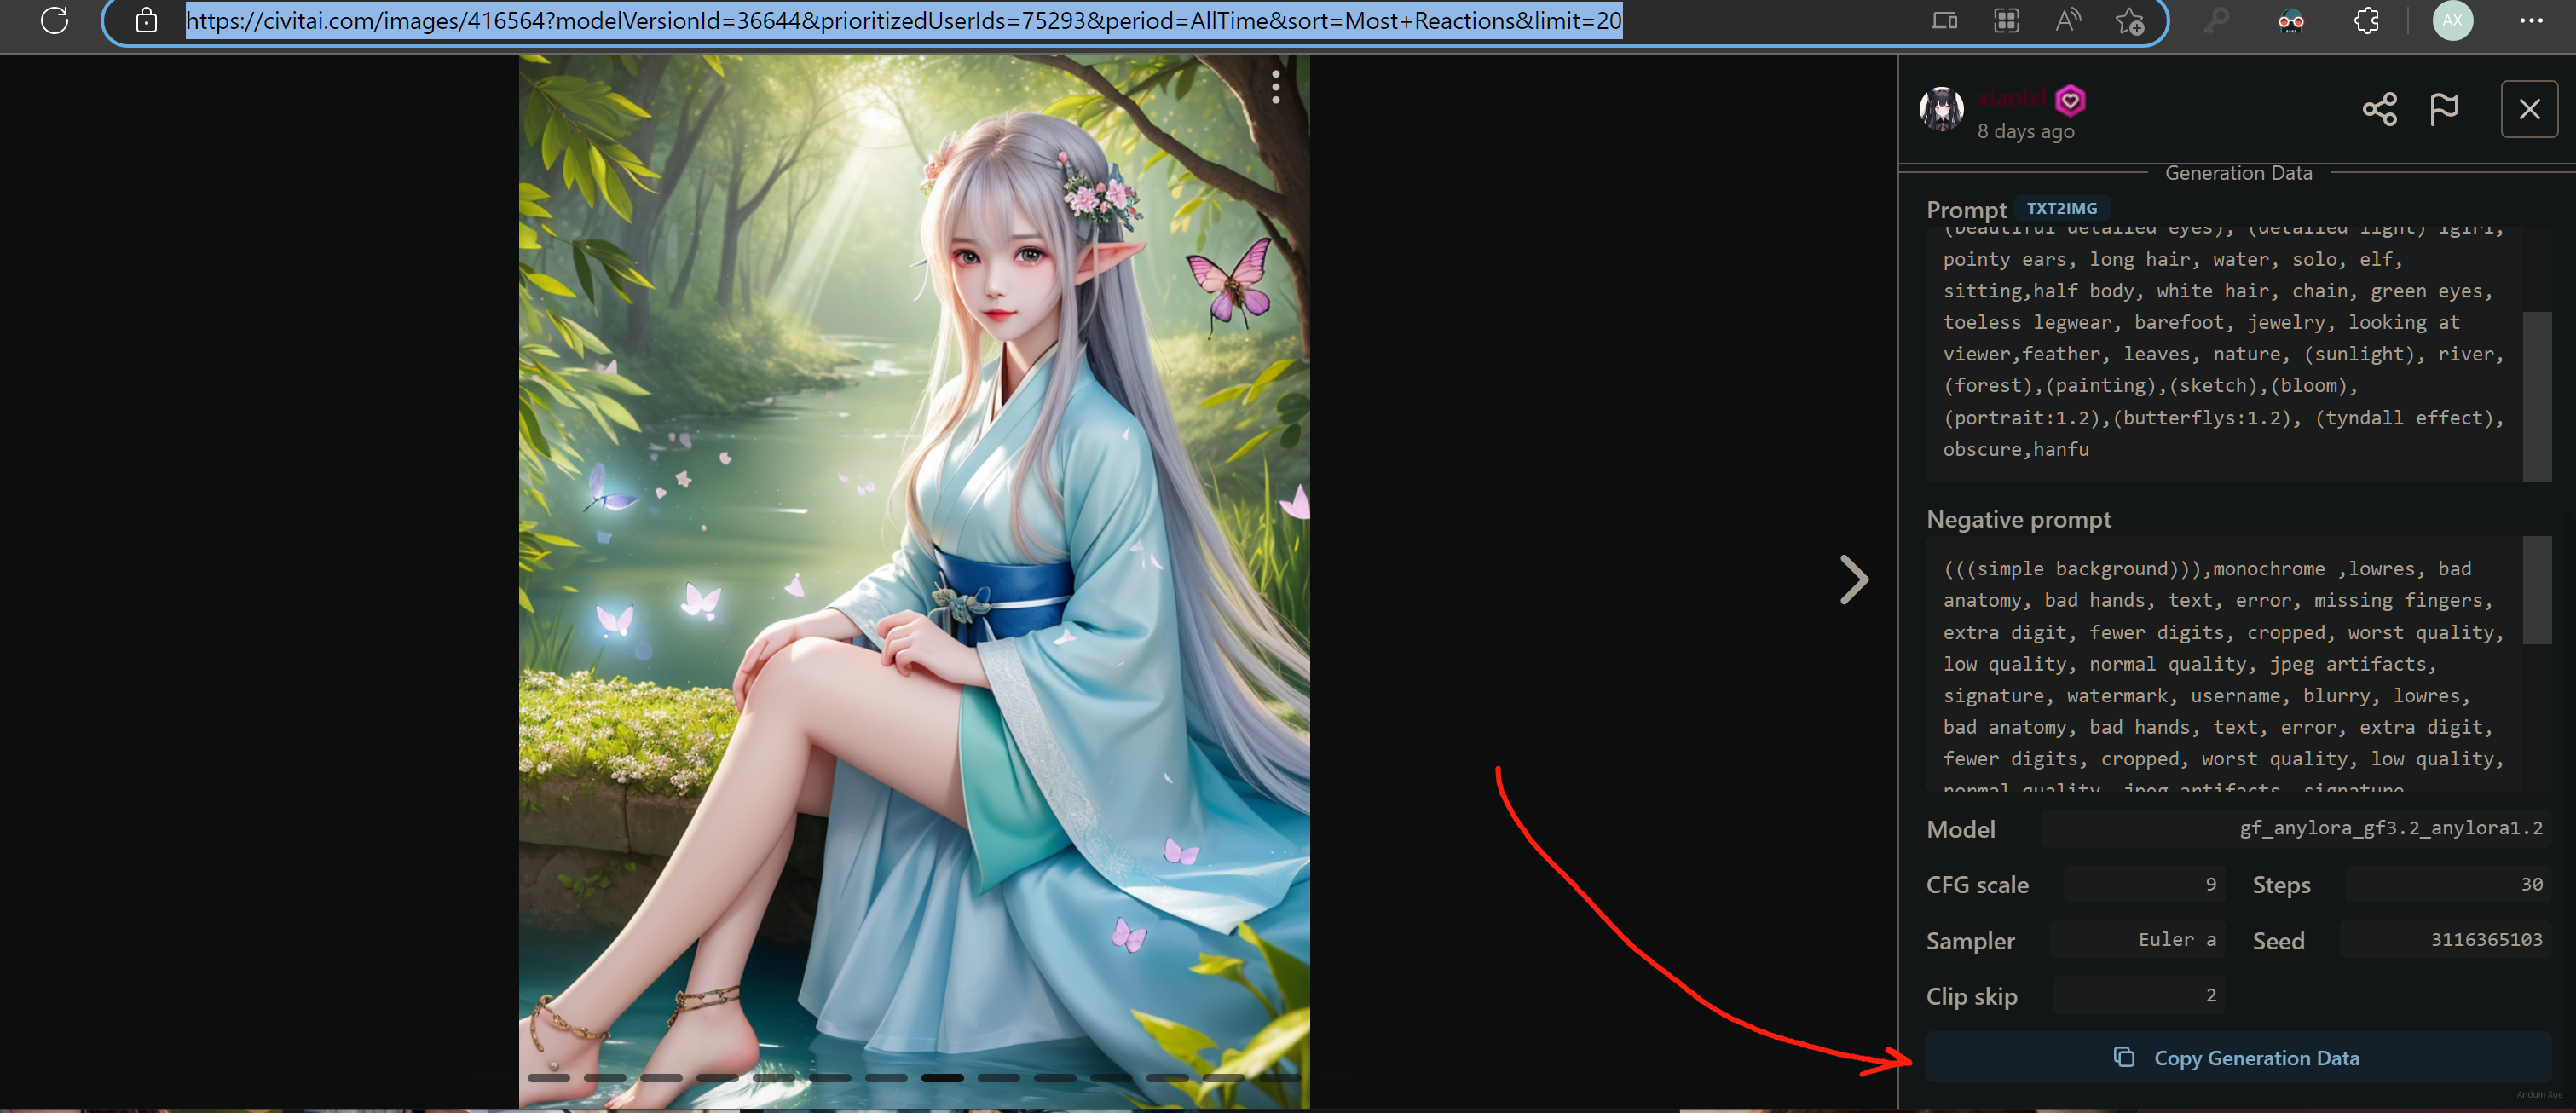
将生成数据粘贴到 Prompt 中。然后点击:Read generation parameters

之后所有的参数均已经设好了。
注意,别忘了手工选择正确的 Checkpoint!例如,图中的 Checkpoint 是:3Guofeng3。
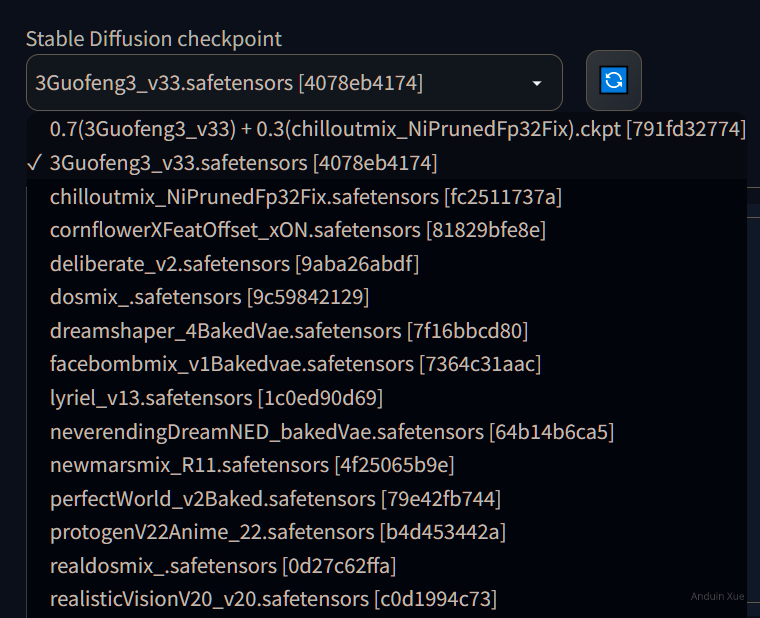
如果你没有提前下载好这个 Checkpoint,那肯定效果截然不同。
全部参数设好、Checkpoint 选好,直接点击生成,即可看到和卖家完全相同的效果啦!
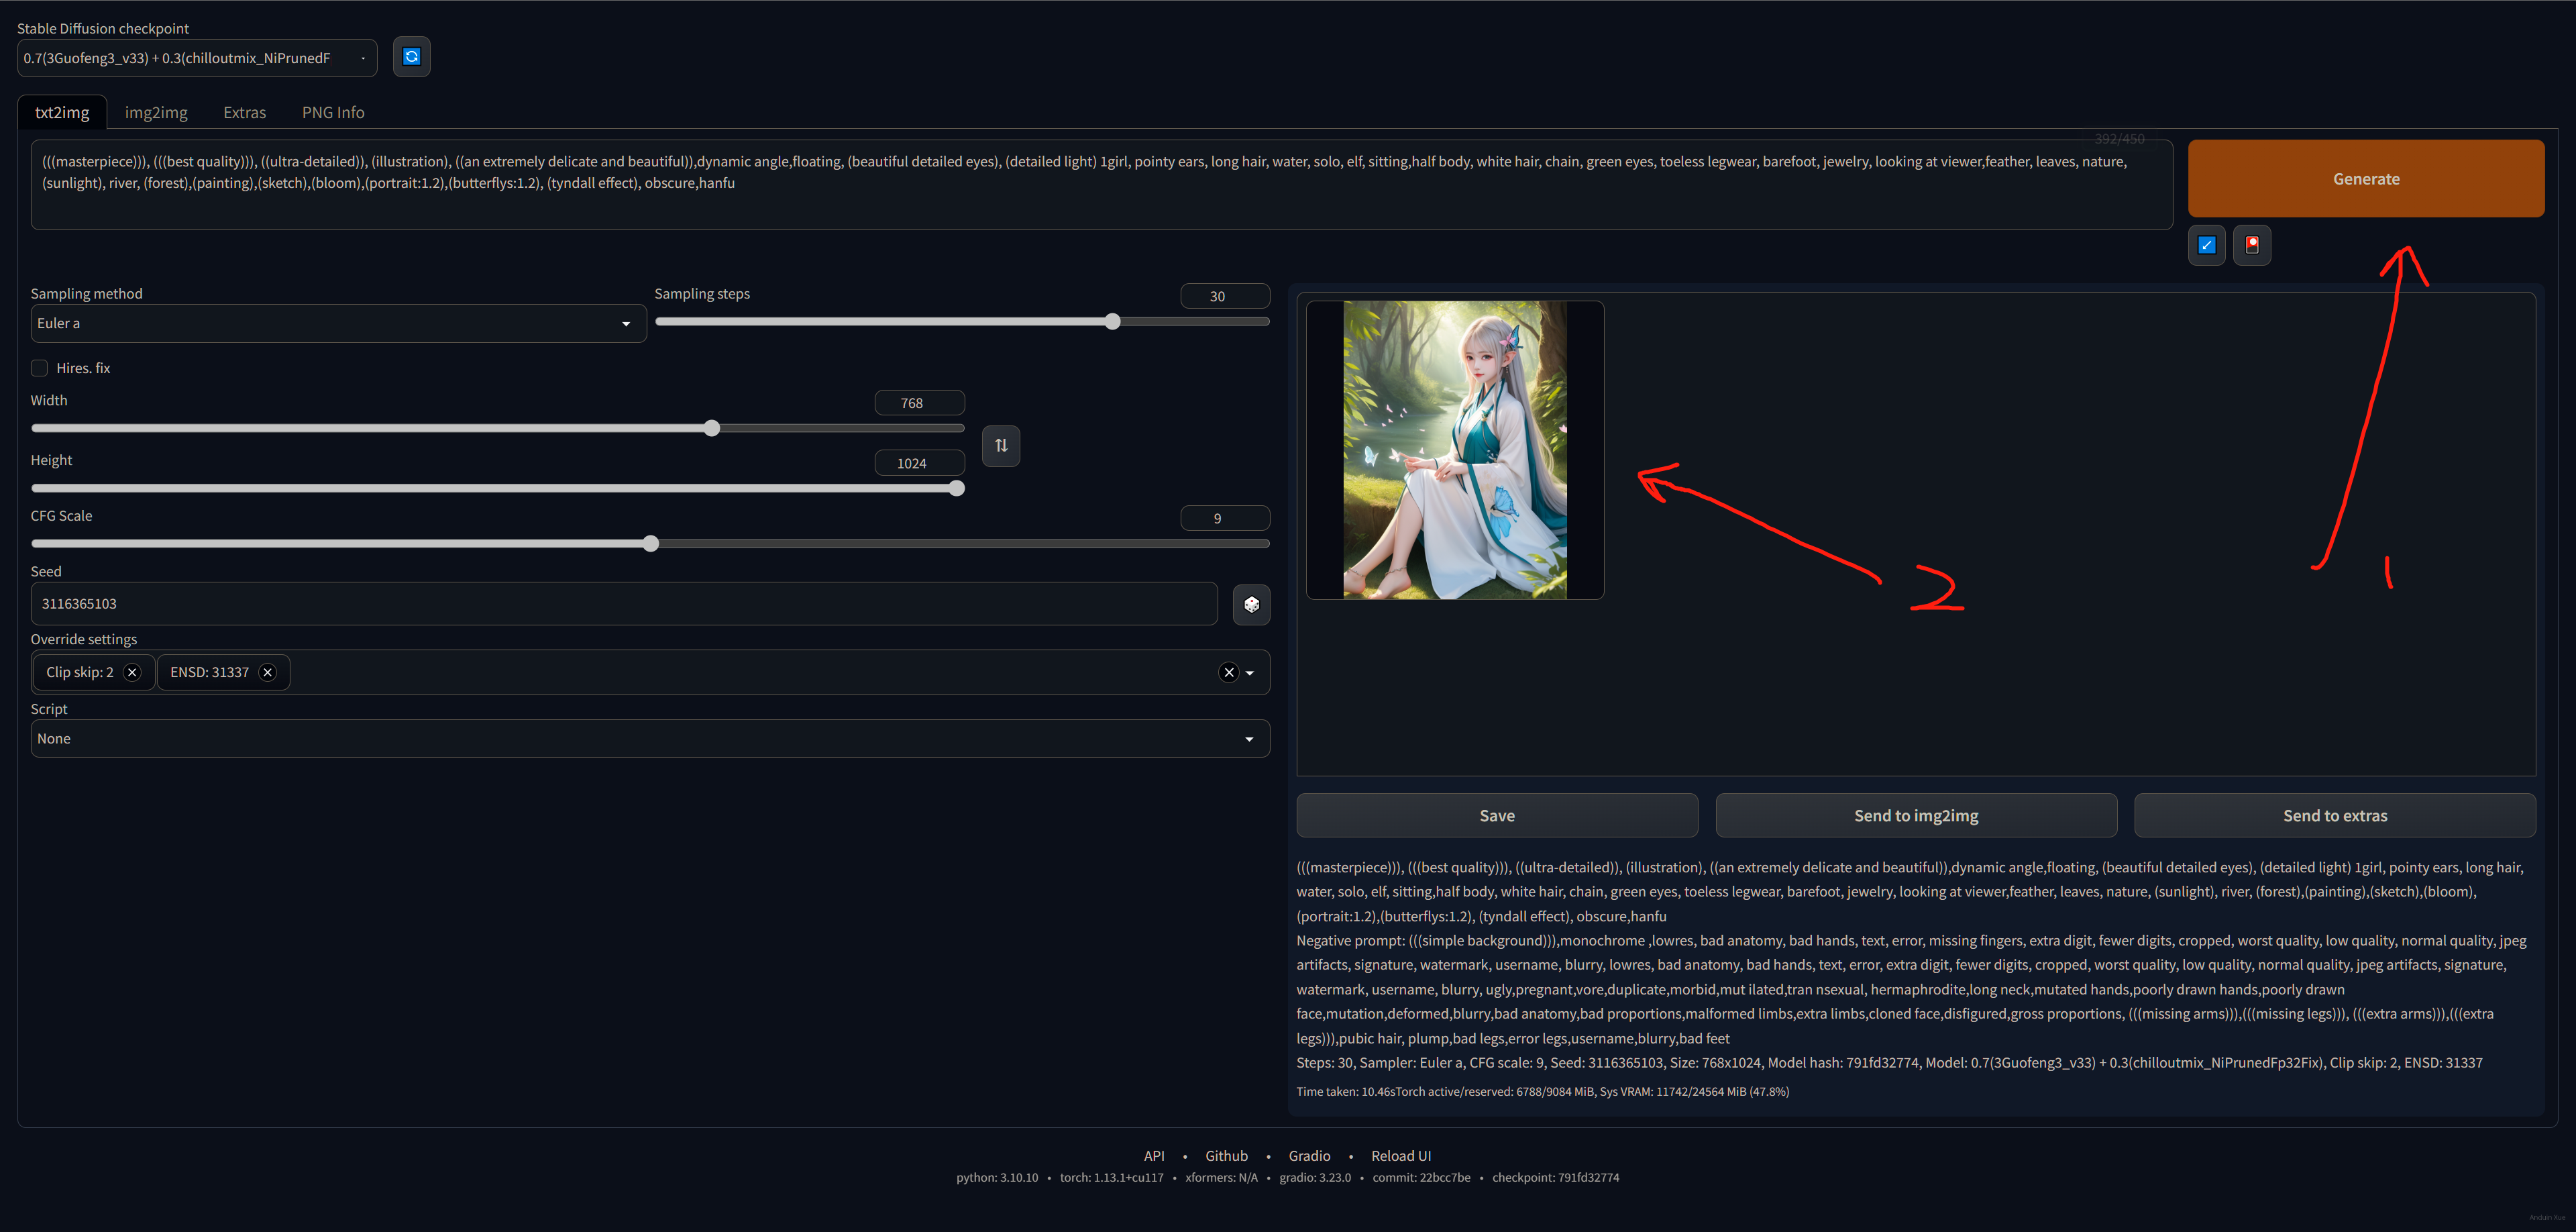
(我知道你看到这两张图,你肯定想问:蝴蝶呢?蝴蝶呢?蝴蝶呢? 实际上这些 算法、Checkpoint 和 Lora ,一个小版本的差异,或是一个提示语少了一个字母,都可能会引发蝴蝶效应,让画出来的图截然不同,这是正常的。)
试图将你的作品参数分享给别人
如果你已经画出来了一张好看的图片,想分享给别人你的参数设置,让别人可以在此基础上魔改,你可以直接把这一段粘贴给他即可。
你的朋友可以收到上面的生成数据后,使用上面的方法,来快速导入参数,从而得到和你完全相同的图。
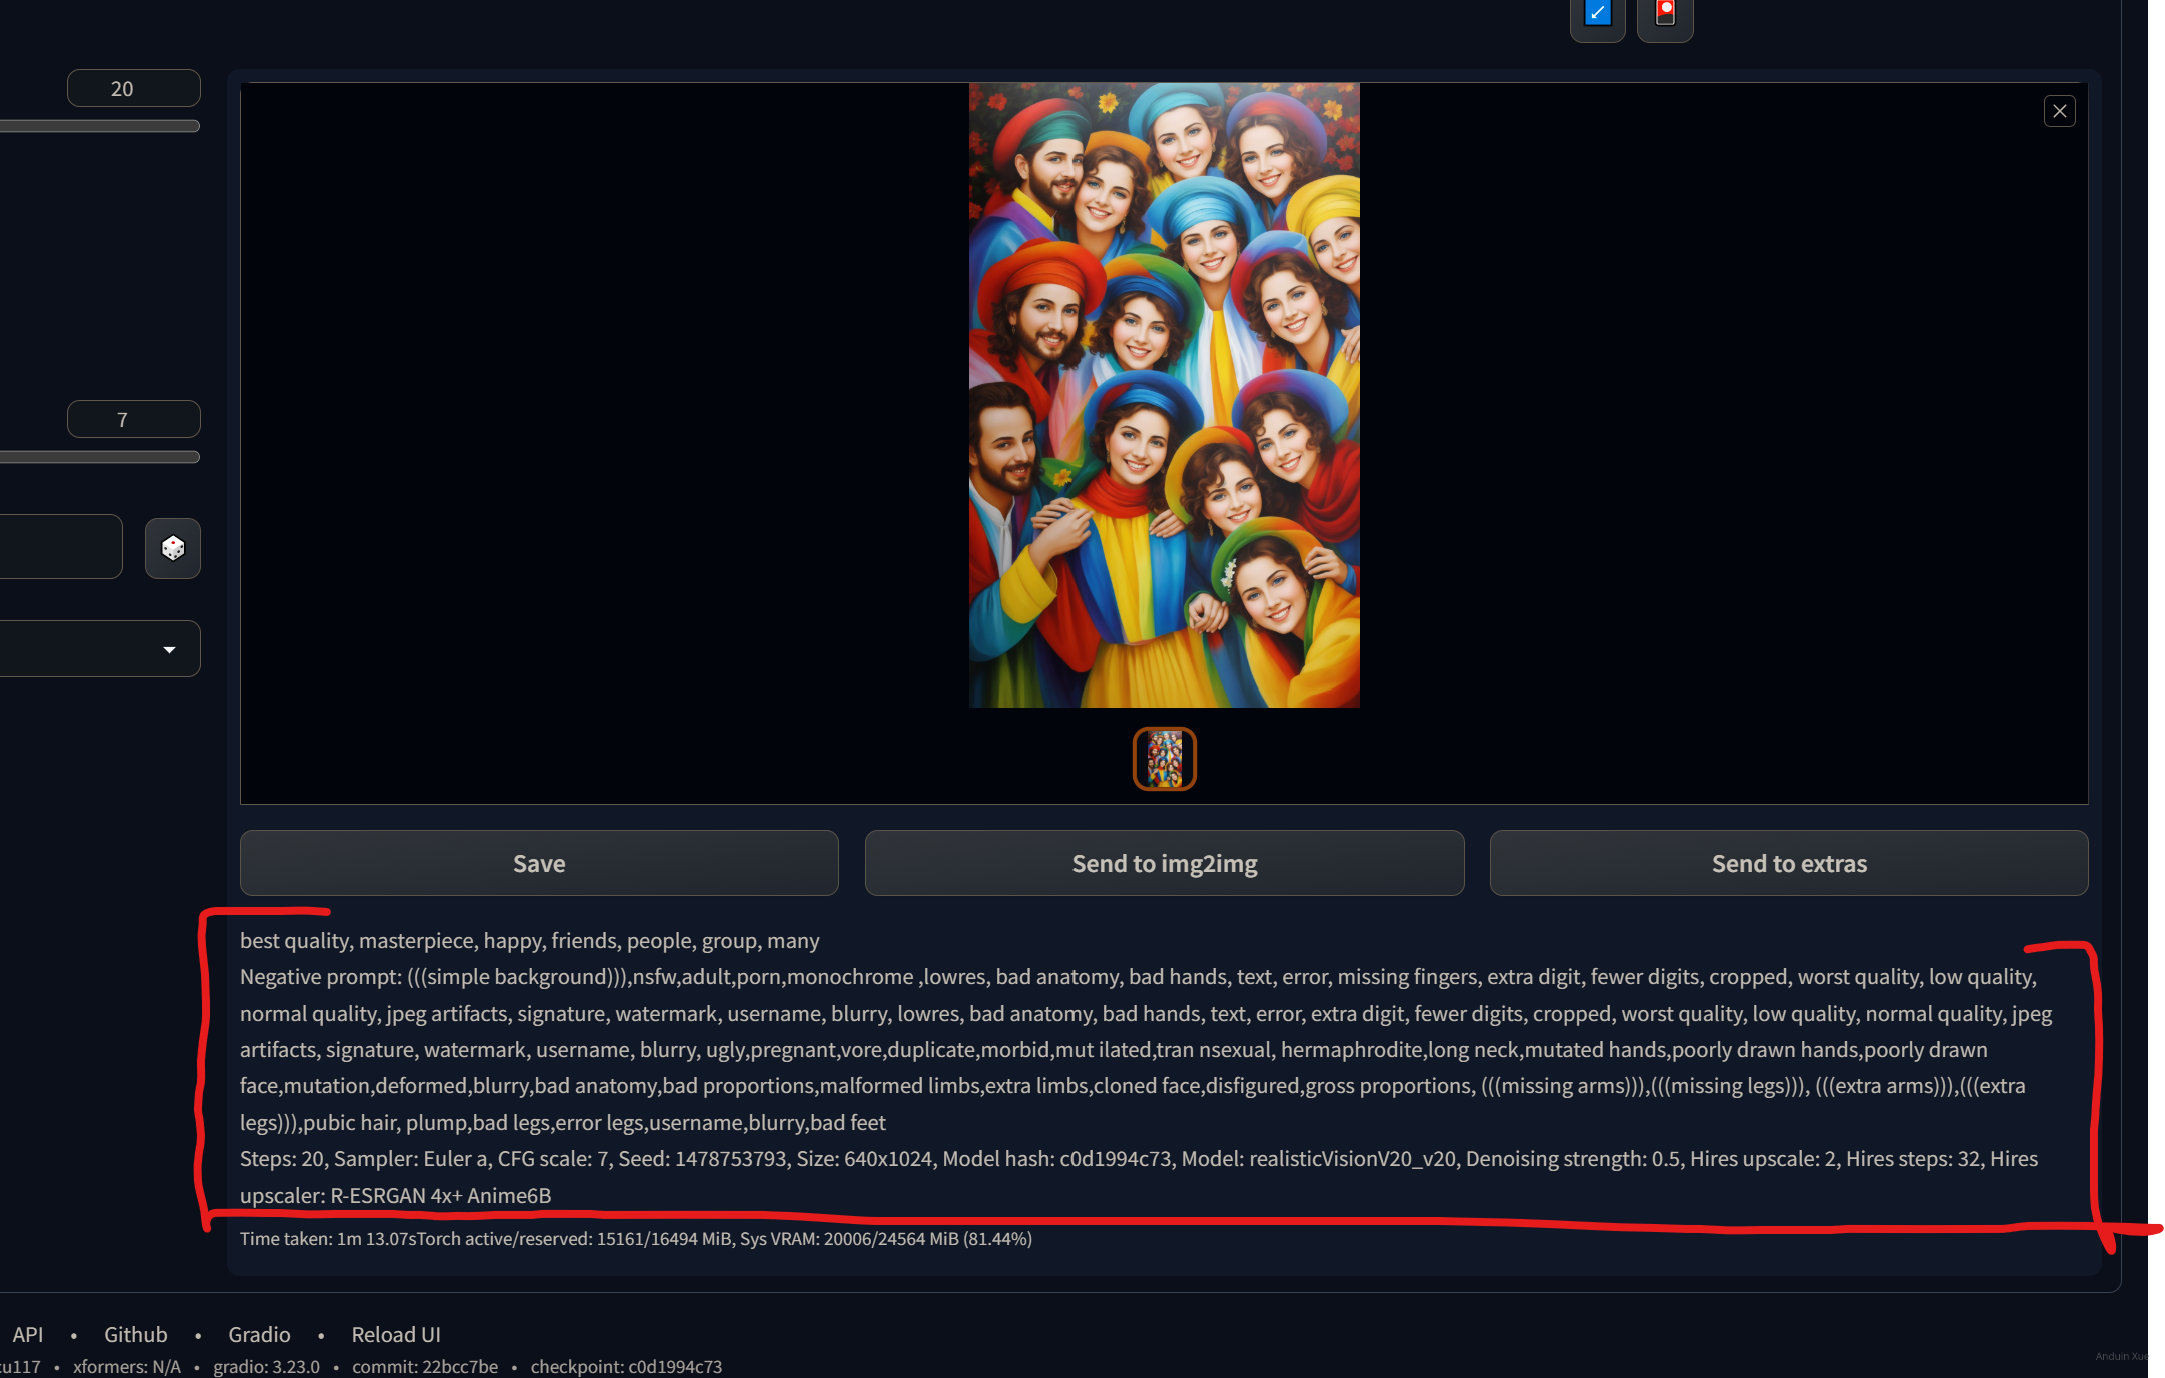
试图从原图中获取生成数据。
有的时候,我生成了一张漂亮的妹子,但是我忘记了我当时参数是怎么填的了。

我想重新看看我当时使用的参数,这时可以使用这个技巧。
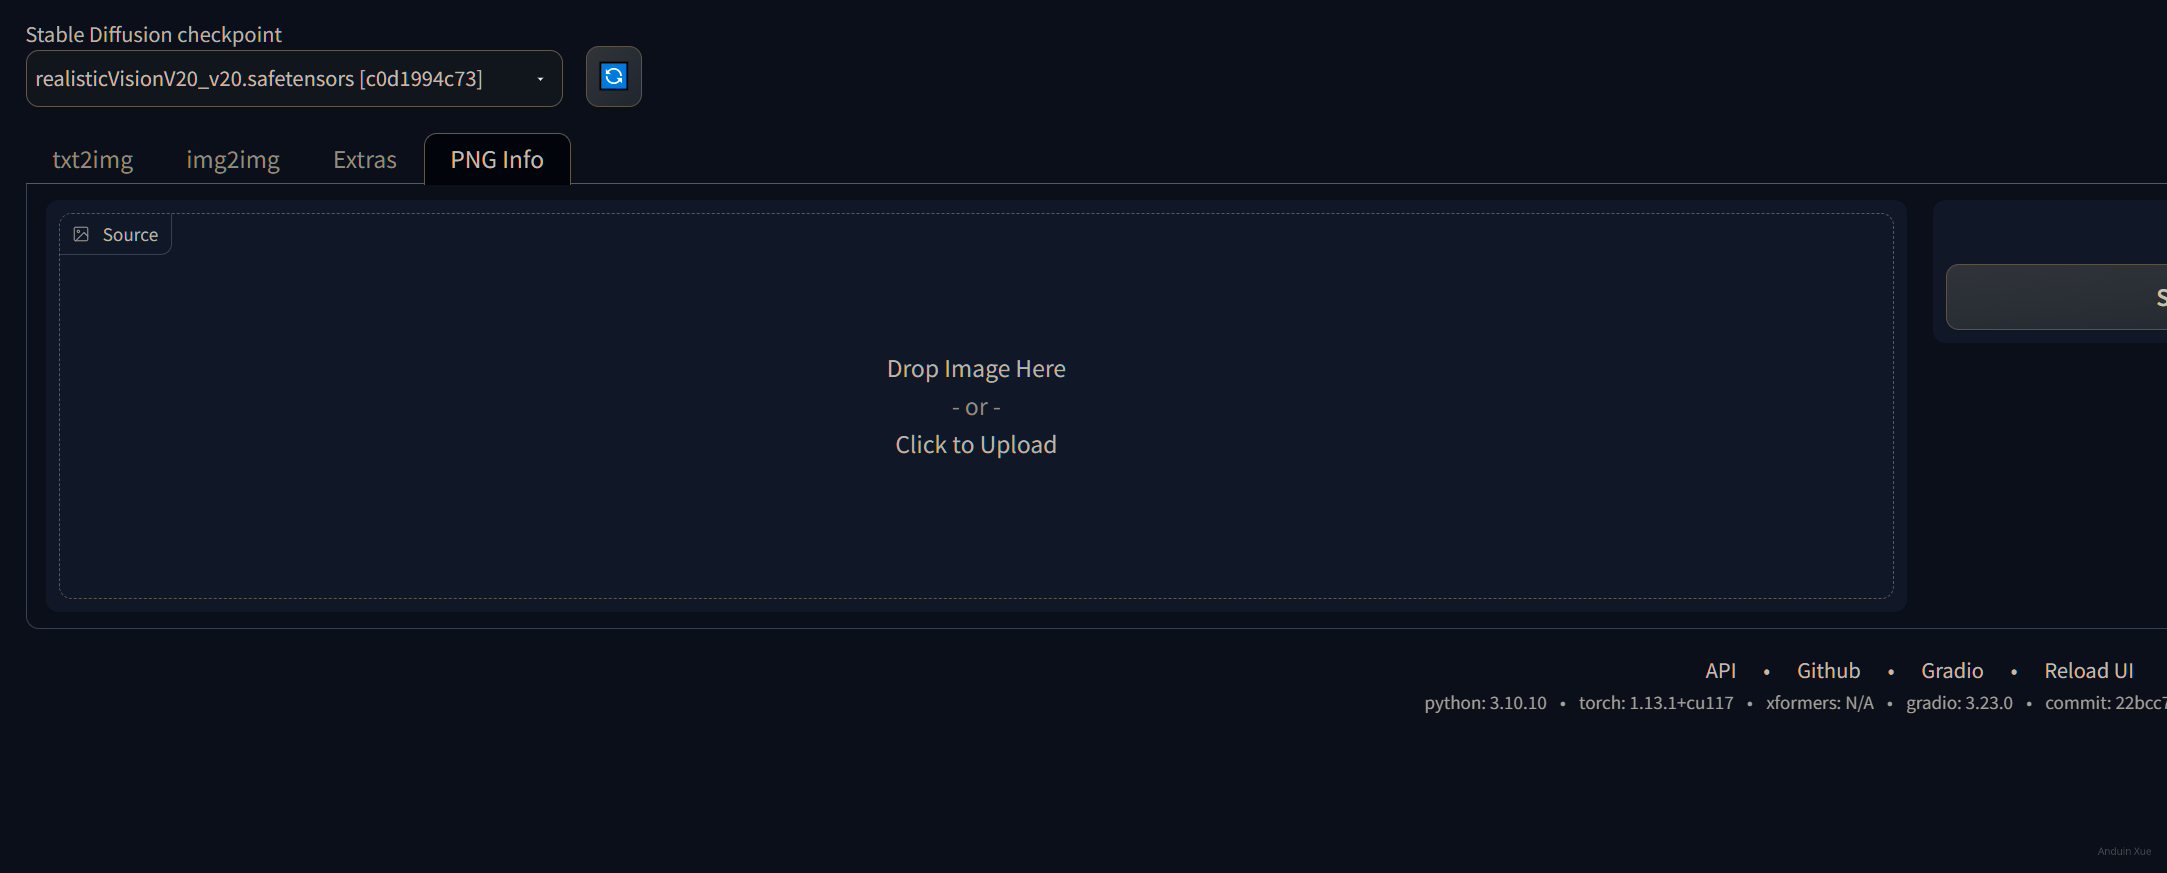
直接来到 Png Info。把图片拖进去。
此时,右侧瞬间就会显示出,这张图片生成时所使用的参数列表。
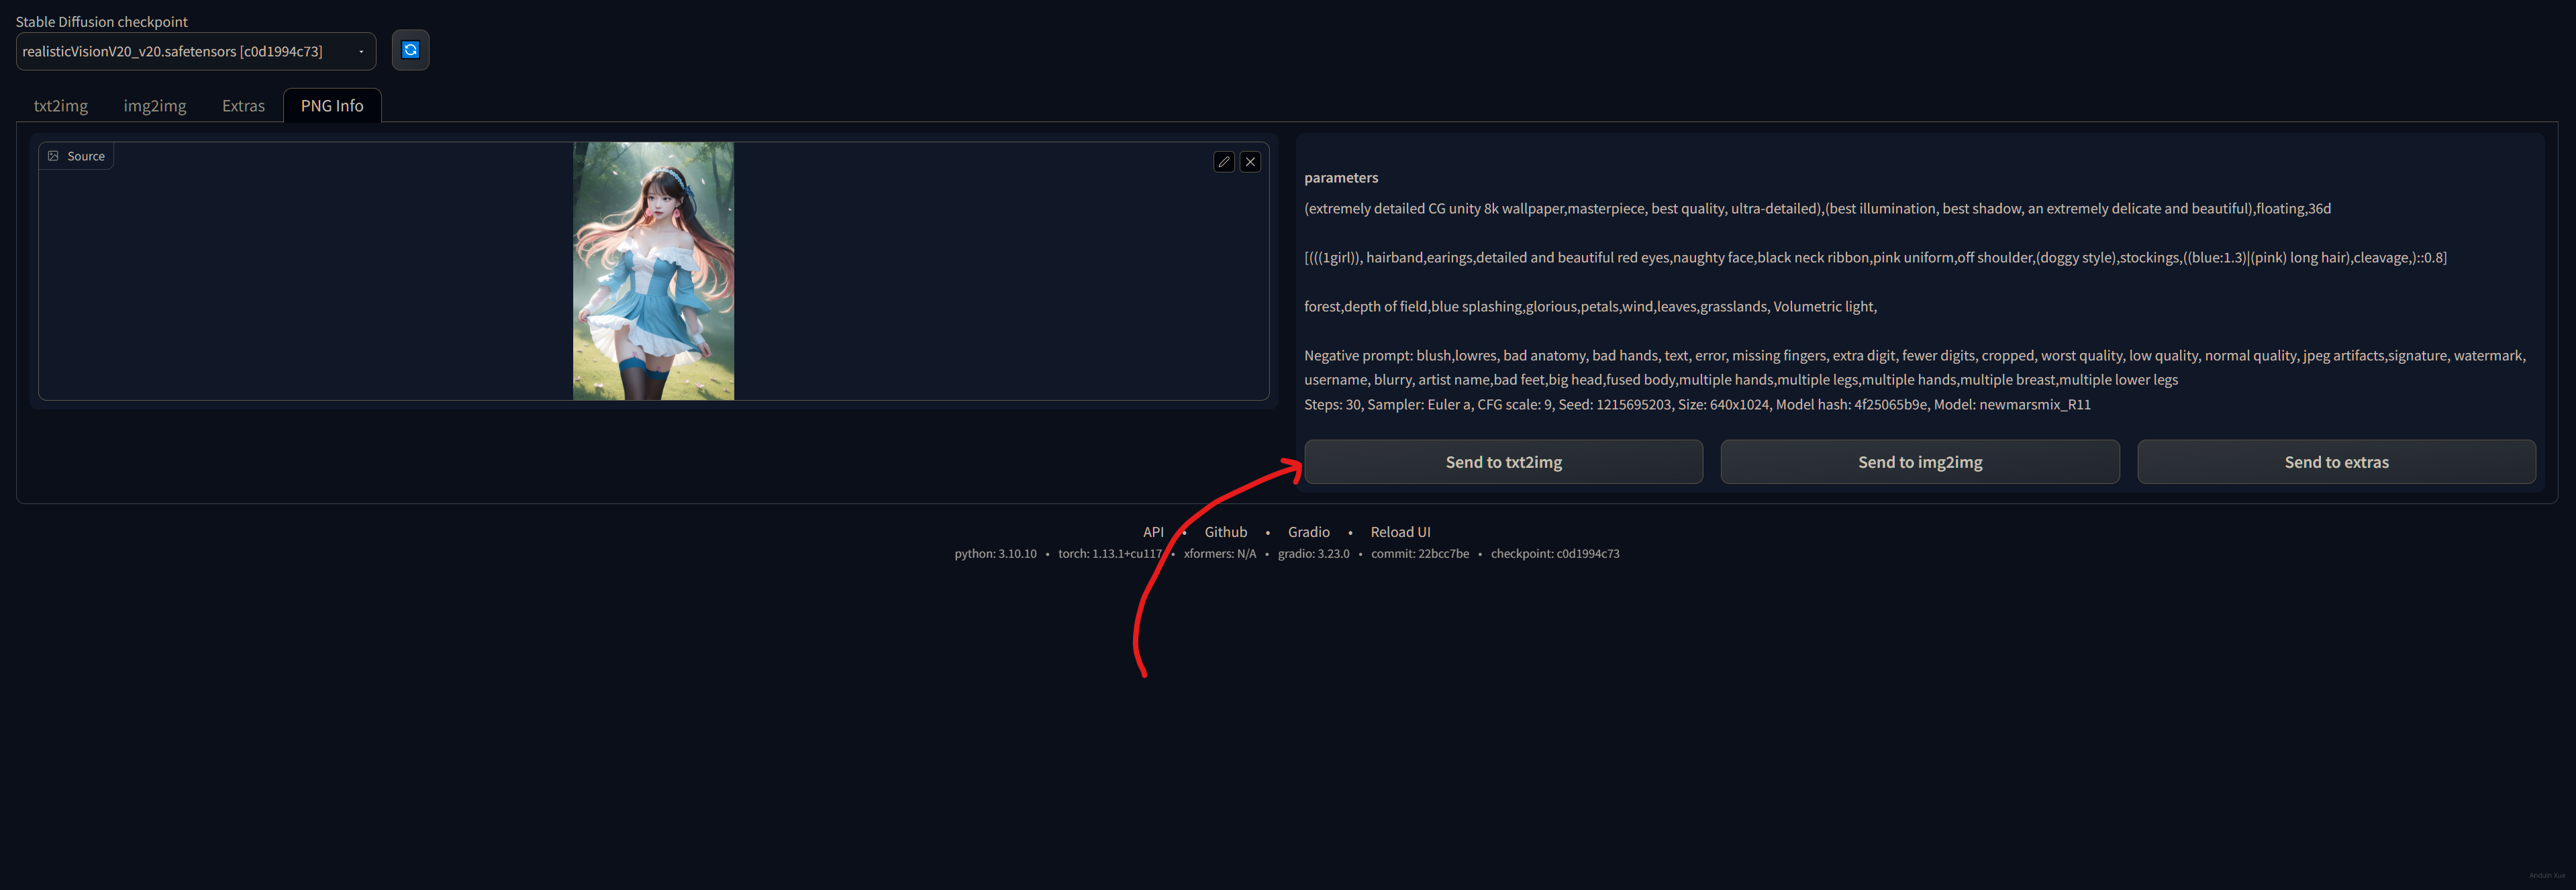
你可以点击 Send to text2image 来编辑它生成使用的参数。
注意,别忘了手工选择正确的 Checkpoint!例如,图中的 Checkpoint 是:newmarsmix_R11。
多多尝试
多多尝试一些 Checkpoint 和 Lora 的组合,尝试总结它们的规律和风格特征,很快就能成为高手。
提供一个更简化、更安全的UI
直接将你本地的端口暴露到互联网是危险的。黑客可以使用Stable Diffusion里的功能,查看到你的OneDrive中的照片。相当危险!
禁用 VENV
venv 可以创建一个独立的 Python 环境,与系统环境隔离开来,这样可以避免不同版本的 Python 和依赖库之间的冲突。
如果你的系统是专门用来运行 Stable Diffusion 的,禁用 VENV 可以降低部署的复杂度。
直接使用 vim 修改 webui.sh,删除掉那部分 venv 的配置函数即可。
安装 xformers
Xformers 是一个基于 PyTorch 的库,用于实现 Transformer 模型。Transformer 是一种流行的神经网络架构,常用于自然语言处理任务。Xformers 对于 Stable Diffusion 来说是可选的。
在 Stable Diffusion 所在路径直接执行:
pip install xformers
修改启动参数
编辑 webui-user.bat,增加一些参数。这可以让服务器更适合暴露到公网。
@echo off

set PYTHON=
set GIT=
set VENV_DIR=
set COMMANDLINE_ARGS=--listen --hide-ui-dir-config --no-gradio-queue

call webui.bat
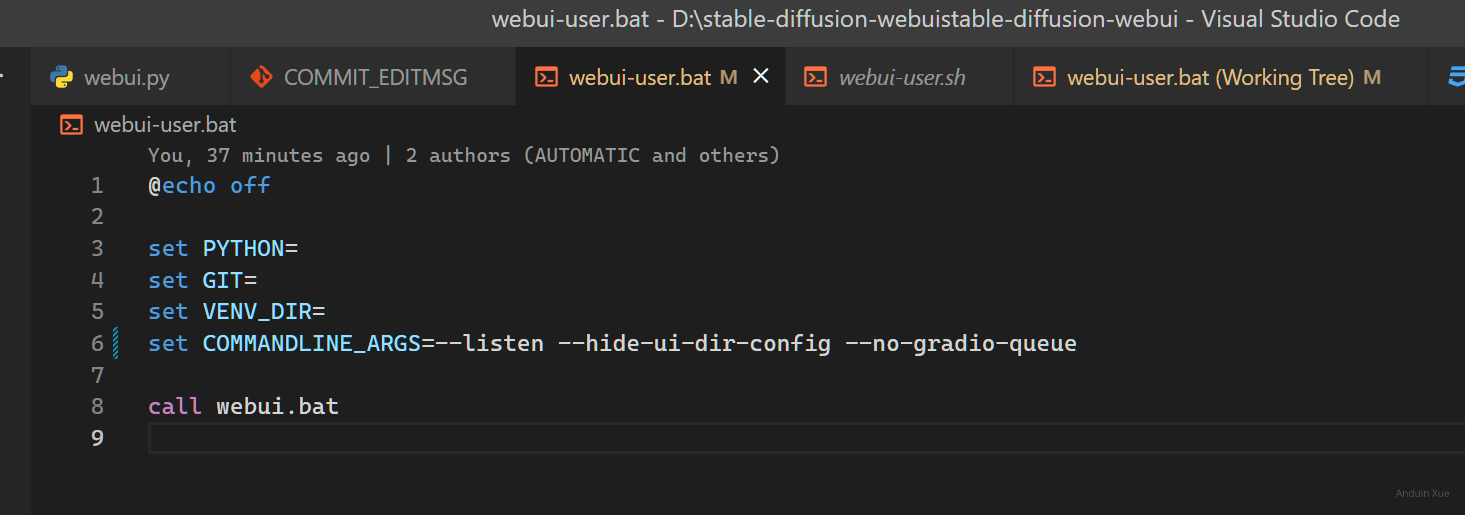
当然,如果你禁用了 venv,直接 python launch.py 也是妥妥的。
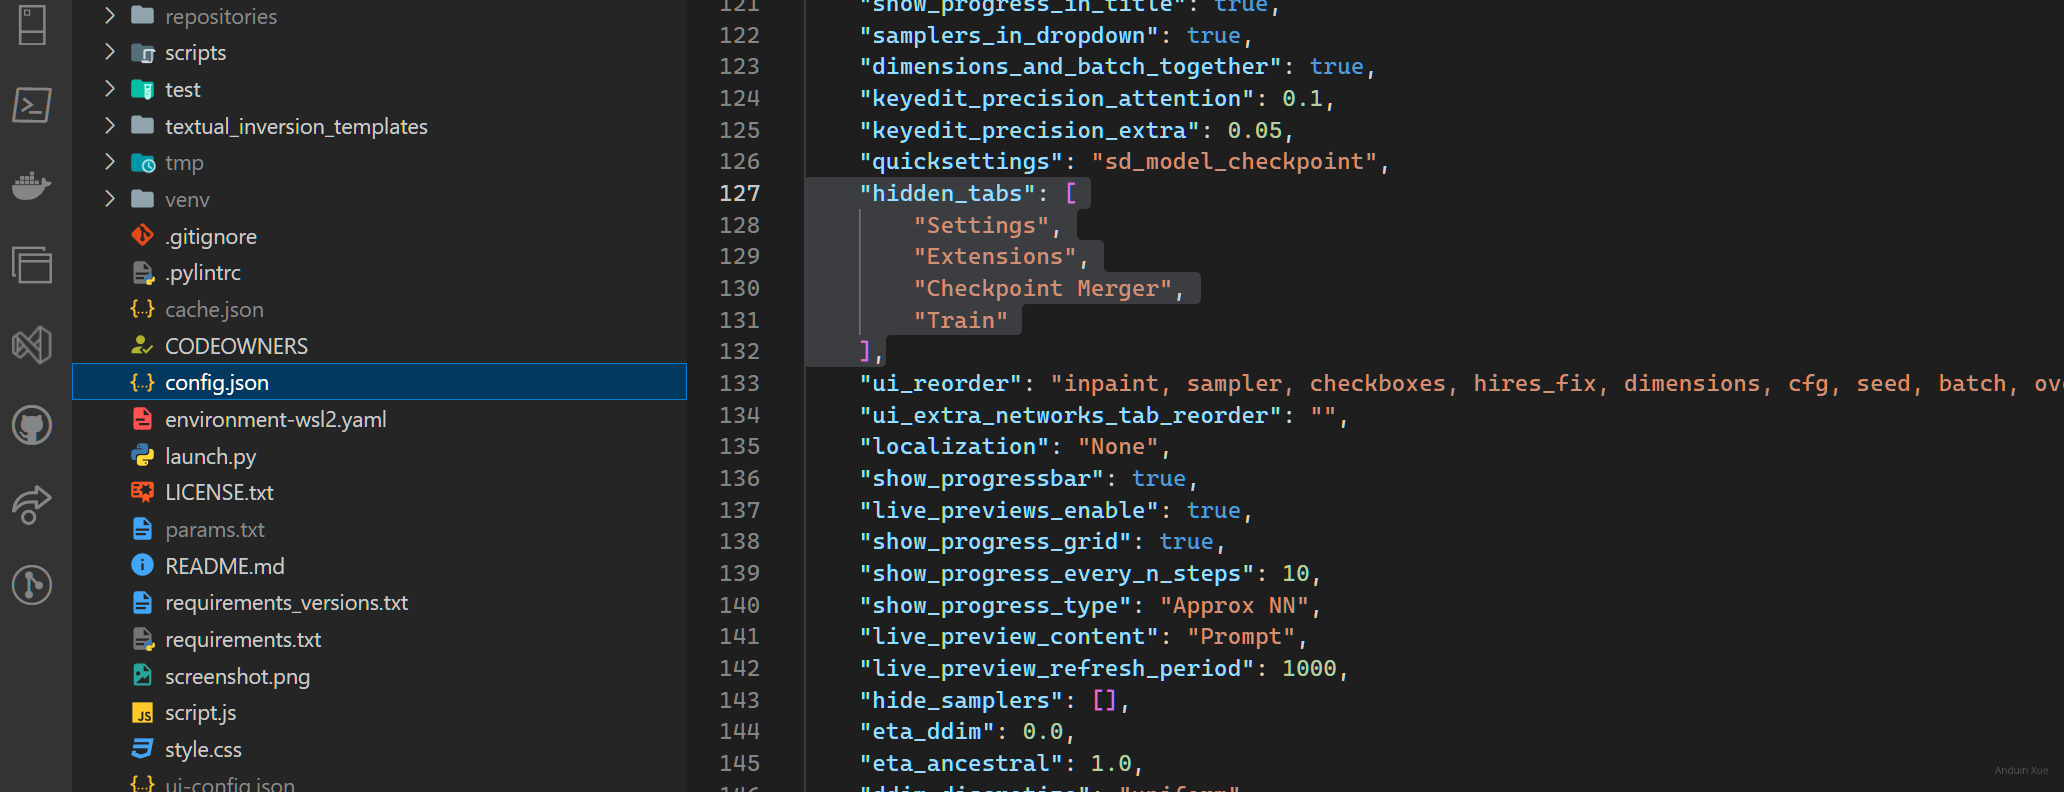
禁用一些 Tab
编辑 config.json,修改其属性hidden_tabs为下面的内容,这可以禁止用户访问特定的功能:
{
    "hidden_tabs": [
        "Settings",
        "Extensions",
        "Checkpoint Merger",
        "Train"
    ]
}
设置一些默认值和配置值
Stable Diffusion默认允许批量生成。
但是暴露给你的朋友批量生成功能是危险的。他们随手一坨,你的电费爆炸。
这里建议限制这些功能。
同时,暴露给你的朋友任意Prompt的填写是危险的。他们随手 nsfw,你可能就要被抓进牢里。
这里建议限制 Stable Diffusion画色图的功能。
编辑ui-config.json文件,将下面的属性改一改:
{
    "txt2img/Prompt/visible": true,
    "txt2img/Prompt/value": "best quality, masterpiece",
    "txt2img/Negative prompt/visible": false,
    "txt2img/Negative prompt/value": "(((simple background))),nsfw,adult,porn,monochrome,lowres, bad anatomy, bad hands, text, error, missing fingers, extra digit, fewer digits, cropped, worst quality, low quality, normal quality, jpeg artifacts, signature, watermark, username, blurry, lowres, bad anatomy, bad hands, text, error, extra digit, fewer digits, cropped, worst quality, low quality, normal quality, jpeg artifacts, signature, watermark, username, blurry, ugly,pregnant,vore,duplicate,morbid,mut ilated,tran nsexual, hermaphrodite,long neck,mutated hands,poorly drawn hands,poorly drawn face,mutation,deformed,blurry,bad anatomy,bad proportions,malformed limbs,extra limbs,cloned face,disfigured,gross proportions, (((missing arms))),(((missing legs))), (((extra arms))),(((extra legs))),pubic hair, plump,bad legs,error legs,username,blurry,bad feet",
    "txt2img/Styles/visible": true,
    "txt2img/Styles/value": [],
    "txt2img/Sampling method/visible": true,
    "txt2img/Sampling method/value": "Euler a",// 可以选择你更适合的值。具体可以多种都试试。
    "txt2img/Sampling steps/visible": true,
    "txt2img/Sampling steps/value": 20,
    "txt2img/Sampling steps/minimum": 15,
    "txt2img/Sampling steps/maximum": 35,// 如果你算力冗余,可以拉大一点。
    "txt2img/Sampling steps/step": 1,
    "txt2img/Restore faces/visible": false,
    "txt2img/Restore faces/value": false,
    "txt2img/Tiling/visible": false,
    "txt2img/Tiling/value": false,
    "txt2img/Hires. fix/visible": true,
    "txt2img/Hires. fix/value": false, // 如果你算力冗余,可以改到 true
    "txt2img/Upscaler/visible": true,
    "txt2img/Upscaler/value": "R-ESRGAN 4x+ Anime6B",// 可以选择你更适合的值。具体可以多种都试试。
    "txt2img/Hires steps/visible": true,
    "txt2img/Hires steps/value": 32,
    "txt2img/Hires steps/minimum": 0,
    "txt2img/Hires steps/maximum": 128,// 如果你算力冗余,可以拉大一点。
    "txt2img/Hires steps/step": 1,
    "txt2img/Denoising strength/visible": true,
    "txt2img/Denoising strength/value": 0.5,
    "txt2img/Denoising strength/minimum": 0.0,
    "txt2img/Denoising strength/maximum": 1.0,
    "txt2img/Denoising strength/step": 0.01,
    "txt2img/Upscale by/visible": true,
    "txt2img/Upscale by/value": 2.0,
    "txt2img/Upscale by/minimum": 1.0,
    "txt2img/Upscale by/maximum": 4.0,// 如果你算力冗余,可以拉大一点。
    "txt2img/Upscale by/step": 0.05,
    "txt2img/Resize width to/visible": false,
    "txt2img/Resize width to/value": 0,
    "txt2img/Resize width to/minimum": 0,
    "txt2img/Resize width to/maximum": 2048,
    "txt2img/Resize width to/step": 8,
    "txt2img/Resize height to/visible": false,
    "txt2img/Resize height to/value": 0,
    "txt2img/Resize height to/minimum": 0,
    "txt2img/Resize height to/maximum": 2048,
    "txt2img/Resize height to/step": 8,
    "txt2img/Width/visible": true,
    "txt2img/Width/value": 640, // 如果你算力冗余,可以拉大一点。
    "txt2img/Width/minimum": 64,
    "txt2img/Width/maximum": 1024,// 如果你算力冗余,可以拉大一点。
    "txt2img/Width/step": 8,
    "txt2img/Height/visible": true,
    "txt2img/Height/value": 1024,// 如果你算力冗余,可以拉大一点。
    "txt2img/Height/minimum": 64,
    "txt2img/Height/maximum": 1024,// 如果你算力冗余,可以拉大一点。
    "txt2img/Height/step": 8,
    "txt2img/Batch count/visible": false,
    "txt2img/Batch count/value": 1,
    "txt2img/Batch count/minimum": 1,
    "txt2img/Batch count/maximum": 1,
    "txt2img/Batch count/step": 1,
    "txt2img/Batch size/visible": false,
    "txt2img/Batch size/value": 1,
    "txt2img/Batch size/minimum": 1,
    "txt2img/Batch size/maximum": 1,
    "txt2img/Batch size/step": 1,
    "txt2img/CFG Scale/visible": true,
    "txt2img/CFG Scale/value": 7.0,// 可以选择你更适合的值。具体可以多种都试试。
    "txt2img/CFG Scale/minimum": 3.0,
    "txt2img/CFG Scale/maximum": 15.0,
    "txt2img/CFG Scale/step": 1.0,
    "txt2img/Seed/visible": true,
    "txt2img/Seed/value": -1.0,
    "txt2img/Extra/visible": true,
    "txt2img/Extra/value": false,
    "txt2img/Variation seed/visible": true,
    "txt2img/Variation seed/value": -1.0,
    "txt2img/Variation strength/visible": true,
    "txt2img/Variation strength/value": 0.0,
    "txt2img/Variation strength/minimum": 0,
    "txt2img/Variation strength/maximum": 1,
    "txt2img/Variation strength/step": 0.01,
    "txt2img/Resize seed from width/visible": true,
    "txt2img/Resize seed from width/value": 0,
    "txt2img/Resize seed from width/minimum": 0,
    "txt2img/Resize seed from width/maximum": 2048,
    "txt2img/Resize seed from width/step": 8,
    "txt2img/Resize seed from height/visible": true,
    "txt2img/Resize seed from height/value": 0,
    "txt2img/Resize seed from height/minimum": 0,
    "txt2img/Resize seed from height/maximum": 2048,
    "txt2img/Resize seed from height/step": 8,
    "txt2img/Override settings/value": null,
    "txt2img/Script/visible": true,
    "txt2img/Script/value": "None"
}
隐藏一些按钮
编辑 user.css,修改其内容为下面的内容,这可以隐藏一些让人困惑的按钮。
#txt2img_style_apply {
    display: none;
}

#txt2img_style_create {
    width: 0;
    height: 0;
    display: none;
}

#txt2img_clear_prompt {
    width: 0;
    height: 0;
    display: none;
}


#inpaint_tab {
    width: 0;
    height: 0;
    display: none;
}

#save_zip_txt2img {
    width: 0;
    height: 0;
    display: none;
}


#txt2img_subseed_show {
    width: 0;
    height: 0;
    display: none;
}

#txt2img_reuse_seed {
    width: 0;
    height: 0;
    display: none;
}

#txt2img_styles_row {
    width: 0;
    height: 0;
    display: none;
}

.progressDiv {
  display: block !important;
}

#txt2img_interrupt {
  width: 100% !important;
}

#txt2img_skip {
  display: none !important;
}
最后,暴露到公网吧!
这里,你可以使用 FRPC + Caddy 的玩法,将Stable Diffusion暴露到公网,并使用加密通信。
FRPC 可以允许互联网的计算机主动连接到本地的计算机,即使它没有公网IP地址。Caddy是一款优秀的HTTP反向代理,可以为web服务自动办理TLS证书。
例如,我搭建的 结果就是: https://stable-diffusion.aiursoft.cn/
你可以阅读 FRP 的使用教程,在这里:FRP
你可以阅读 Caddy 的使用教程,在这里:Caddy
当然,别忘了,记得遵循 Caddy 的教程去设置一下密码。
文章中提到的配置方法在提升系统稳定性的同时,确实可能牺牲部分用户自定义的灵活性。例如将采样步数限制在15-35范围内,虽然能避免资源过载,但对需要精细控制生成质量的用户来说,是否考虑提供分级权限设置?普通用户使用默认参数,而高级用户通过验证后可解锁扩展范围?
在敏感词过滤策略上,当前的硬性屏蔽清单是否可能产生误判?比如"plump"这类词汇在艺术创作中可能有合法使用场景,是否可以结合上下文语义分析而非单纯关键字匹配?此外,针对NSFW内容过滤,是否有计划集成AI模型实时检测生成内容,而非仅依赖提示词过滤?
关于界面优化部分,隐藏"Style Create"按钮确实简化了操作流程,但是否会限制用户对预设风格的自定义需求?或许可以采用折叠式面板设计,在保持界面简洁的同时保留扩展入口。同时,进度条的显眼提示设计值得肯定,但能否增加实时资源占用显示,让用户更直观感知系统负载?
在反向代理配置方面,Caddy的自动证书管理确实提升了部署效率,但针对高并发场景,是否考虑过使用Nginx+Let's Encrypt的组合?此外,文章提到的密码保护是否已开启速率限制机制?在公网暴露场景下,如何防范自动化工具的暴力破解攻击?或许可以补充基于IP的访问频率限制策略?
最后,Hires.fix功能的启用阈值设定为算力冗余时开启,这种保守策略是否会影响图像质量?是否有过不同硬件配置下的性能基准测试?比如RTX 3060和RTX 4090在启用该功能时的渲染时间对比数据,或许能为用户提供更具体的配置建议。
这篇文章确实提供了许多实用的方法来优化Stable Diffusion的使用体验。通过调整配置文件,可以更好地适应个人的工作流程;隐藏一些按钮有助于减少界面的复杂性,使操作更加直观。对于那些希望将服务分享到公网的用户来说,FRPC和Caddy的结合无疑是一个高效且安全的选择。
在实践中,建议读者根据自己的实际需求逐步进行设置,并确保理解每一步的操作及其潜在的影响。特别是关于安全性方面,在使用FRP和Caddy时,务必按照教程中的指导设置访问控制和加密通信,以保护数据的安全性和隐私性。希望这些方法能够帮助用户更高效地利用Stable Diffusion进行创作!
非常感谢你分享了如何独立运营一个面向朋友的AI绘画系统(基于Stable Diffusion)的博客。我觉得你对于限制功能和避免不适内容的建议非常有价值,这有助于确保系统的安全和合规。同时,你还提供了详细的ui-config.json文件配置和user.css样式修改,这对于初次尝试搭建此类系统的读者来说非常有帮助。
此外,你还提供了关于如何使用FRPC和Caddy将Stable Diffusion暴露到公网的方法,这对于希望将自己的作品分享给更多人的读者来说非常实用。你推荐的FRP和Caddy使用教程也是很好的资源,可以帮助读者更好地学习这些工具的使用。
在这篇博客中,你的核心理念是帮助读者独立运营一个面向朋友的AI绘画系统,通过限制功能和避免不适内容,确保系统的安全和合规。我非常支持这一理念,因为这有助于推广AI绘画技术,同时确保其在合适的范围内使用。
尽管这篇文章已经非常详尽,但我认为有一些方面仍有改进的空间。例如,在介绍如何修改ui-config.json文件和user.css样式时,可以提供更多的背景信息和解释,以帮助那些不熟悉这些配置文件的读者更好地理解它们的作用。另外,在推荐FRP和Caddy教程时,可以简要介绍一下这两个工具的主要功能和用途,以便读者更好地了解它们的价值。
总的来说,这是一篇非常实用且内容丰富的博客。希望你继续分享更多有关AI绘画和其他技术主题的文章,帮助读者更好地了解和应用这些技术。再次感谢你的分享!
日你牙
安度因,日你牙
日你牙