As individuals, it's important to have a way for others to easily verify our identity. One of the best ways to do this is by using a digital certificate for signing. Digital certificates can do many things, such as signing code.
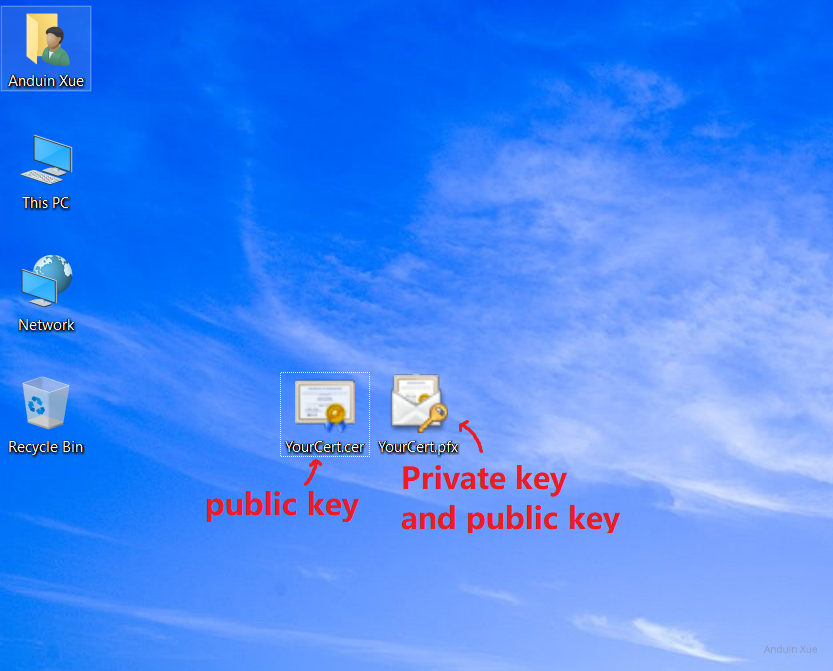
Certificates are split into two parts, public and private keys. The public key needs to be made available online for others to download and trust. This way, when you sign content with your private key, others will see it as trusted.
What's subject and name?
The Subject and Friendly Name in a digital certificate are used to identify the certificate holder's information.
The Subject field contains information such as the certificate holder's name, organization, country, state/province, city, etc., which is used to verify the certificate holder's identity when using the digital certificate for encrypted communication or authentication. The system checks the Subject field to ensure the legitimacy of both parties in the communication.
The Friendly Name is an optional field that is typically used to name the certificate for easier identification and management by the user. It can be any user-defined string and does not affect the security or validity of the certificate.
For HTTPS certificates, the Subject field typically includes the domain name or hostname of the certificate holder. This is because HTTPS certificates are used to protect the security of web servers, and the identity of a web server is typically identified by its domain name or hostname.
In HTTPS communication, when a client initiates a connection request, the server sends its digital certificate to the client, which verifies the certificate's validity and checks whether the domain name or hostname in the Subject field matches the client's request. If the verification is successful, the client establishes a secure connection with the server to ensure the confidentiality and integrity of the communication.
Therefore, for HTTPS certificates, the domain name or hostname in the Subject field is crucial and must be accurate and legitimate. The Friendly Name can also be used to identify and manage the certificate, but it does not affect the security of HTTPS communication.
Generate your own self-signed certificate
Here's how to generate a self-signed certificate and obtain the private key:
$name = Read-Host "Please enter friendly name"
$subject = Read-Host "Please enter subject"
$password = Read-Host "Please enter pfx password" -AsSecureString

$cert = New-SelfSignedCertificate -Subject $subject `
                          -FriendlyName $name `
                          -Type CodeSigning `
                          -KeyUsage DigitalSignature `
                          -KeyLength 2048 `
                          -KeyAlgorithm RSA `
                          -HashAlgorithm SHA256 `
                          -Provider "Microsoft Enhanced RSA and AES Cryptographic Provider" `
                          -CertStoreLocation "Cert:\CurrentUser\My"

$certPath = "cert:\CurrentUser\My\" + $cert.Thumbprint

Export-Certificate -Cert $certPath -FilePath "YourCert.cer"
Export-PfxCertificate -Cert $certPath -FilePath "YourCert.pfx" -Password $password
You will have two files: YourCert.cer and YourCert.pfx. Keep the .pfx safe! And make the YourCert.cer public for downloading.
Or course, if you are rich, buy one from:
- Certum
- Comodo
- DigiCert
- GlobalSign
- SSL.com
It's hard to buy one if you are in China. Because they prefer to ship the cert to you. So I contacted sales in China.
The digital certificate salespeople in China were very reluctant to sell it to me. I kept explaining to him that I was only used to develop open source projects, so I reluctantly agreed to help me apply.

Trust your public key
If you are using your self-signed certificate, your friends are not trusing it by default. You need to manually distribute it to your friends.
And here's how to trust the public key:
# Run as Admin!
$cert = New-Object System.Security.Cryptography.X509Certificates.X509Certificate2
$cert.Import("C:\path\to\YourCert.cer")
$store = New-Object System.Security.Cryptography.X509Certificates.X509Store("Root","LocalMachine")
$store.Open("MaxAllowed")
$store.Add($cert)
$store.Close()
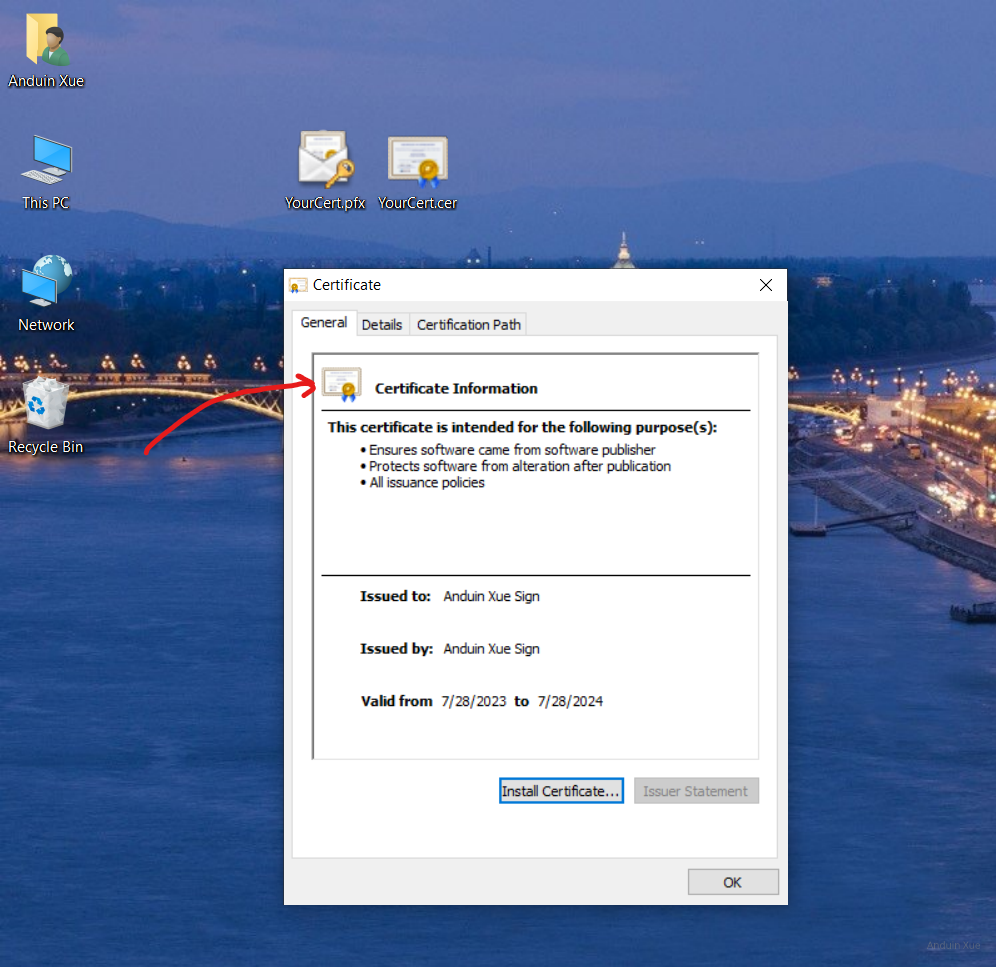
Now your cert (public key) will be shown as trusted. The error icon will disappear.
By generating a self-signed certificate and distributing the public key, individuals can establish a level of trust with their clients and ensure that their communications are secure. This process is useful for developers and individuals who want to sign their own code and communications without relying on a third-party certificate authority.
Use your own cert to sign any exe!
Now you can sign your exe.
To use Signtool to sign a file, you need to first install the Microsoft Windows SDK. Then, you can follow these steps to sign the file:
- Open a command prompt window.
- Use the CD command to navigate to the directory where the Signtool.exe file is located (by default, this file is located in the
"C:\Program Files (x86)\Windows Kits\10\bin\{YOUR_WINDOWS_VERSION}\x64\signtool.exe". - Enter the following command:
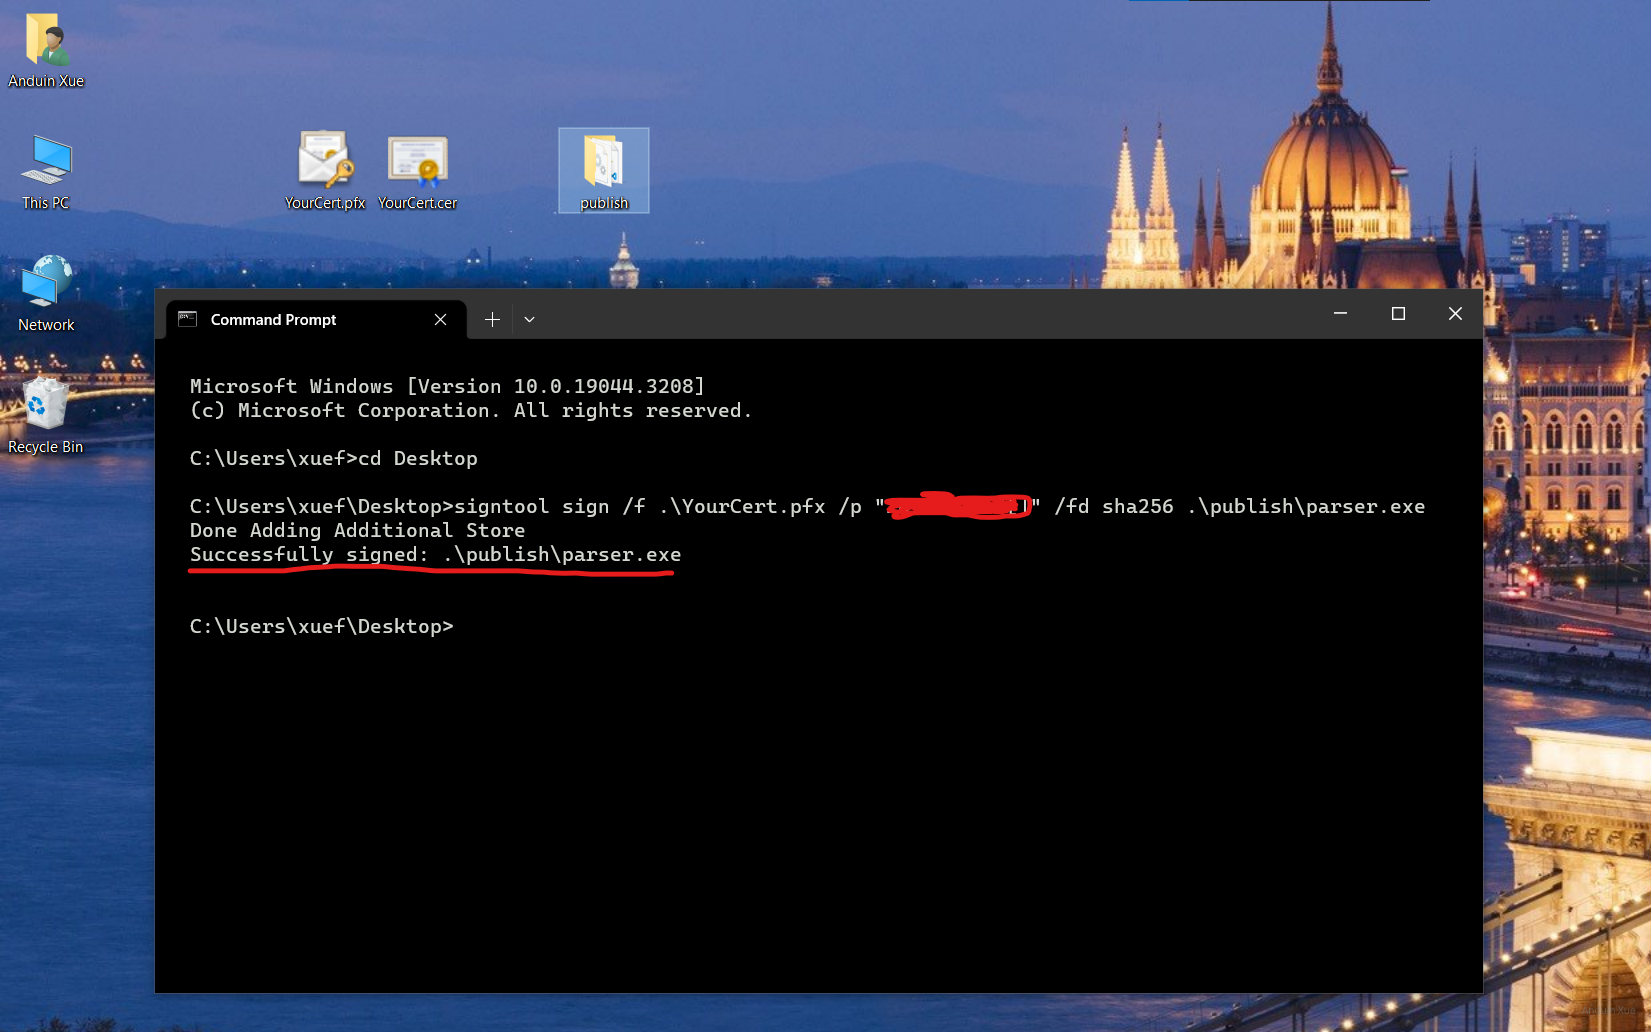
signtool sign /f .\PrivateKey.pfx /p "Password" /fd sha256 .\app.exe
Press Enter to execute the command. If the signing is successful, you will see the message "Successfully signed".
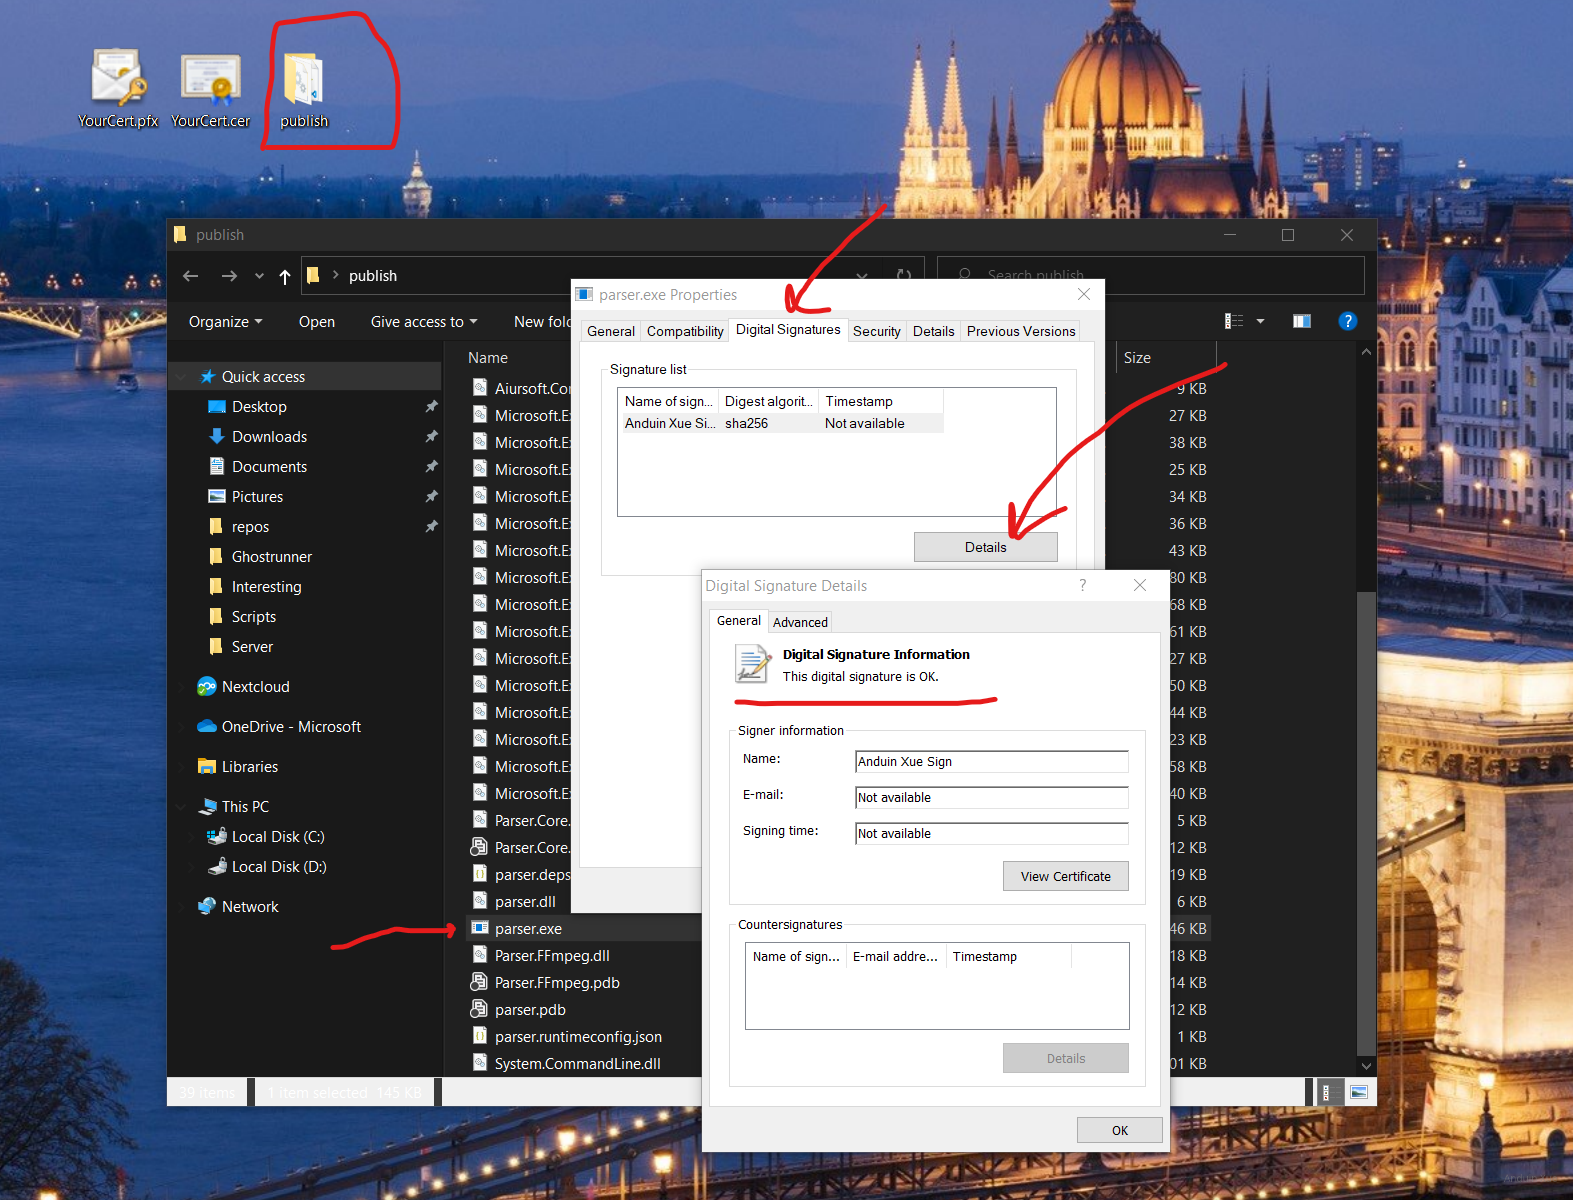
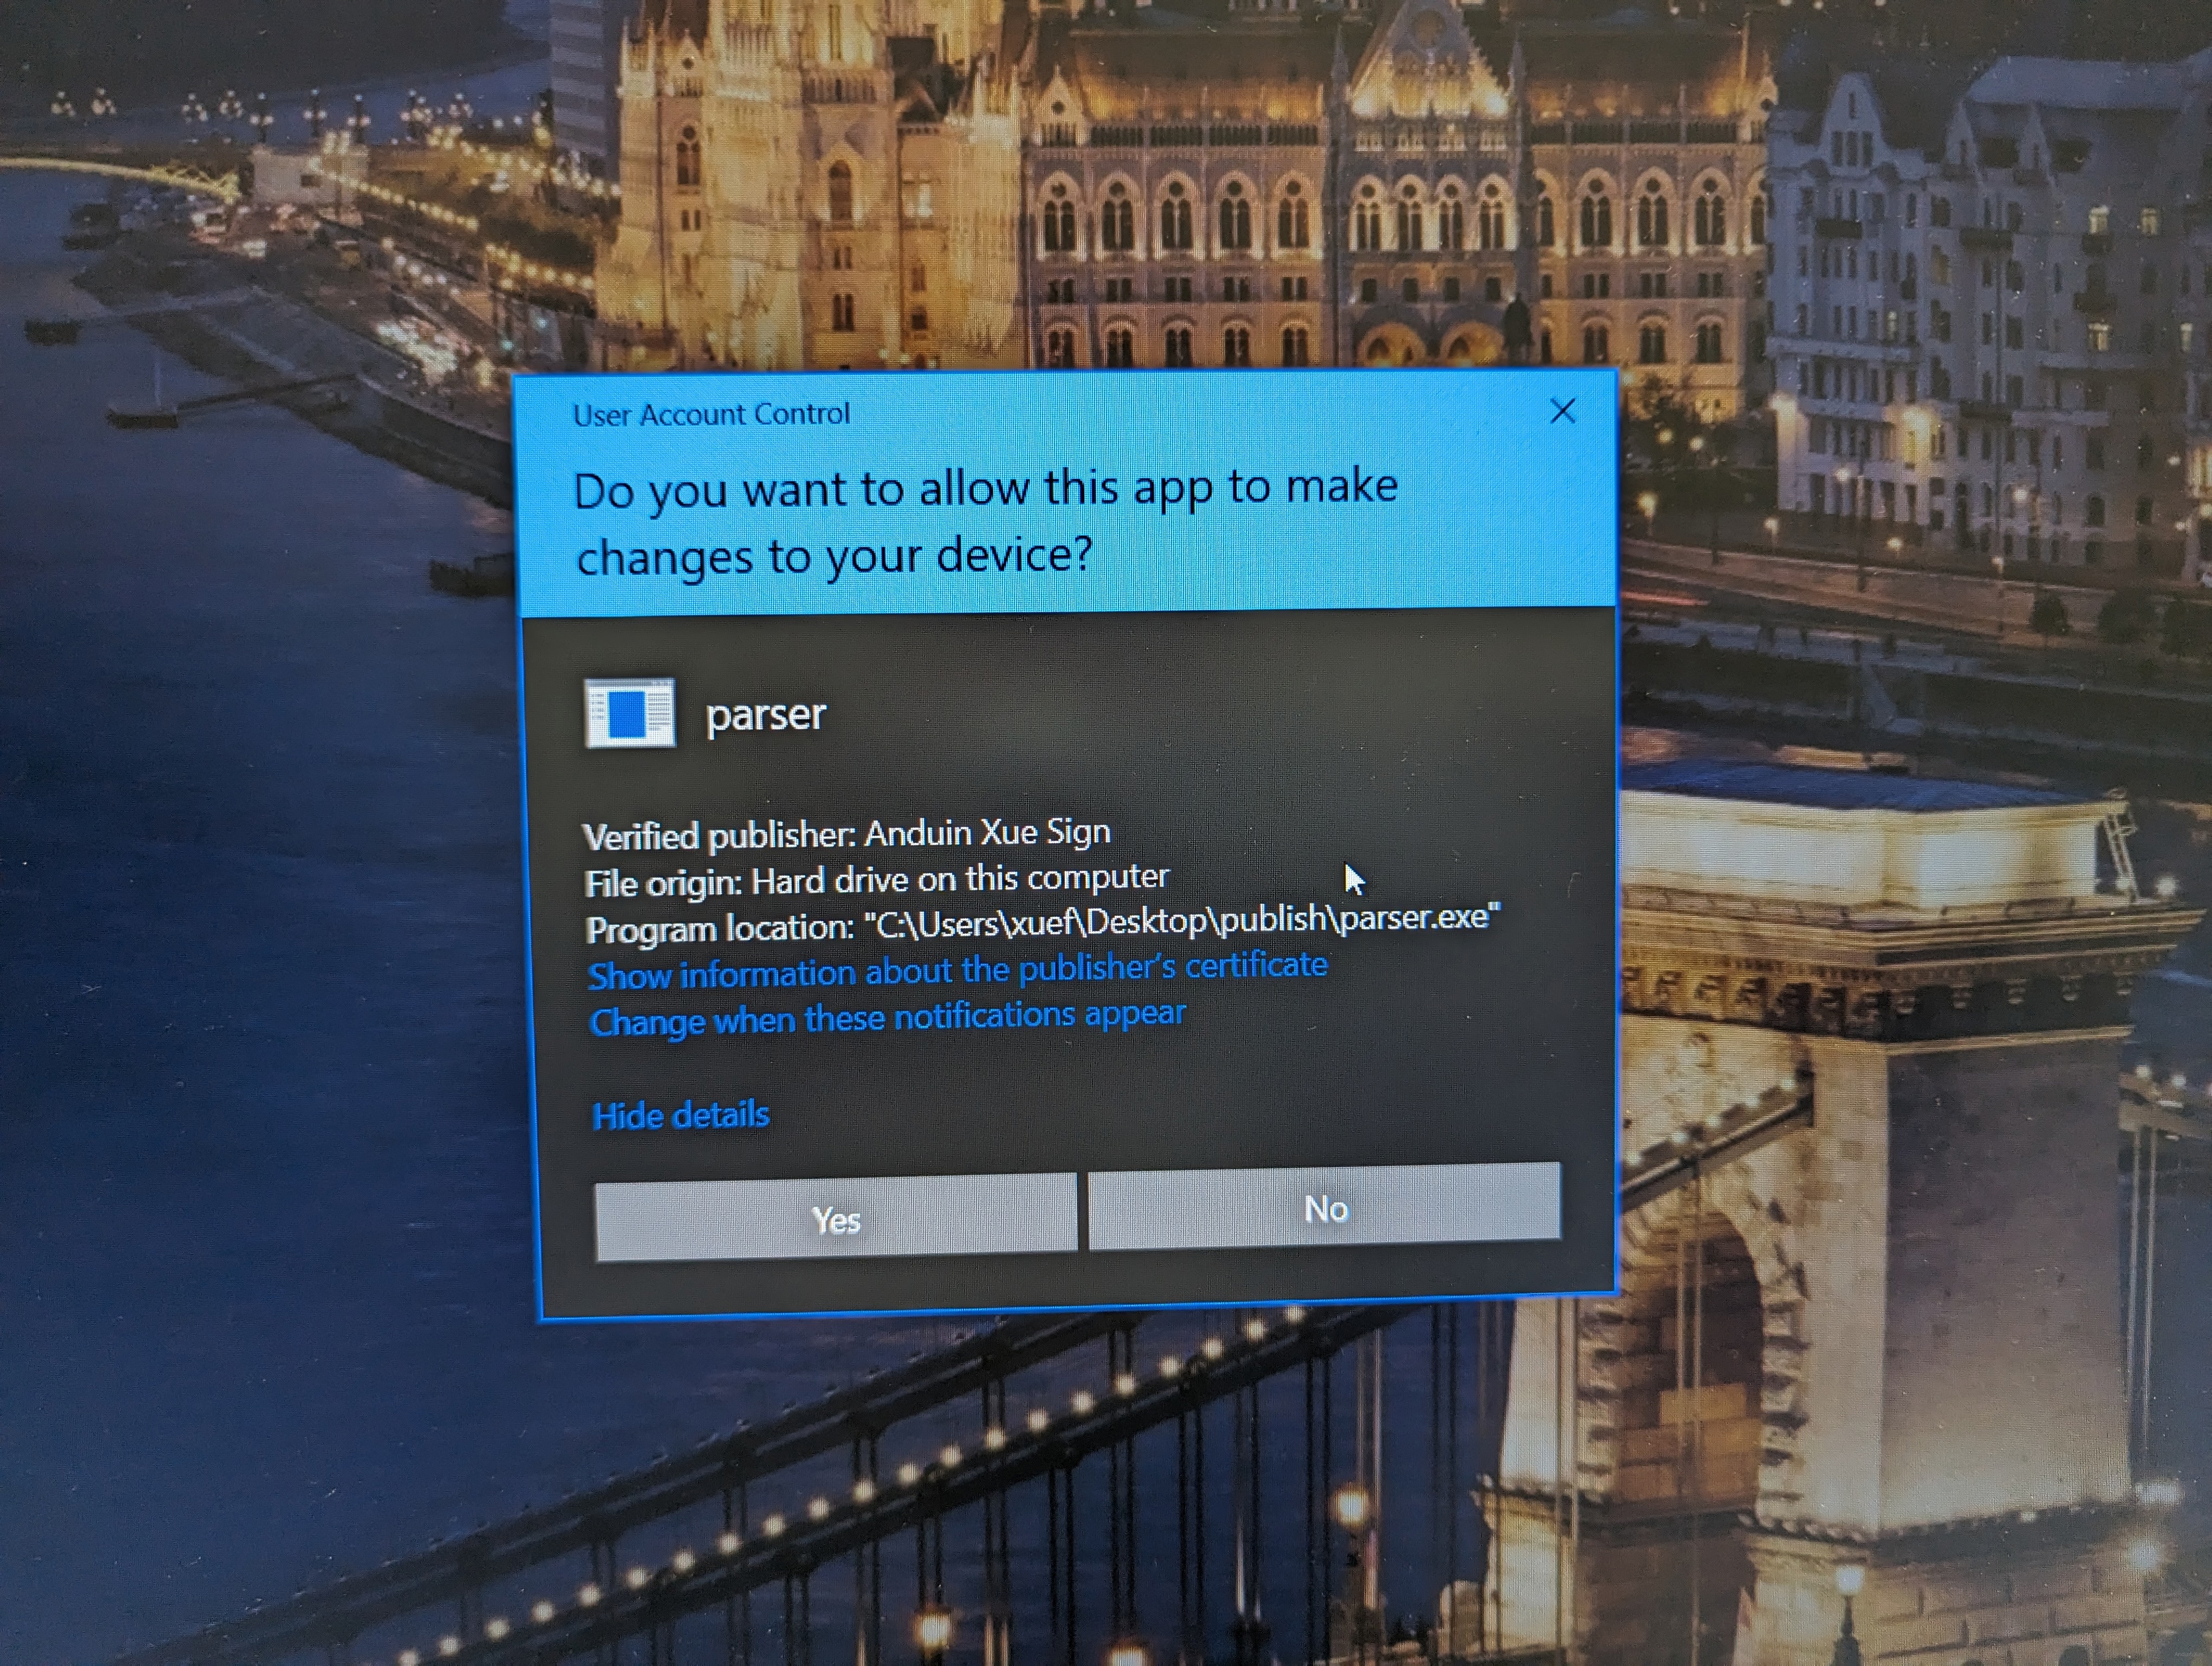
Congratulations! Now you can see that your binary is signed with a valid signature!
When it was trying to run as admin, you will see blue badge:
Use your own cert to sign nuget package
Now you can sign your binary. Right here assume you are a .NET developer and already built a C# project.
Pack your project first:
$ dotnet pack -c Release
MSBuild version 17.6.8+c70978d4d for .NET
  Determining projects to restore...
  All projects are up-to-date for restore.
  Aiursoft.CommandFramework -> C:\Users\xuef\source\repos\Anduin\HappyRecorder\src\Aiursoft.CommandFramework\bin\Release\net6.0\Aiursoft.CommandFramework.dll
Now sign it!
$ dotnet nuget sign ./Aiursoft.CommandFramework.1.0.0.nupkg --certificate-path ~/Desktop/YourCert.pfx --certificate-password "password" --timestamper http://timestamp.digicert.com

To verify if a NuGet package is signed, you can use the nuget verify command. Here's how:
$ dotnet nuget verify ./Aiursoft.CommandFramework.1.0.0.nupkg
This command will verify the package's signature and display the result. If the package is signed and the signature is valid, you will see a message indicating that the package is signed and the signature is valid. If the package is not signed or the signature is invalid, you will see an error message.
Additionally, you can also check the package's signature manually by opening it with an archive tool like 7-Zip and looking for the .signature.p7s file. This file contains the signature data, and you can use a tool like OpenSSL to verify the signature.

For more, please reference Nuget document: https://learn.microsoft.com/en-us/nuget/create-packages/sign-a-package.
这篇文章结构清晰、内容详实,对数字证书的使用场景、核心概念和操作流程进行了系统性梳理,尤其在技术细节的呈现上表现出专业性和实用性。以下从多个维度进行分析与建议:
优点与闪光点:
可改进之处:
安全警示的补充:
X509Store("Root","LocalMachine"))存在潜在风险。建议增加安全提示,如强调该操作应仅限测试环境,生产环境仍需依赖CA证书,以避免信任链被恶意证书劫持的风险。技术细节的深化:
-Type CodeSigning参数虽正确,但可补充说明该类型证书与服务器身份证书(如Web服务器证书)的区别,避免概念混淆。timestamper参数,建议解释时间戳服务的作用(确保签名在证书过期后仍有效),并推荐其他公开时间戳服务(如http://timestamp.comodoca.com),增强方案的鲁棒性。内容扩展方向:
地域性问题的深入分析:
总结:文章在技术实践层面具有极高的参考价值,尤其适合需要快速掌握代码签名的开发者。通过补充安全提示、深化技术对比、扩展应用场景,可进一步提升内容的全面性与深度。期待作者未来能针对证书管理的进阶主题(如PKI架构、证书透明度日志等)进行延伸探讨,为读者构建更完整的知识体系。
这篇文章详细介绍了如何使用自签名证书来签署可执行文件和NuGet包,这对于开发者来说是一个非常实用的话题。以下是基于文章内容的一些关键点总结和可能遇到的问题及解决方案:
生成自签名证书:
New-SelfSignedCertificate可以创建一个自签名证书。安装Windows SDK:
C:\Program Files (x86)\Windows Kits\10\bin\<version>\x64\signtool.exe。如果找不到路径,可以使用搜索功能或检查SDK的安装日志。签署可执行文件:
签署NuGet包:
dotnet nuget sign时,指定时间戳服务器是推荐的做法,以确保签名的有效性即使在证书过期后依然可靠。验证签名:
nuget verify命令可以轻松检查NuGet包的签名状态。资源和进一步学习:
总的来说,这篇文章为开发者提供了一个清晰的指南,但在实际操作中可能会遇到各种环境配置和命令执行的问题。对于新手来说,逐步测试每个步骤,并在出现问题时参考官方文档或社区资源,将有助于顺利完成签署过程并确保代码的安全性和可信度。
This blog post is a comprehensive guide on how to use a self-signed digital certificate to sign code. It successfully explains the concept of digital certificates, the significance of the Subject and Friendly Name fields, and how to generate a self-signed certificate.
The core idea of the blog is to enable developers to establish trust with their clients and ensure secure communication by using self-signed certificates. This idea is explained effectively with the help of PowerShell commands and screenshots, which make the process easy to understand and follow.
The highlight of this blog post is the detailed, step-by-step guide on how to generate a self-signed certificate and use it to sign a binary file. The use of PowerShell commands and screenshots to illustrate each step is commendable as it makes the process easier to follow.
However, the blog could benefit from a brief introduction on why it's important to sign code and what the potential risks are if code is not signed. This context would help readers understand the importance and relevance of the process being described.
The blog could also provide more information on the pros and cons of using self-signed certificates as opposed to certificates issued by a trusted certificate authority. This would help readers make an informed decision on which approach to use.
The section on trusting the public key could also use a bit more explanation. While the PowerShell commands are helpful, a brief explanation of what each command does would make it easier for readers who are not familiar with PowerShell to understand the process.
Additionally, the blog could benefit from a conclusion summarizing the key points and reiterating the importance of using digital certificates for code signing.
Overall, this blog post provides a valuable resource for developers looking to sign their code using self-signed certificates. With a few enhancements, it could serve as an even more comprehensive guide on this topic.