Summary
The commands sysprep and dism can build a system image and configure what the user will see when the system it is first powered on. With customization, users can have a friendly out-of-box experience, configure his account and services, and then get a system that has been activated, updated to the latest with the driver and software installed.
OOBE:
This is useful for: giving PC to others, IT preparing new PCs, preparing Windows images for yourself, etc.
Before starting
Before starting, you need to find the sysprep binary:
C:\Windows\System32\Sysprep

sysprep is a CLI tool, but also has GUI.
Prepare a computer to give it to others
When you need to give a computer to a friend or prepare a computer for employees of other companies, they get the computer and should see the OOBE page and log in to their account.
However, when a PC just installed Windows, there are often not activated, no necessary drivers and software in it. Not ideal.
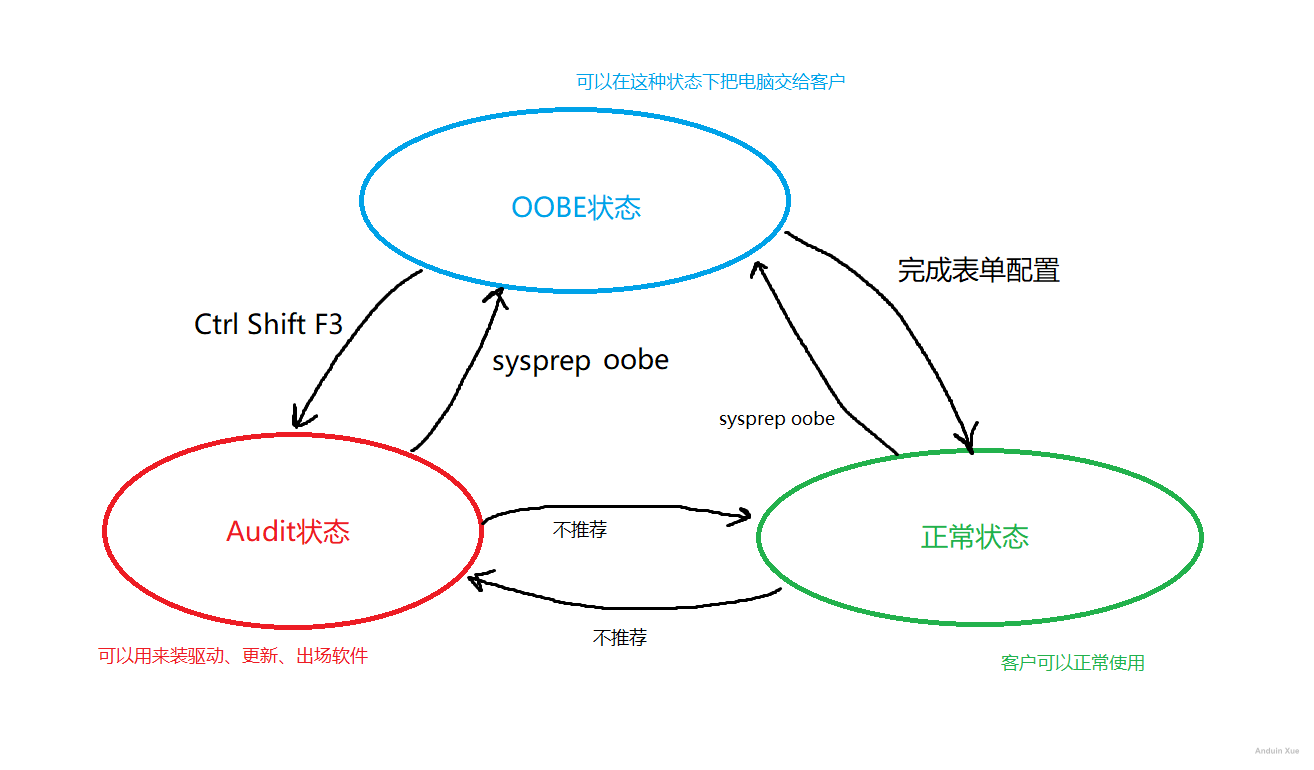
We can enter the audit state first.
What is the Audit state?
The Audit state can temporarily skip OOBE for activation, installing drivers and software. In the audit state, the Administrator user will be used to log in, and only computer-level operations can be performed.
After the Audit state, you must re-enter the OOBE state, so that the user who gets the computer can create a normal user on the OOBE page.
Switch to Audit state from OOBE state
If you want to enter the Audit state when you are in OOBE, you can use the command: Ctrl + Shift + F3. This will go directly to the Audit state.
Of course, when you enter the Audit state, you can use sysprep /generalize /oobe to get back to the OOBE state.
After installing the software, erase user data through the sysprep /generalize /oobe command, and the device can be handed to the user.
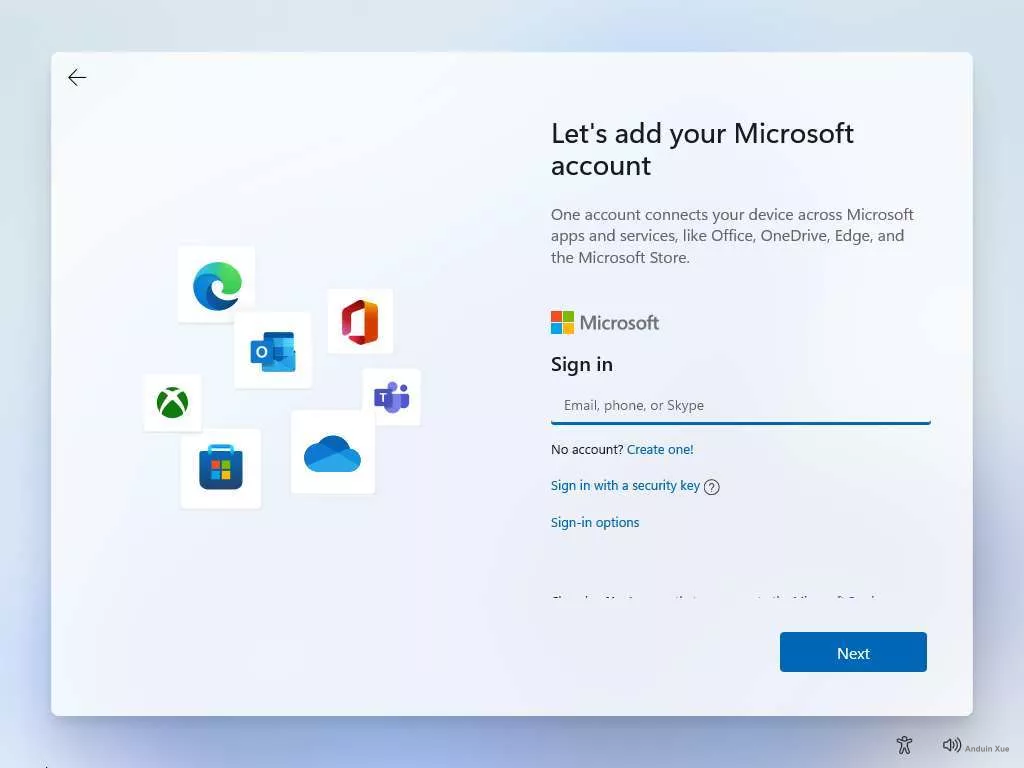
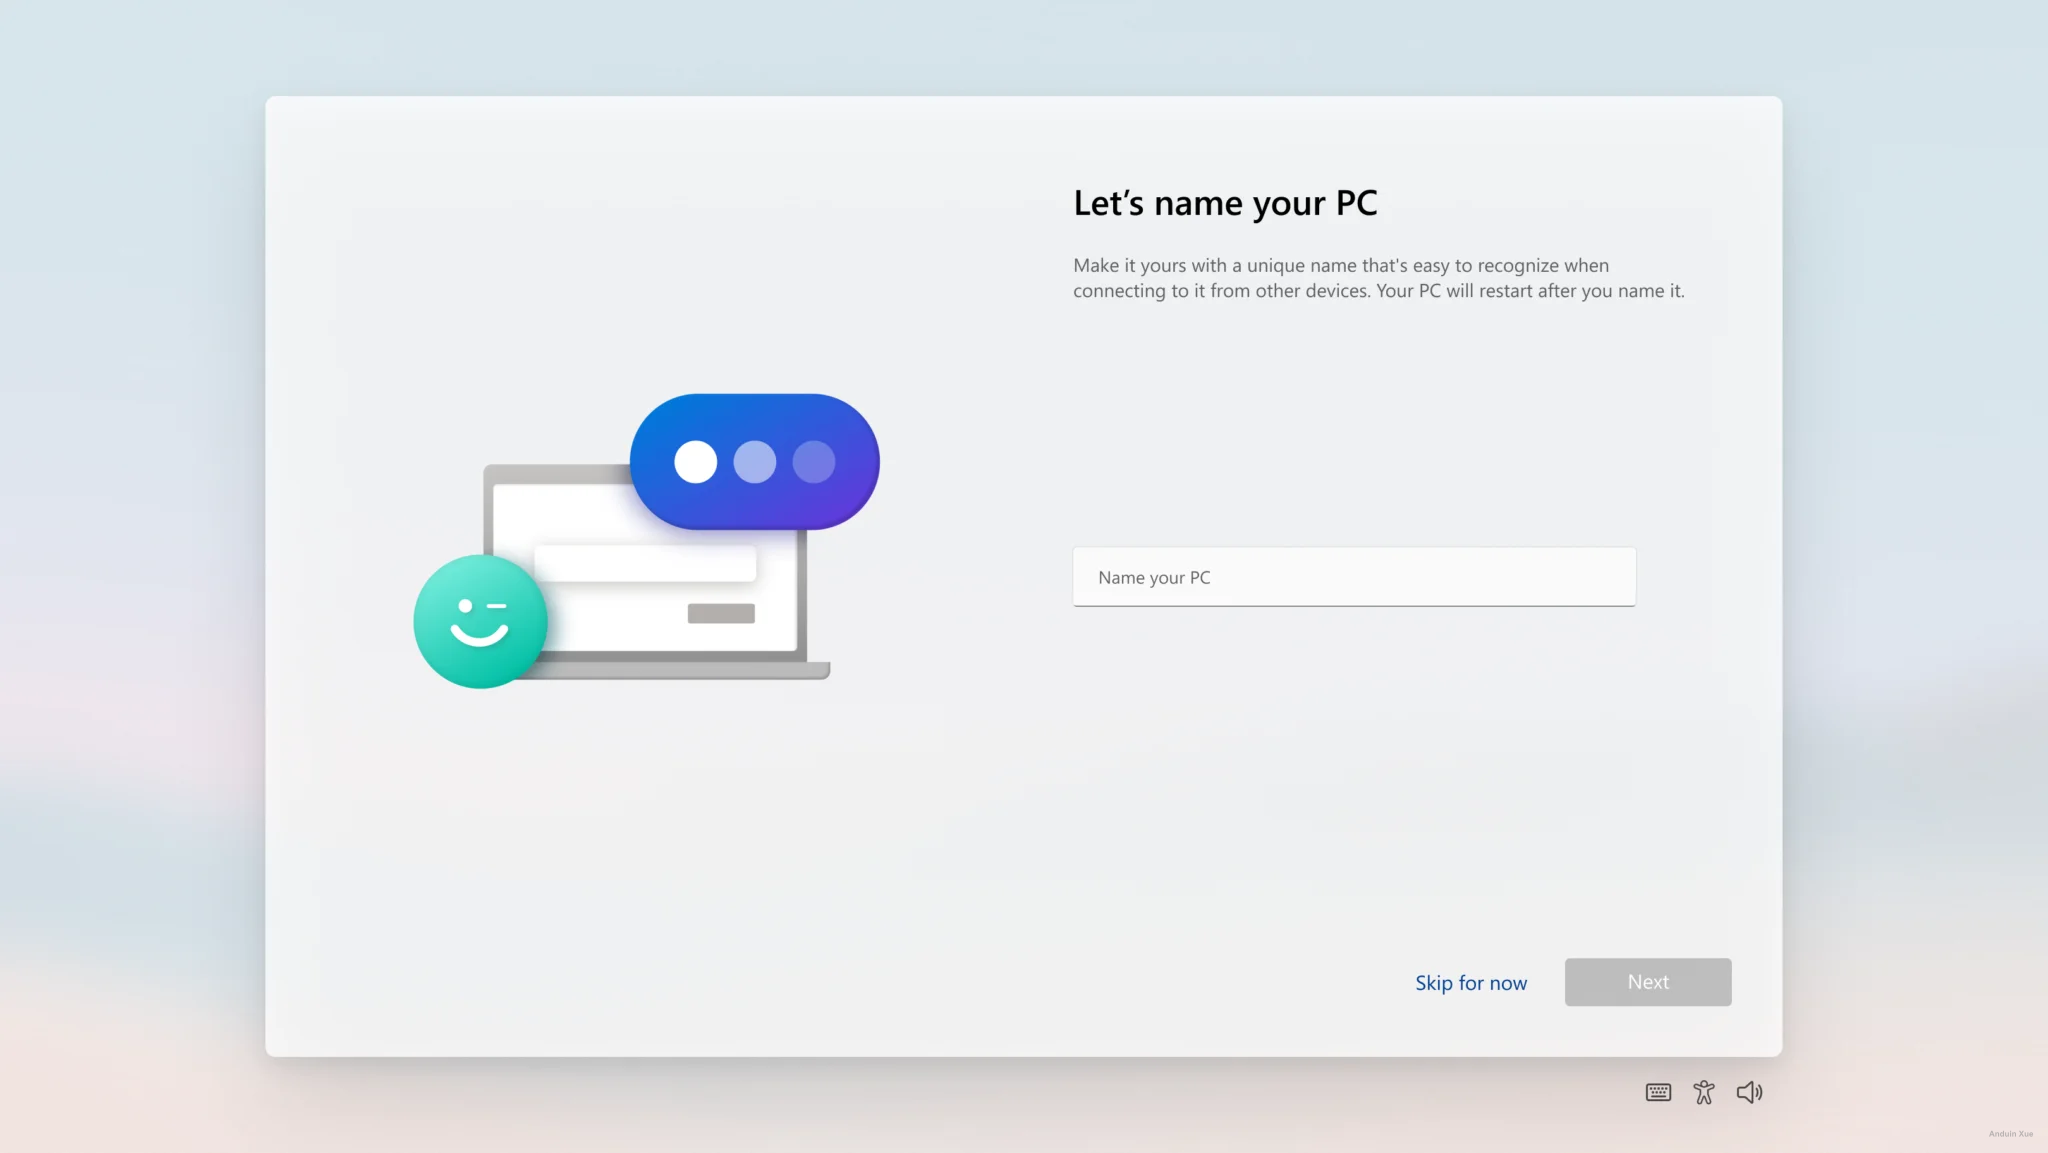
What's inside OOBE
The computer in the OOBE state will prompt the user to configure the language, region, keyboard layout, network, system update, license agreement, login account, privacy settings, etc. when the computer is turned on next time. The original version of Windows that has just been installed is in OOBE state.
Without erasing any data. But let the computer enter the OOBE state directly (not recommended):
sysprep /oobe /reboot
Erases all device data and user data, but keeps system-level settings and programs. This command is generally used to reset the computer and enter the OOBE state. This command can also be used to prepare a system disk to capture as own Windows images.
sysprep /generalize /oobe /reboot
Build your own Windows image
If you want to build a Windows image that can be directly deployed later, you can also use dism to capture the current system disk and make a wim image after generalize parameter wipes user and device data.
Once that's done, just install this image on the computer that needs to be handed over to the client, and you're done.

Capturing a system image can be used to quickly deploy this wim later.
It is recommended to enter the OOBE state and erase the data before capturing. That is, pass in the parameter sysprep /generalize /oobe /reboot. This ensures that the captured system image is not related to a specific device, and will not capture computer names, user information, etc. The image captured at the same time is in the OOBE state directly after deployment.
It is recommended to optimize the target image before capturing. This can speed up its startup after deployment. This step is optional.
dism /image:D:\ /optimize-image /boot
Here, I just prepared, generalized, and in the OOBE state, and did not start that Windows, it is on the D drive.
After that start capturing:
Dism /Capture-Image /ImageFile:"C:\my-image.wim" /CaptureDir:D:\ /Name:MyWindows
The captured wim file can be used to install it~
Install a wim (Windows image file) to the new device
You can replace your own wim file with install.wim in the source directory of the original Windows installation U disk. In this way, the Windows installed using this installation U disk is your own customized Windows.
Or use this command to deploy the wim file:
# (Requires admin rights, PowerShell runs)
iex ((New-Object System.Net.WebClient).DownloadString('https://github.com/Anduin2017/configuration-script-win/raw/main/Reimage.ps1'))
Based on Windows image, then customized
It's not that difficult if you've deployed a custom Windows image to your users' devices, but suddenly you want to add some extra software.
You can first enter the Audit state from the OOBE state through Ctrl + Shift + F3, and then re-enter the OOBE state after completing the relevant configuration.
Don't forget, you can always go back to OOBE state via: sysprep /oobe /reboot.
In this case, usually you don't need to run generalize, because you are not building a commonly used image, instead, you are preparing this OS for this specific machine. Just bring back to OOBE mode is enought.
Inject drivers for an existing wim image
Now open a new PowerShell session with Admin.
Run the following command to get your preferred system index.
dism /Get-ImageInfo /imagefile:"C:\install.wim"
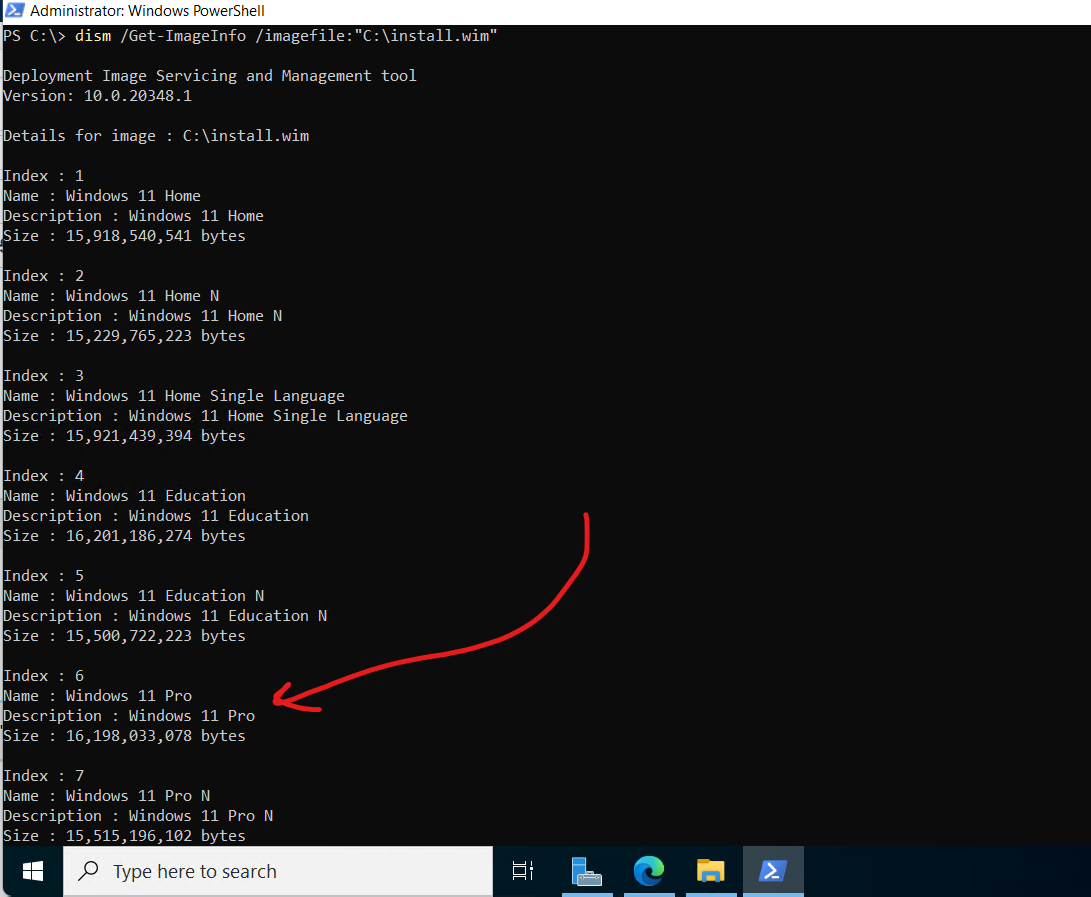
For example, I want to install Windows 11 Pro. Then I need to remember the index: 6.
Now run the following commands to mount the system.
Remember: The index number should be your preferred OS index! I use 6 here as an example.
cd C:\
mkdir win11_temp
Dism /Mount-Image /ImageFile:C:\install.wim /MountDir:C:\win11_temp /Index:6
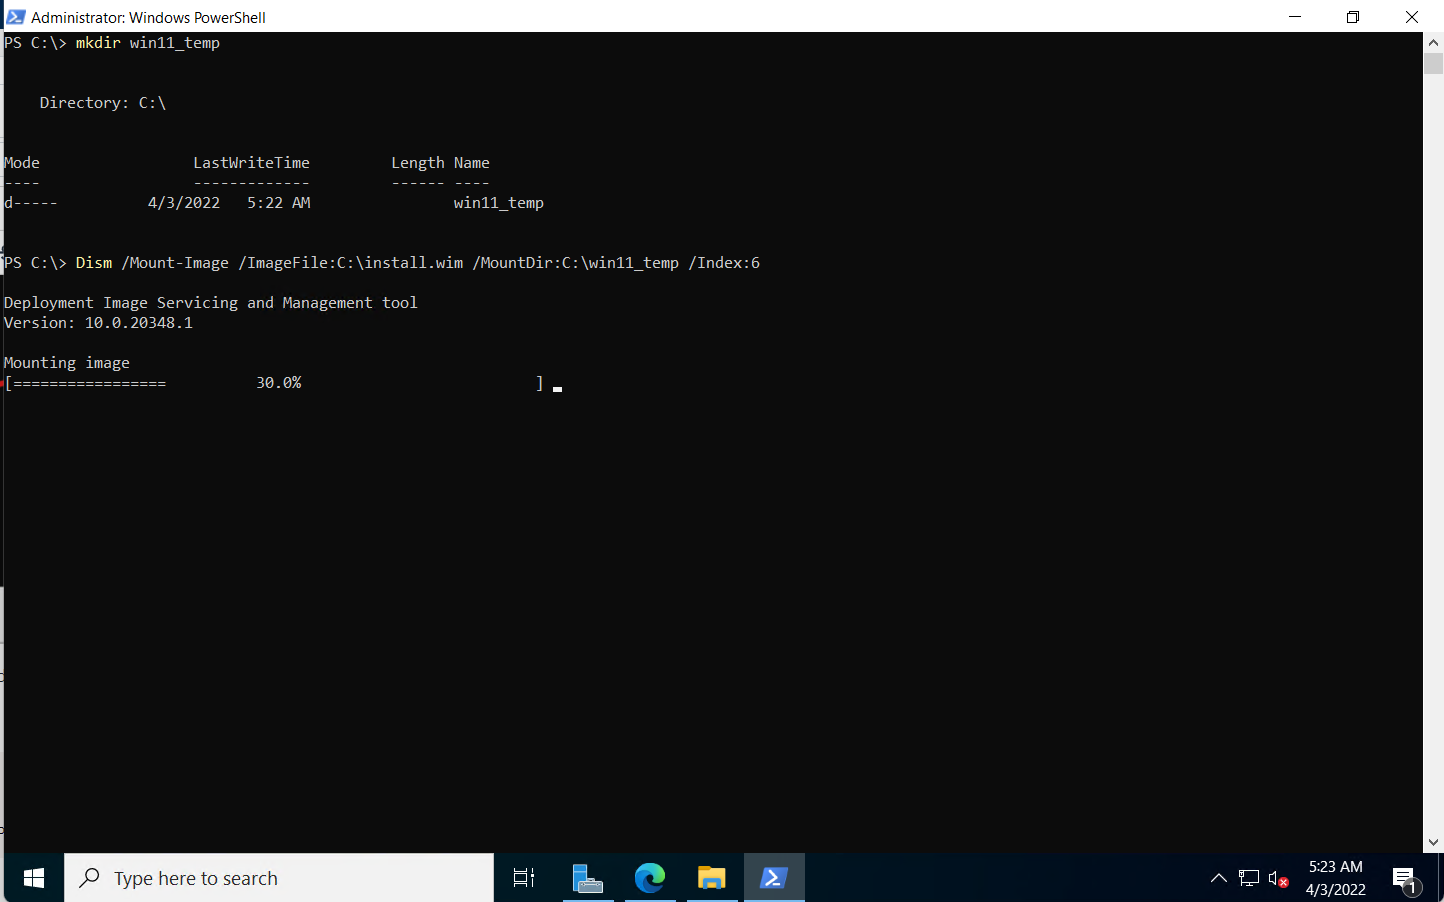
After mounting, don't touch those mounted files!
Inject the necessary drivers now. (You just mounted the Vultr drivers as E:\)
Run the following command:
Dism /Image:C:\win11_temp /Add-Driver /Driver:E:\ /Recurse
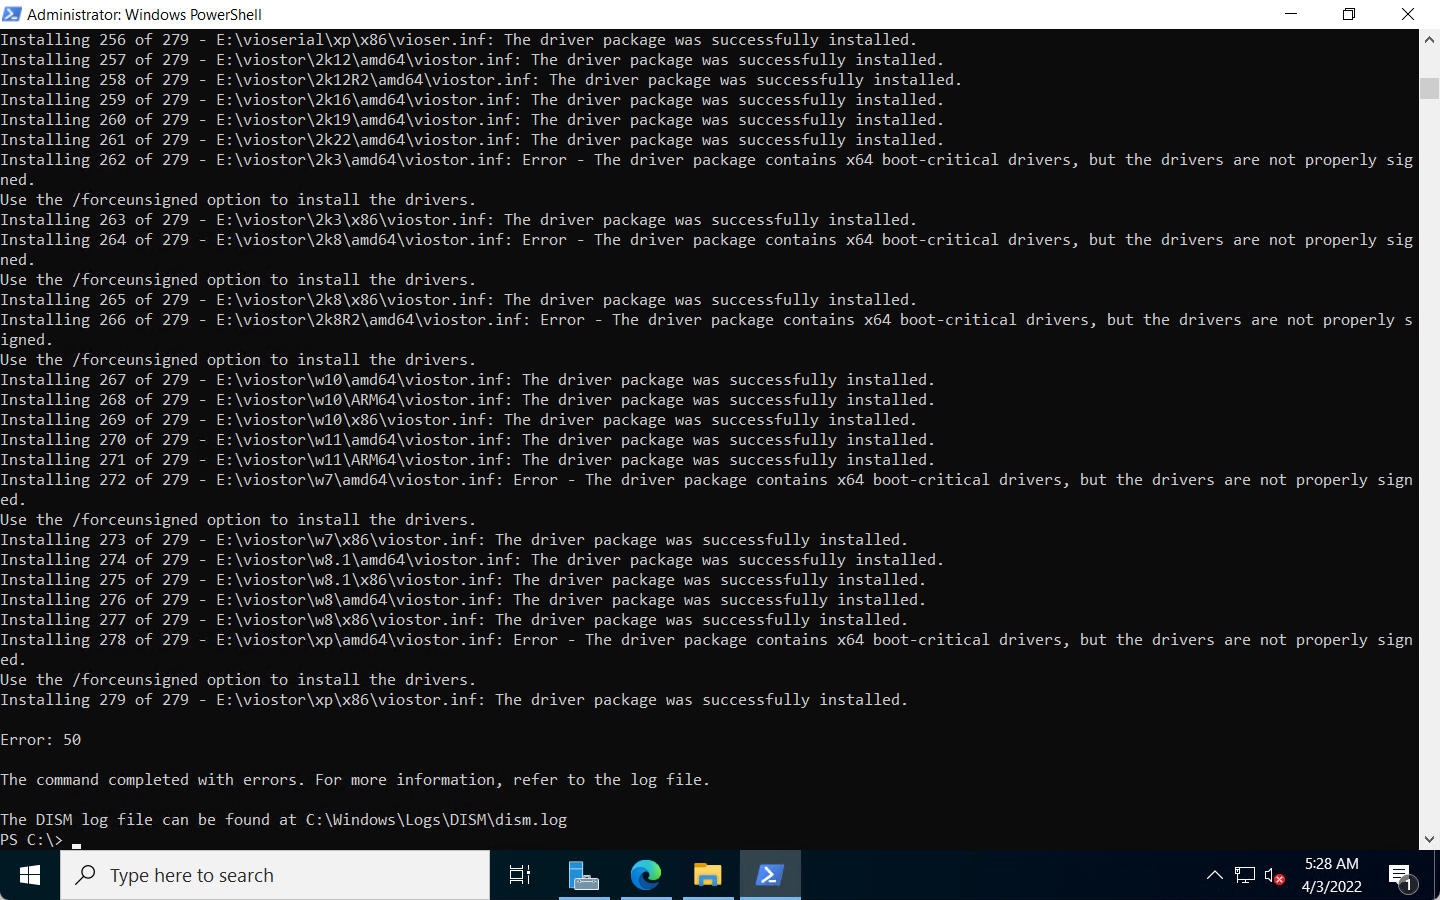
You may see some errors. Those are not necessary. Just ignore them. Most of the drivers are installed.
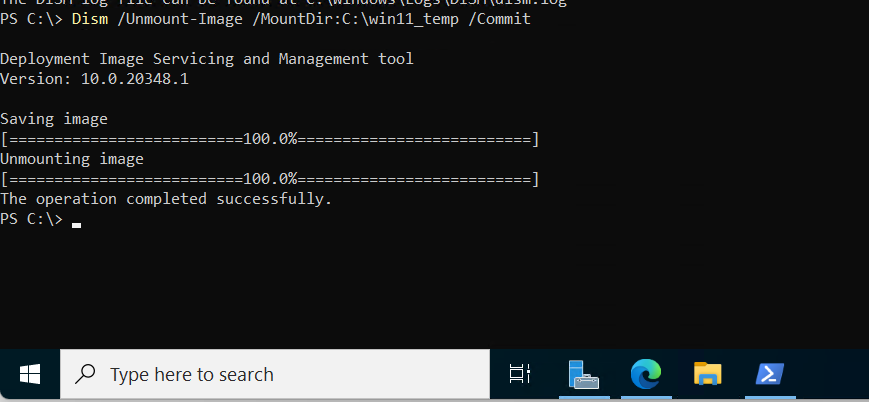
Now, commit the changes to the wim file.
Dism /Unmount-Image /MountDir:C:\win11_temp /Commit
When running the command, close all file explorer windows. Don't use your terminal to change the directory to the mounted folder! We need to make sure dism can successfully delete those mounted file or there will be an error.
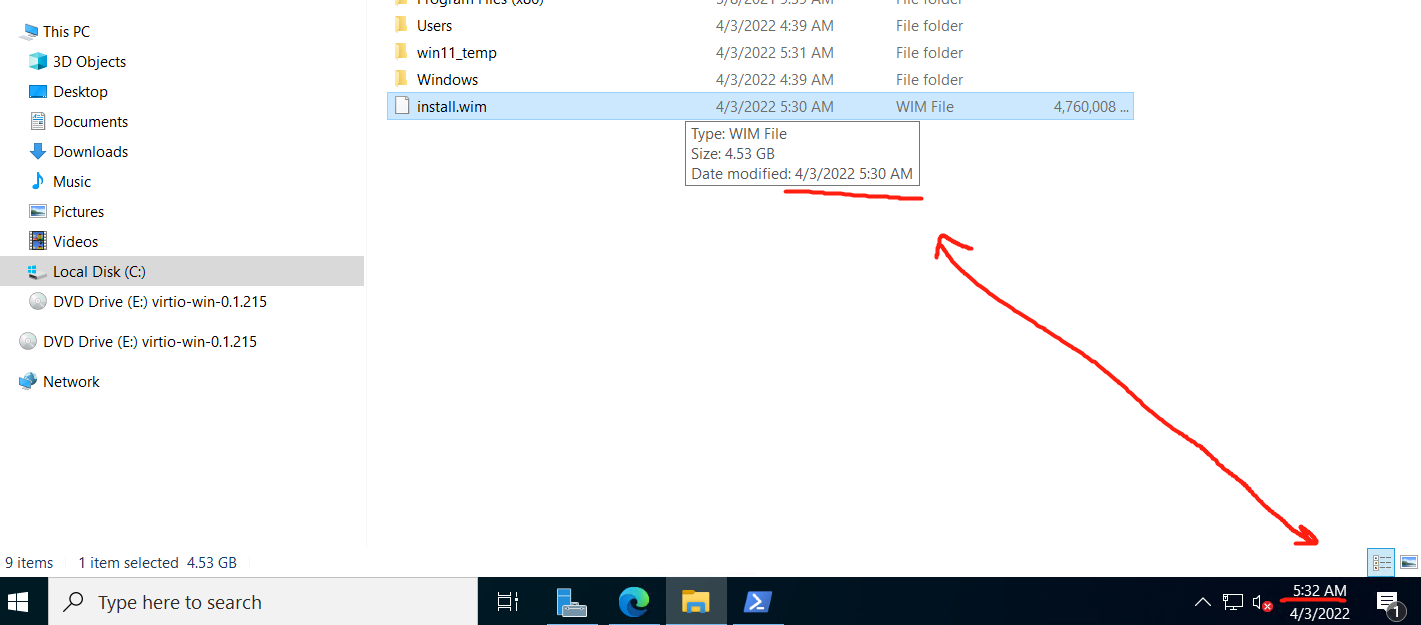
After unmounting, double-check the wim file's modification time is around 2 minutes earlier from now.
Other steps
It is also critical to prepare the Windows RE environment before shipping your computer to customers.
You can follow the guidance here: Prepare Windows RE
这篇文章详细介绍了如何通过sysprep和dism工具构建自定义Windows镜像并实现OOBE体验,内容结构清晰,技术细节完整,对系统部署和优化有实际指导价值。以下是对文章的客观分析与建议:
优点与核心理念的肯定
实用性强
文章覆盖了从基础命令(如sysprep进入审核模式)到进阶操作(如自定义镜像注入驱动)的全流程,结合代码示例和步骤说明,直接指向解决真实场景问题(如批量部署企业设备、制作个性化系统镜像),对IT从业者和系统管理员具有高参考价值。
OOBE体验优化的强调
作者明确指出通过sysprep /generalize /oobe命令清除用户数据并重置系统到首次启动状态,确保用户获得标准化的开箱体验(如语言、网络配置等),这一理念符合企业或个人定制化部署的需求,逻辑严谨。
工具链整合
通过结合sysprep和dism的协作(如捕获镜像、注入驱动),展示了如何高效构建可复用的Windows镜像。例如,使用
Dism /Capture-Image生成wim文件并替换原版install.wim,简化了部署流程,体现了对Windows部署生态的深入理解。风险控制意识
在“准备Windows RE环境”部分,作者提醒读者需提前配置恢复环境,避免系统部署后因意外问题导致不可逆风险,这种对系统稳定性的关注值得肯定。
可改进之处与建议
操作细节的补充
img-06185853-2e54-44f3-92b1-3155334615da.png),但未提供有效链接或替代说明,影响读者验证步骤的准确性。建议补充图片或改为文字描述关键界面。错误处理的深化
在“注入驱动”步骤中,作者提到“忽略部分错误”,但未解释哪些错误可接受、哪些需排查(例如驱动冲突或路径错误)。建议补充典型错误代码及解决方法,例如:
可能提示驱动路径错误或权限不足,需明确提醒用户检查驱动兼容性。
安全性提示的缺失
https://github.com/Anduin2017/configuration-script-win/raw/main/Reimage.ps1),但未说明脚本来源可信度或潜在风险(如恶意代码)。建议补充验证步骤,例如:dism /Mount-Image),可能导致权限不足的错误。建议在代码注释中标注# Requires Admin。流程衔接的优化
在“从OOBE进入审核模式”后,直接跳转到
sysprep /generalize /oobe,但未解释为何需要两次进入OOBE状态(一次清除数据,一次重置体验)。建议用流程图或分步说明(如:安装驱动→清除数据→部署镜像)增强逻辑连贯性。技术深度的扩展
dism /optimize-image为可选步骤,但未说明优化对系统性能的具体影响(如减少启动时间、磁盘占用)。可补充数据对比或引用微软官方文档说明优化效果。闪光点与鼓励
文章最大的闪光点在于将复杂的系统部署流程拆解为可复用的标准化步骤,例如通过捕获镜像实现快速部署,同时兼顾OOBE体验的定制化需求。这种兼顾效率与用户体验的思路对系统管理实践具有重要启发。鼓励作者进一步扩展以下方向:
总结
本文是一篇高质量的技术指南,逻辑清晰且实用性强,但可通过补充细节、增强安全性提示和优化流程衔接进一步提升。作者对Windows部署生态的深入理解值得肯定,建议在后续内容中深化技术深度并扩展应用场景,以覆盖更广泛的读者需求。
这篇文章详细介绍了如何根据个人需求定制Windows安装镜像,并提供了具体的步骤和命令示例。对于需要批量部署或个性化操作系统的人来说,这些方法非常有用。特别是注入驱动程序的部分,能够帮助用户在安装过程中避免因硬件不兼容而产生的问题。
一个值得注意的地方是,在使用Dism工具时,确保有足够的权限以管理员身份运行 PowerShell 会话,否则可能会遇到命令执行失败的情况。此外,在解压和处理ISO镜像时,需要注意文件的完整性和正确性,以免影响最终生成的自定义安装镜像的质量。
对于有经验的用户来说,文章中提到的准备Windows RE环境也是一个重要的步骤,这可以在系统出现问题时提供有效的恢复手段。总体而言,这篇文章提供了实用且详细的指导,能够帮助读者实现个性化的系统部署和管理。
This blog post provides a comprehensive guide on how to make and prepare your own Windows image and deploy it with the OOBE (Out-of-Box Experience) for a smoother setup process. The author explains the concept of Audit state, which temporarily skips OOBE for activation and allows for the installation of drivers and software. The post then provides detailed steps on how to switch between Audit and OOBE states, build a custom Windows image, and install a WIM (Windows image file) on a new device.
The blog post is well-structured and provides clear instructions, making it easy for readers to follow along. The use of screenshots and code snippets further enhances the understanding of the steps involved. The author also offers tips on how to optimize the target image before capturing and how to inject drivers for an existing WIM image.
One point for improvement would be to provide more context on the benefits of creating a custom Windows image and deploying it with OOBE. This would help readers understand why they should consider this approach and how it can save time and effort in the long run.
Overall, this is an excellent resource for anyone looking to create and deploy their own Windows image. The author has done a great job in breaking down the process into manageable steps, making it accessible to users of all skill levels. Keep up the good work!
anduin nb
anduin YYDS!