Before starting, you need to make sure that you are NOT running under Administrator account!
Administrator account can NOT start store apps.
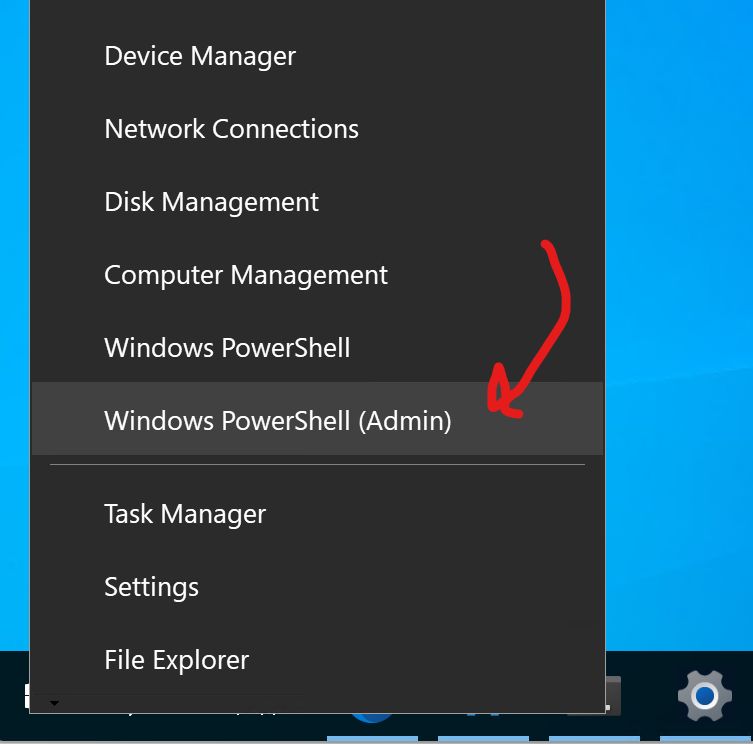
After starting new Windows Server, start a new PowerShell session with Administrator privilege.
Run the following commands:
function Install-Package {
    param (
        [string]$PackageFamilyName
    )

    Write-Host "Querying latest $PackageFamilyName version and its dependencies..."
    $response = Invoke-WebRequest `
        -Uri "https://store.rg-adguard.net/api/GetFiles" `
        -Method "POST" `
        -ContentType "application/x-www-form-urlencoded" `
        -Body "type=PackageFamilyName&url=$PackageFamilyName&ring=RP&lang=en-US" -UseBasicParsing

    Write-Host "Parsing response..."
    $regex = '<td><a href=\"([^\"]*)\"[^\>]*\>([^\<]*)<\/a>'
    $packages = (Select-String $regex -InputObject $response -AllMatches).Matches.Groups

    $result = $true
    for ($i = $packages.Count - 1; $i -ge 0; $i -= 3) {
        $url = $packages[$i - 1].Value;
        $name = $packages[$i].Value;
        $extCheck = @(".appx", ".appxbundle", ".msix", ".msixbundle") | % { $x = $false } { $x = $x -or $name.EndsWith($_) } { $x }
        $archCheck = @("x64", "neutral") | % { $x = $false } { $x = $x -or $name.Contains("_$($_)_") } { $x }

        if ($extCheck -and $archCheck) {
            # Skip if package already exists on system
            $currentPackageFamilyName = (Select-String "^[^_]+" -InputObject $name).Matches.Value
            $installedVersion = (Get-AppxPackage "$currentPackageFamilyName*").Version
            $latestVersion = (Select-String "_(\d+\.\d+.\d+.\d+)_" -InputObject $name).Matches.Value
            if ($installedVersion -and ($installedVersion -ge $latestVersion)) {
                Write-Host "${currentPackageFamilyName} is already installed, skipping..." -ForegroundColor "Yellow"
                continue
            }

            try {
                Write-Host "Downloading package: $name"
                $tempPath = "$(Get-Location)\$name"
                Invoke-WebRequest -Uri $url -Method Get -OutFile $tempPath
                Add-AppxPackage -Path $tempPath
                Write-Host "Successfully installed:" $name
            } catch {
                $result = $false
            }
        }
    }

    return $result
}

function Install-Package-With-Retry {
    param (
        [string]$PackageFamilyName,
        [int]$RetryCount
    )

    for ($t = 0; $t -le $RetryCount; $t++) {
        Write-Host "Attempt $($t + 1) out of $RetryCount..." -ForegroundColor "Cyan"
        if (Install-Package $PackageFamilyName) {
            return $true
        }
    }

    return $false
}
And run the following PowerShell:
    # Retry 3 times because we don't know dependency relationships
    $result = @("Microsoft.DesktopAppInstaller_8wekyb3d8bbwe") | % { $x = $true } { $x = $x -and (Install-Package-With-Retry $_ 3) } { $x }

    # Test if winget has been successfully deployed
    if ($result -and (Test-Path -Path "$env:LOCALAPPDATA\Microsoft\WindowsApps\winget.exe")) {
        Write-Host "Congratulations! winget is now installed on your system :)" -ForegroundColor "Green"
    } else {
        Write-Host "Oops... Failed to install winget on your system :(" -ForegroundColor "Red"
    }
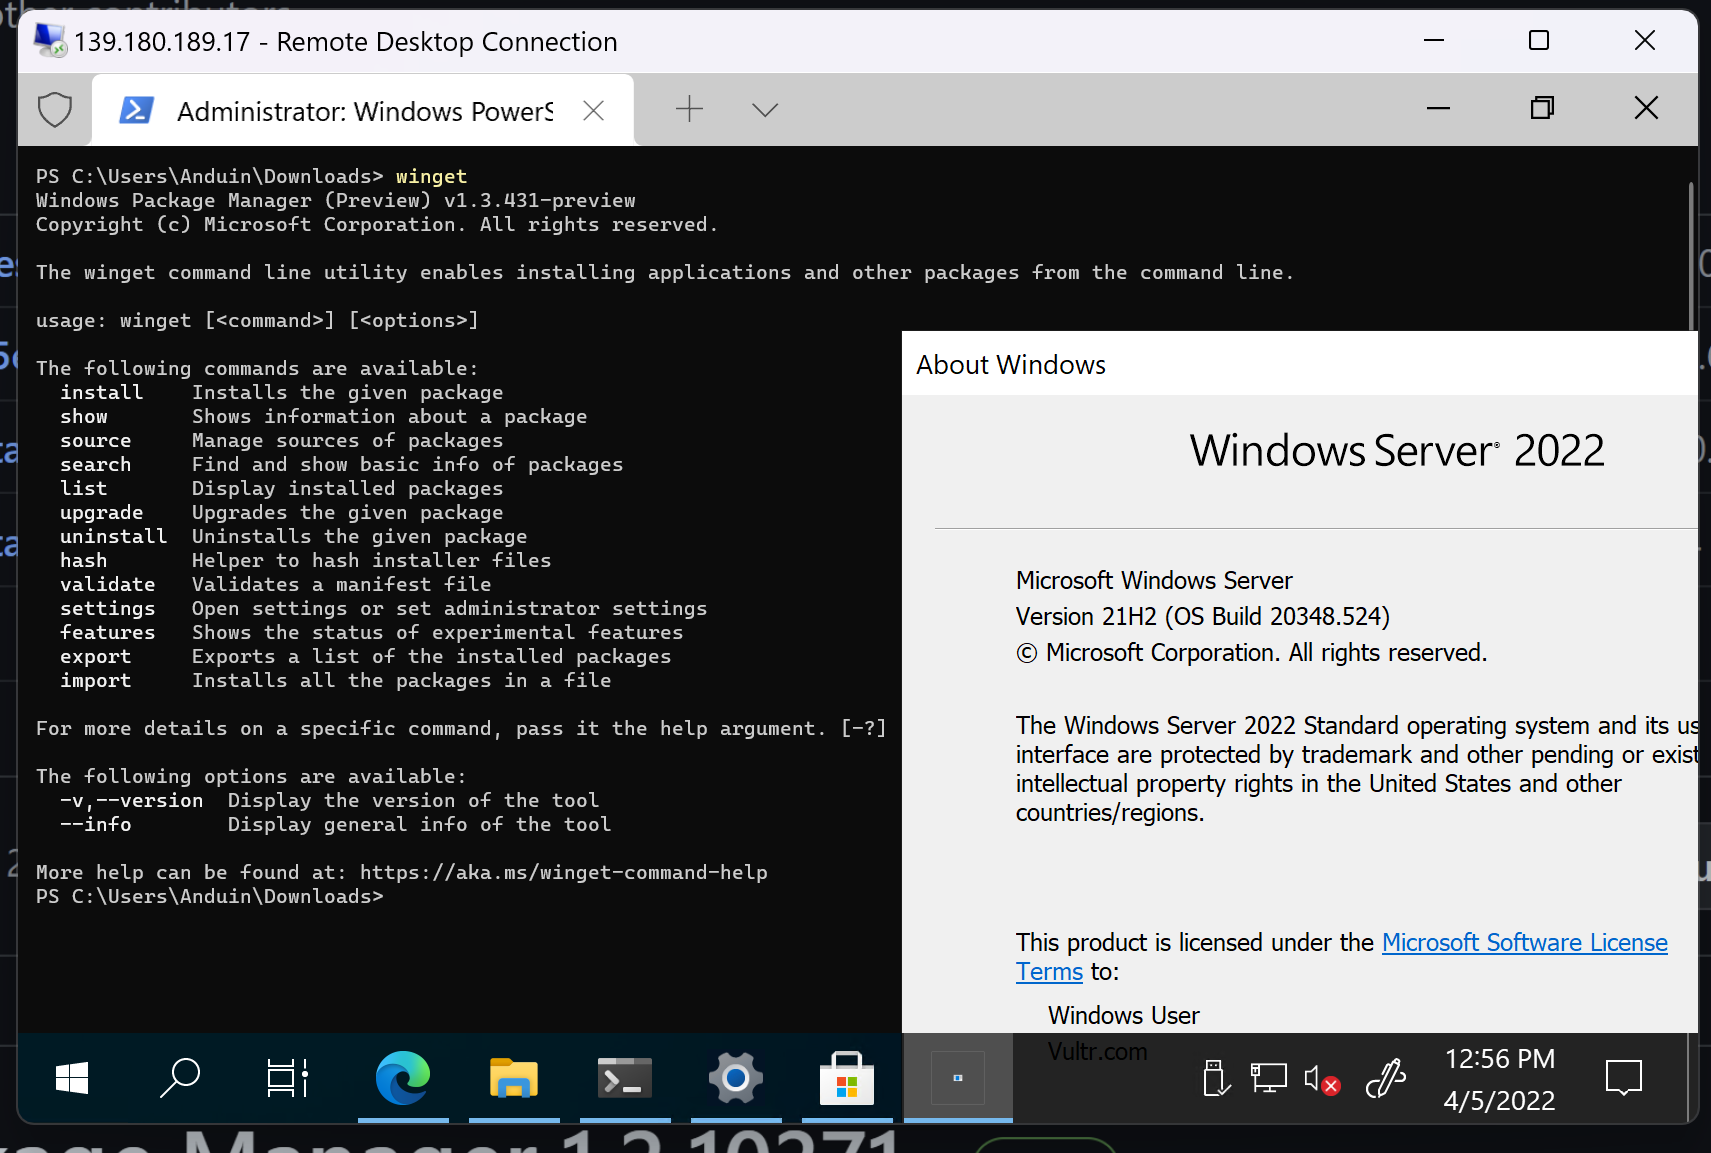
After running, winget will be installed. You may see temporary errors.
Try to run winget. If it failed to install, do the following steps.
Open this page in your browser on server:
https://github.com/microsoft/winget-cli/releases
Download these two files:
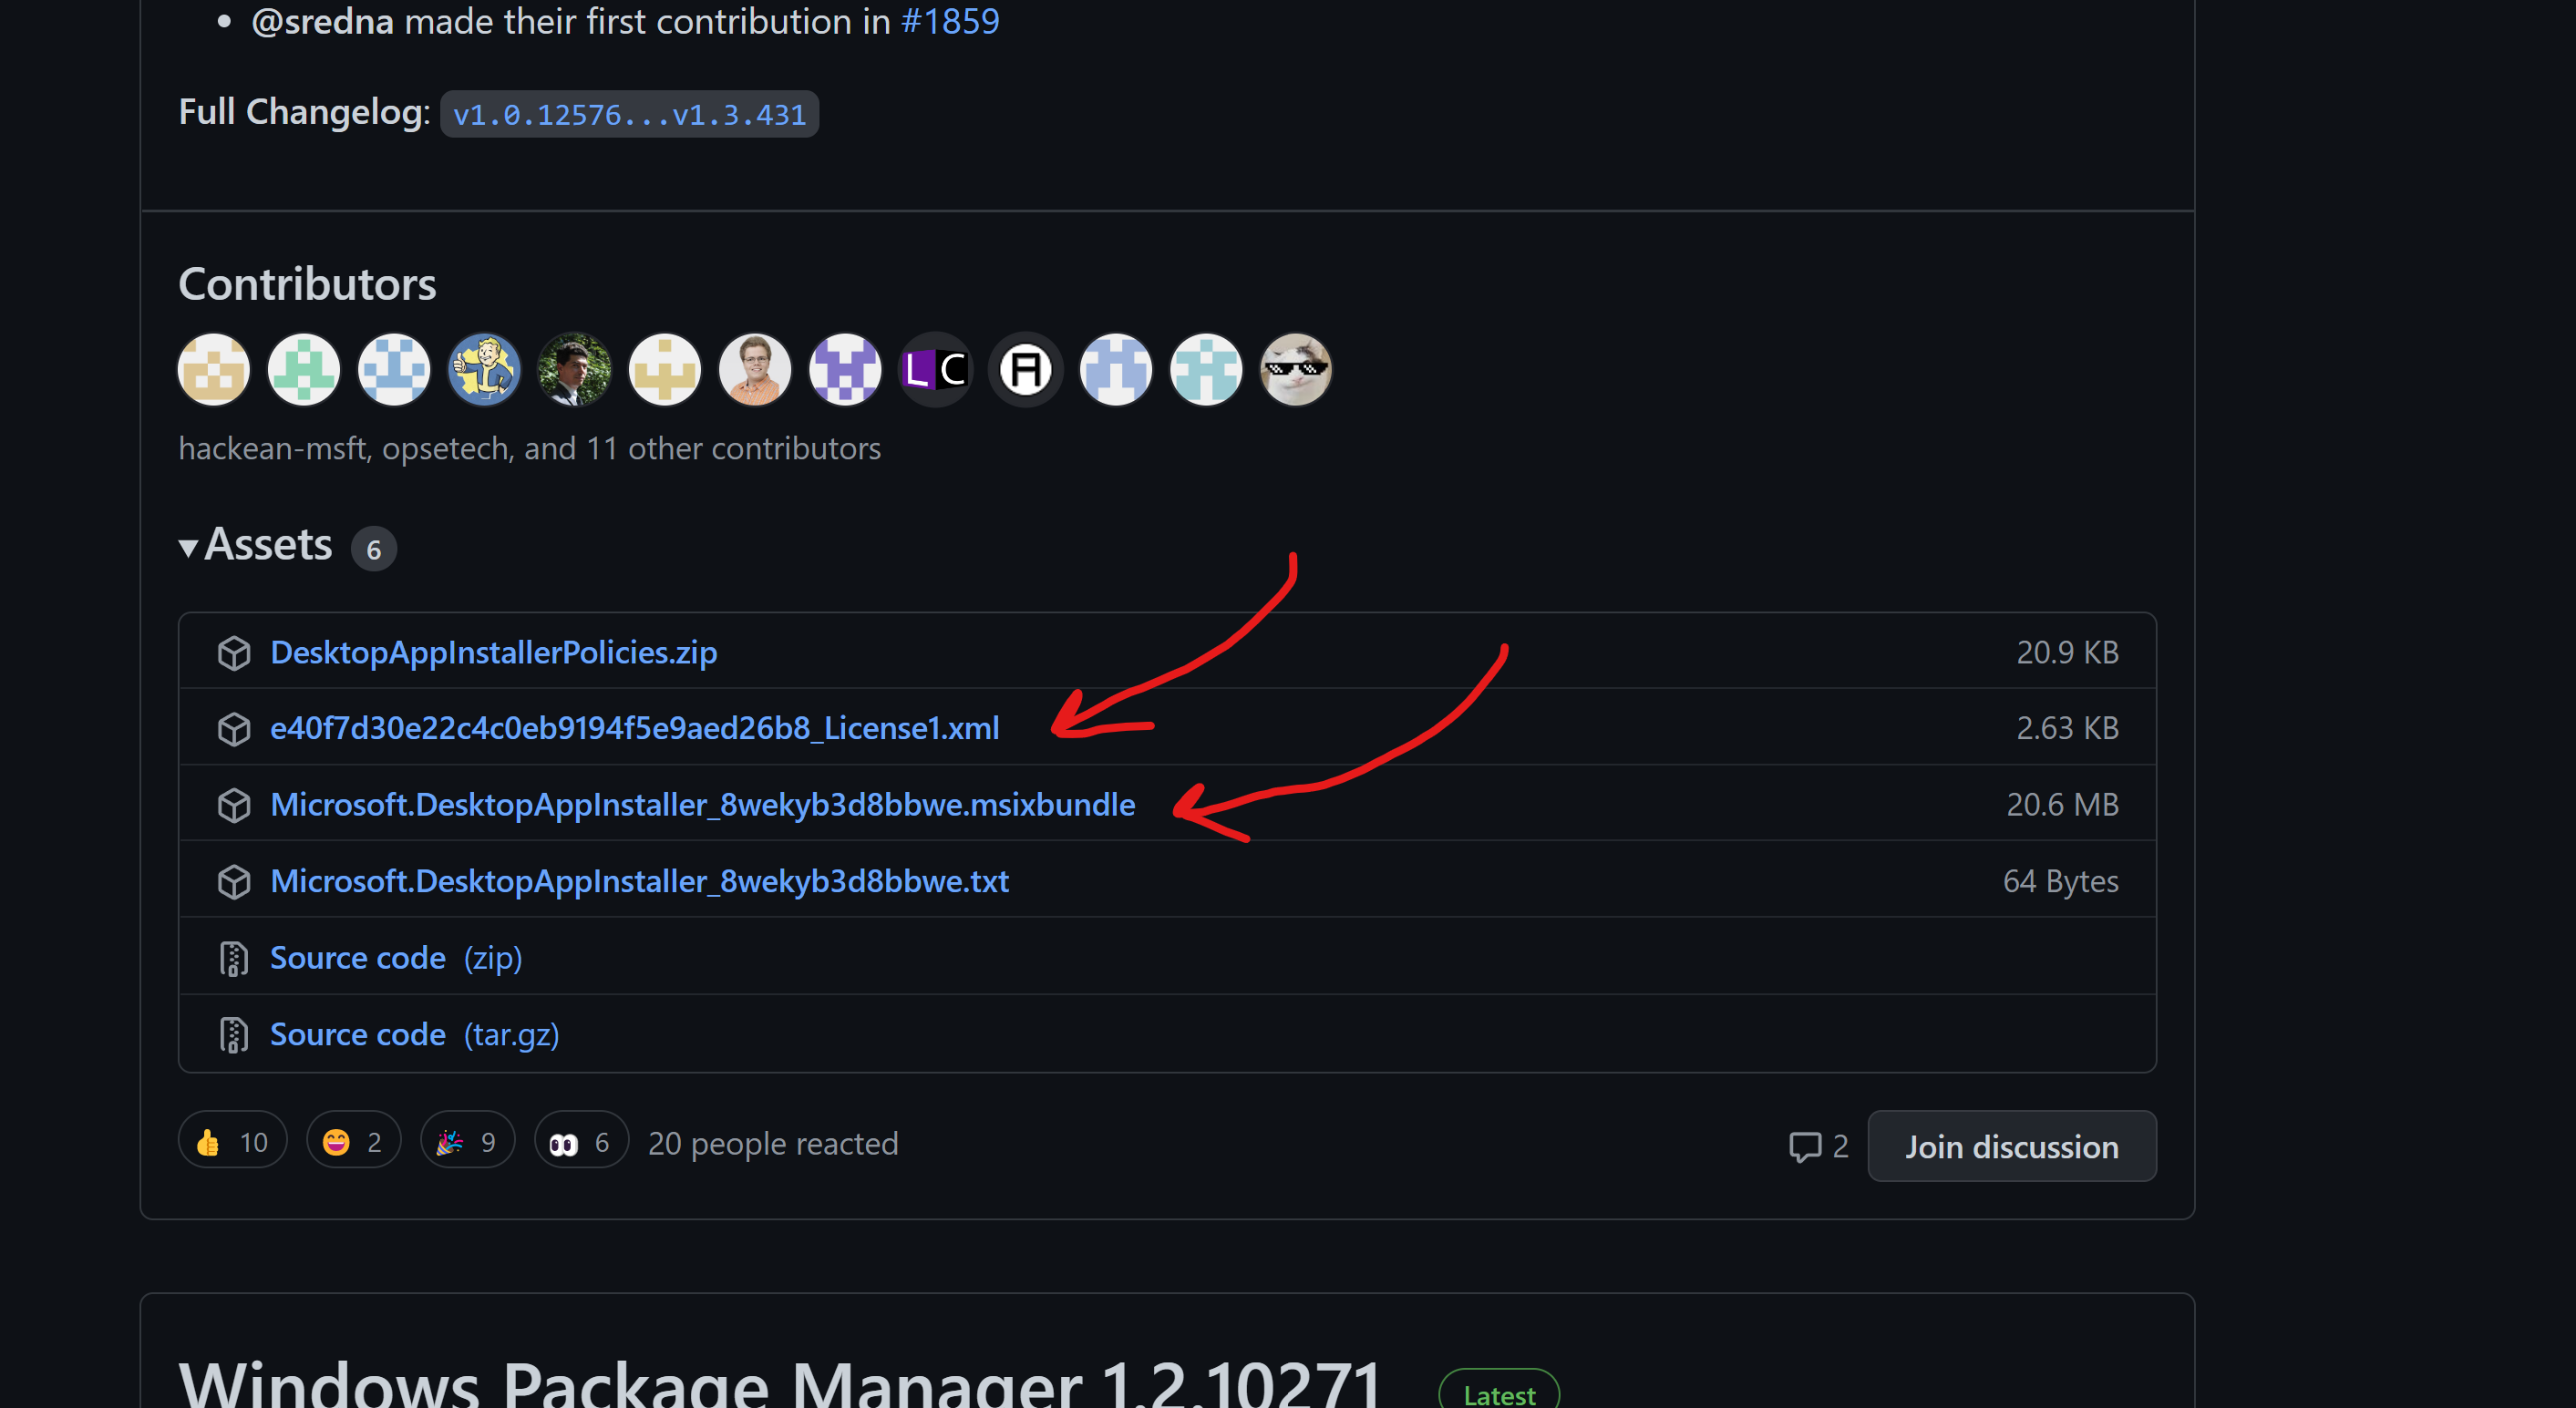
After downloading, run the following command in your downloaded folder (Server must connect to Internet):
Add-ProvisionedAppPackage -Online -PackagePath .\Microsoft.DesktopAppInstaller_8wekyb3d8bbwe.msixbundle -LicensePath .\e40f7d30e22c4c0eb9194f5e9aed26b8_License1.xml
And that will install winget with license. Try to start a new session, and you will see winget available.
You can install Windows Terminal with winget now.
Try winget install Microsoft.WindowsTerminal.
If failed, you can try:
    # Retry 3 times because we don't know dependency relationships
    $result = @("Microsoft.WindowsTerminal_8wekyb3d8bbwe") | % { $x = $true } { $x = $x -and (Install-Package-With-Retry $_ 3) } { $x }
You can also install the following apps:
# snipping tool
winget install --id 9MZ95KL8MR0L
# Sticky notes
winget install --id 9NBLGGH4QGHW
# Clock
winget install --id 9WZDNCRFJ3PR
# Mail and calendar
winget install --id 9WZDNCRFHVQM
To reset Windows Store, you can try this:
(Only support Windows 10 LTSC. May not work on Windows Server)
# Powershell (Admin)
wsreset -i
wsreset
这篇博客为在Windows Server环境中安装WinGet提供了详细且实用的指南,具有较强的实操性。文章核心理念是通过PowerShell脚本与手动干预相结合的方式,突破Windows Server默认不支持Microsoft Store应用的限制,从而实现现代包管理工具的部署。其最大闪光点在于提供了完整的故障排查路径:从脚本自动重试机制到手动下载安装包的备用方案,同时通过正则解析网页数据实现了动态获取最新版本包的功能,这种“自动化+容错”设计值得肯定。
在技术实现层面,文章展现了三个显著优点:1)使用
Install-Package函数封装了版本检测、依赖解析和安装逻辑,通过Select-String与正则表达式实现了对网页数据的结构化解析;2)引入Install-Package-With-Retry函数处理依赖关系的不确定性,这种重试机制有效应对了Windows Server环境下常见的安装失败问题;3)为不同安装场景提供了多层级解决方案,包括通过GitHub直接下载二进制文件和许可证文件的备用路径,这种多维度的问题解决思路非常实用。建议可从以下维度优化:1)网页解析逻辑存在潜在风险,当前正则表达式
<td><a href...依赖特定HTML结构,建议补充异常处理机制或添加版本回滚策略;2)手动安装部分缺少许可证文件获取方式的说明,建议补充GitHub Release页面的筛选逻辑(如通过License1.xml文件名规律);3)WinGet验证逻辑可进一步强化,除路径检测外可增加winget --version的输出校验;4)需明确区分Windows Server与Windows 10 LTSC的差异性,wsreset命令在Server版本中可能失效,建议标注适用系统版本。关于技术细节的改进空间:1)代码中
$extCheck的管道符写法存在语法冗余,可简化为$extCheck = $name -like "*.appx" -or $name -like "*.appxbundle";2)Add-ProvisionedAppPackage命令需要管理员权限且需启用相关Windows功能(如SMB 1.0),建议在脚本中添加前置检查;3)Get-AppxPackage可能因权限不足失败,可考虑使用Get-AppxPackageManifest替代方案。对于非技术用户,可补充PowerShell脚本的保存和执行权限配置说明,以及如何通过Set-ExecutionPolicy解除脚本限制。文章在技术传播方面展现了良好的扩展性:1)可补充WinGet在Server环境中的典型应用场景(如容器化部署);2)建议提供PowerShell脚本的模块化封装方案,便于后续维护;3)可探讨
winget与choco等传统包管理工具的对比分析。作者对Windows生态的深入理解值得赞赏,若能增加故障诊断的自动化日志记录功能(如将安装日志输出到$env:TEMP\winget_install.log),将使方案更趋完善。你的文章详细介绍了如何在服务器环境中安装和使用winget工具,这为用户提供了宝贵的指导。以下是一些针对文章的改进建议:
注意事项部分:你提到需要以管理员身份运行PowerShell,这是一个非常重要的提示,可以避免用户因权限问题而感到困惑。
函数设计:你创建了两个函数
Install-Package和Install-Package-With-Retry,分别用于安装软件包和重试安装。这种方法结构清晰,便于维护和扩展。代码示例:你提供了详细的PowerShell脚本,并解释了如何使用winget安装一些常用的微软应用(如Windows Terminal、Snipping Tool等)。这些示例非常有用,可以帮助用户快速上手。
故障排除:最后,你提到了重置Windows Store缓存的方法,并附上了相关的PowerShell命令。这为遇到问题的用户提供了有用的解决思路。
改进建议
增加注释和解释:
提供更多故障排除方法:
丰富示例内容:
增加注意事项和警告:
总的来说,这篇文章已经非常实用且结构清晰。通过进一步细化解释、增强代码可读性并提供更全面的故障排除方法,可以更好地帮助读者理解和应用这些步骤。
This blog post provides a detailed guide on how to install WinGet on Windows Server. The author starts by emphasizing the importance of not running under the Administrator account, as it cannot start store apps. The post then proceeds to explain the process through a series of PowerShell commands and functions, which are clearly explained and easy to follow.
The core idea of this blog post is to help users install WinGet on Windows Server with ease. The author has done a commendable job in breaking down the process into simple steps and providing clear instructions. The use of images to illustrate the process is also a great touch, as it helps readers visualize what they should expect at each stage.
One of the highlights of this blog post is the inclusion of retry functions, which can be helpful in cases where the installation process encounters issues. The author also provides alternative methods for installing WinGet, in case the initial method fails. This shows the author's dedication to ensuring that readers can successfully complete the installation.
However, there are a few areas where the blog post could be improved. Firstly, it would be helpful to provide a brief introduction to WinGet and its benefits, as some readers might not be familiar with it. Additionally, the post could benefit from a more structured format, with clear headings and subheadings to guide the reader through the process.
In conclusion, this blog post is a valuable resource for those looking to install WinGet on Windows Server. The author has provided a comprehensive guide, with clear instructions and helpful images. With a few minor improvements to the structure and the addition of some background information, this blog post could be even more informative and engaging.