Target. Display code coverage information on your own .NET Core project.
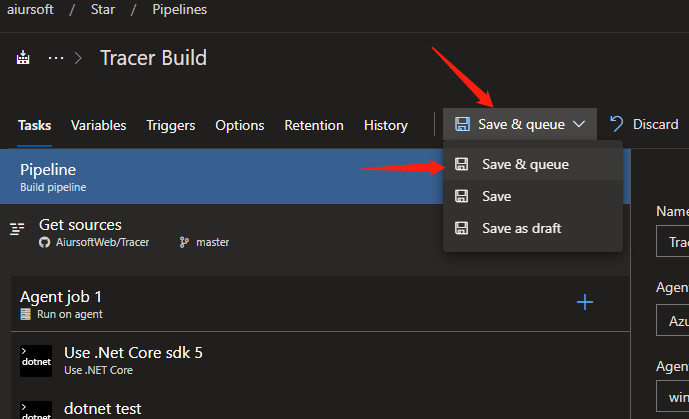
First, create a build pipeline in your Azure DevOps.

If you are using the classic designer, you need to add new .NET Core command line step.
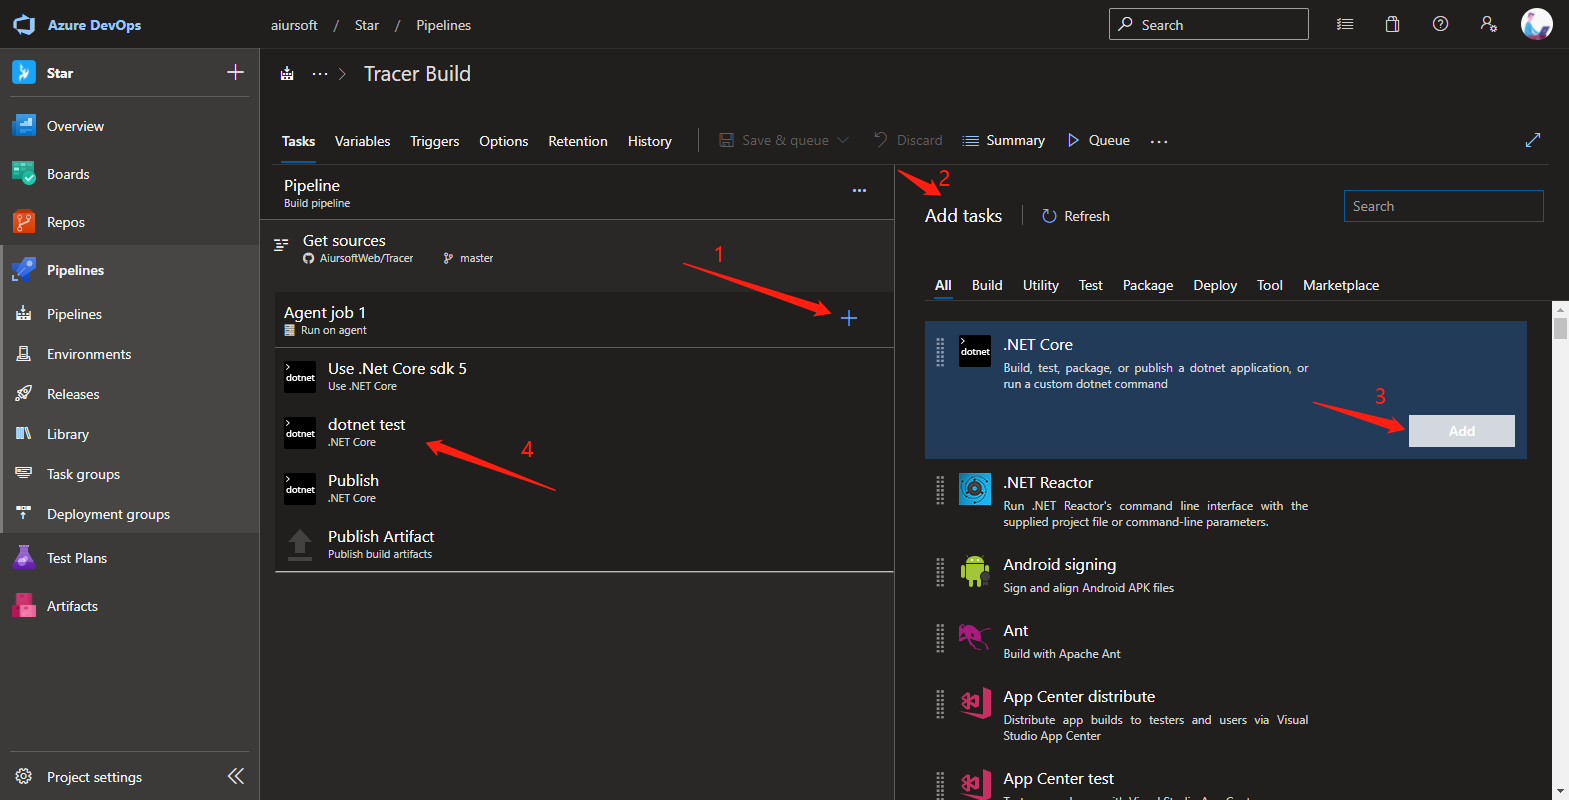
Make sure you publish the test result.
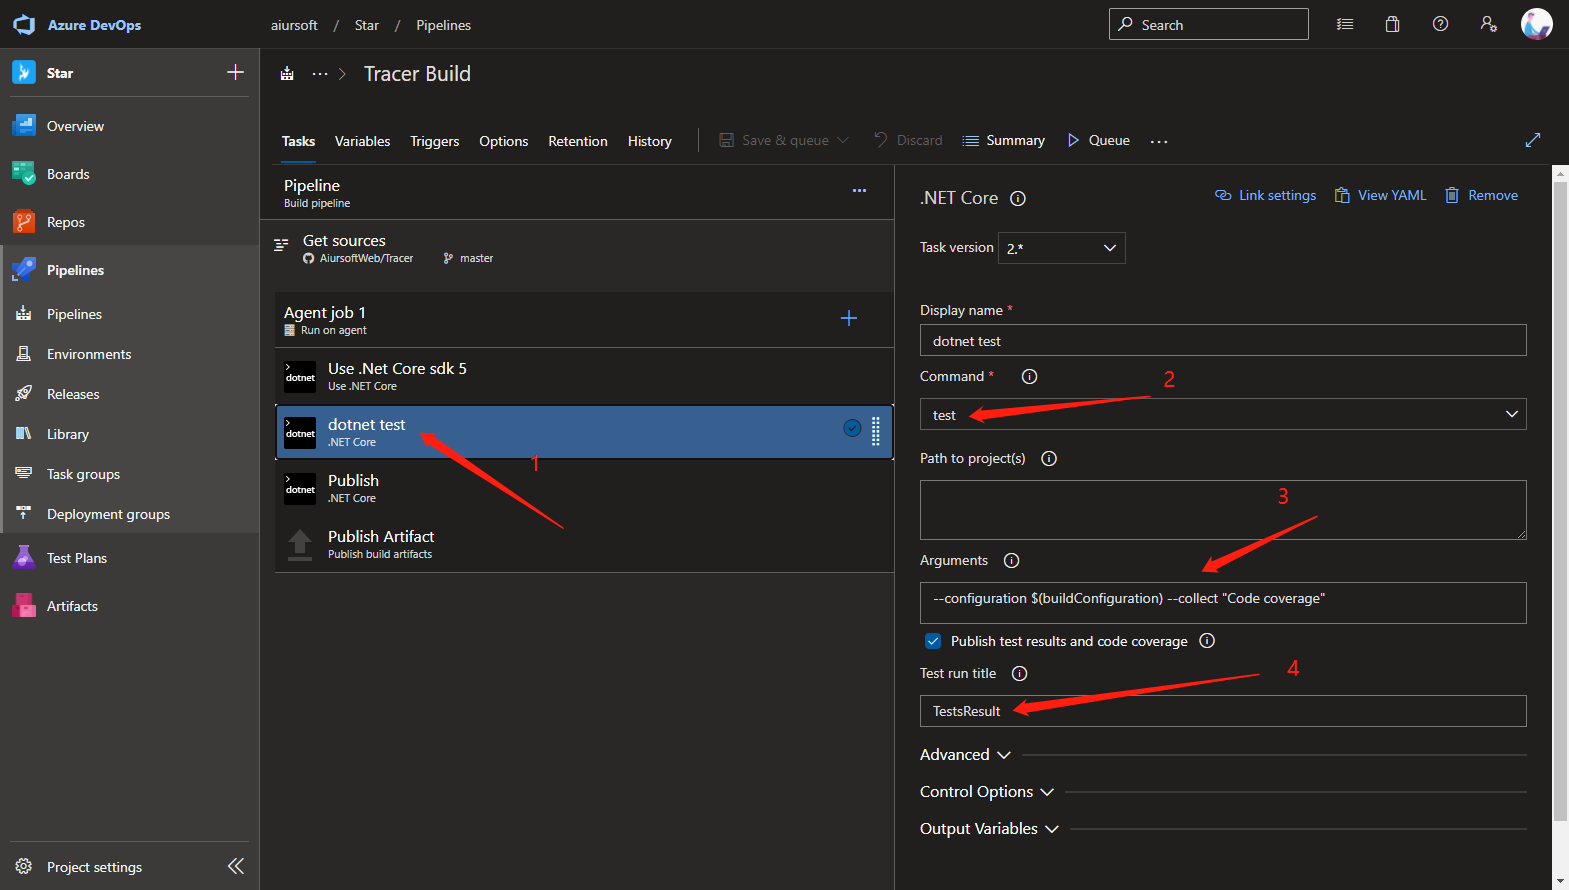
As for the Arguments input, insert:
--configuration $(buildConfiguration) --collect "Code coverage"
Or if you are using YAML:
Add the task: DotNetCoreCLI@2
- task: DotNetCoreCLI@2
    displayName: dotnet test
    inputs:
      command: test
      arguments: --configuration $(buildConfiguration) --collect "Code coverage"
      testRunTitle: TestsResult
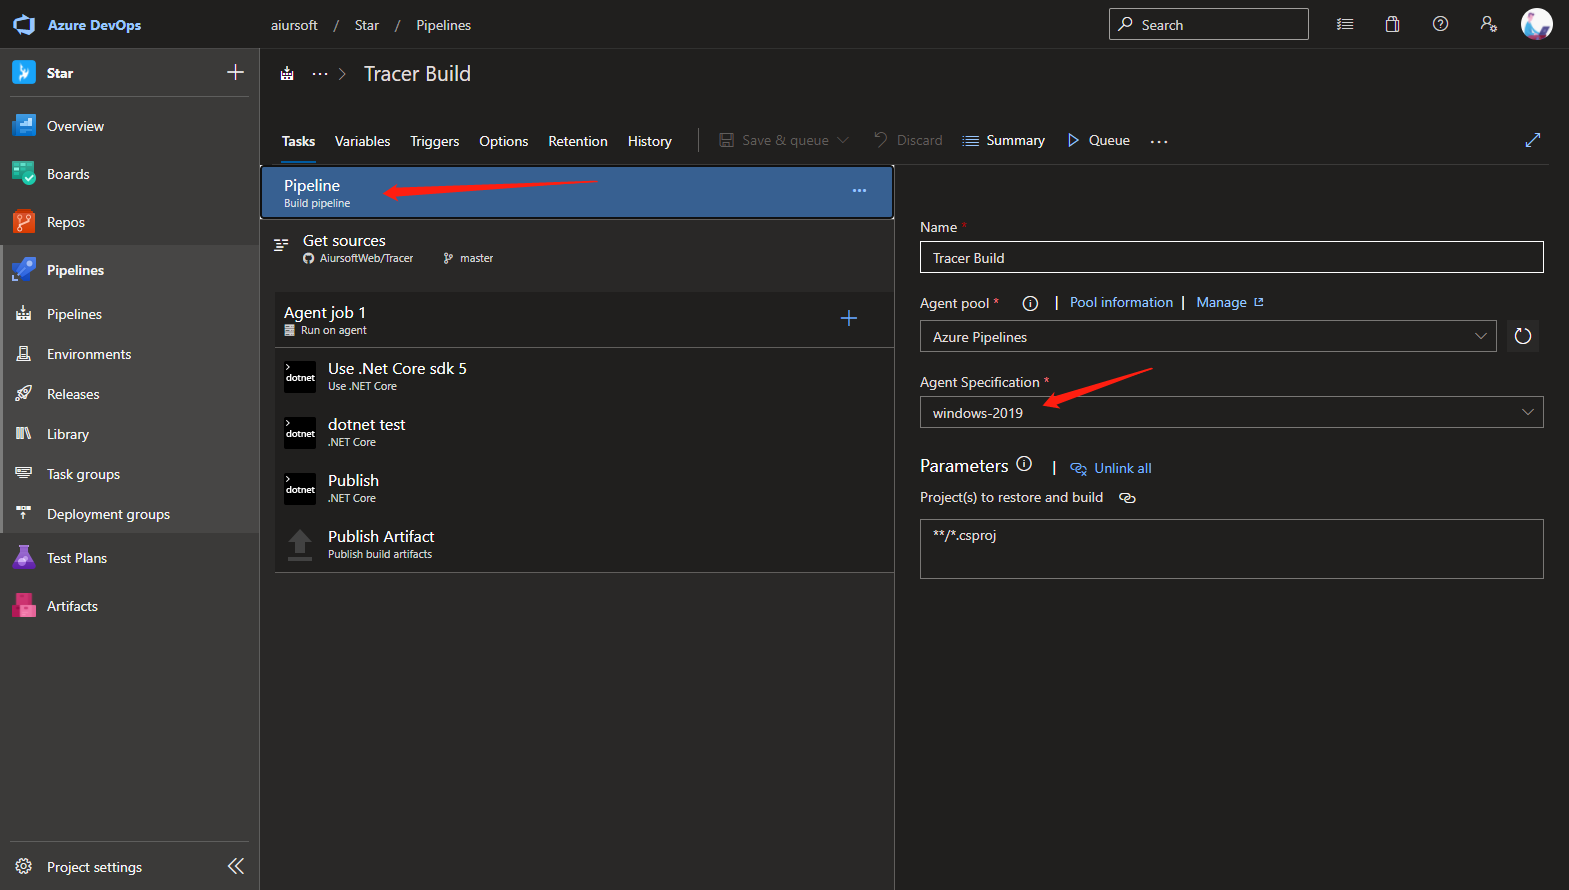
And always use Windows platform to run the build. Do NOT run in Linux because the code coverage generator still doesn't support Linux.
Now save and run the pipeline.
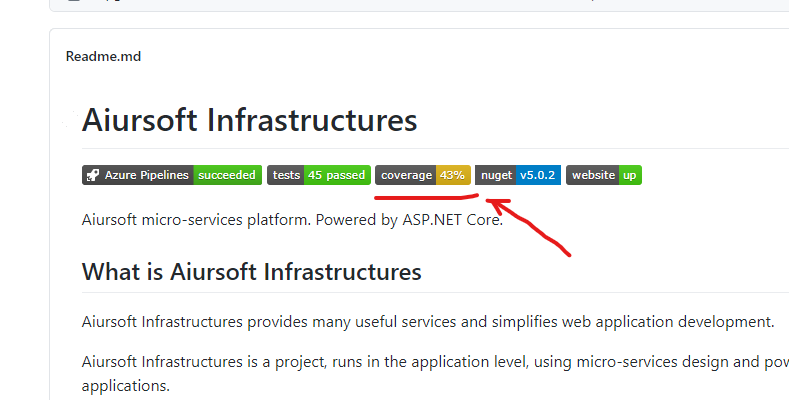
When the build finish, you will see the code coverage and test result here.
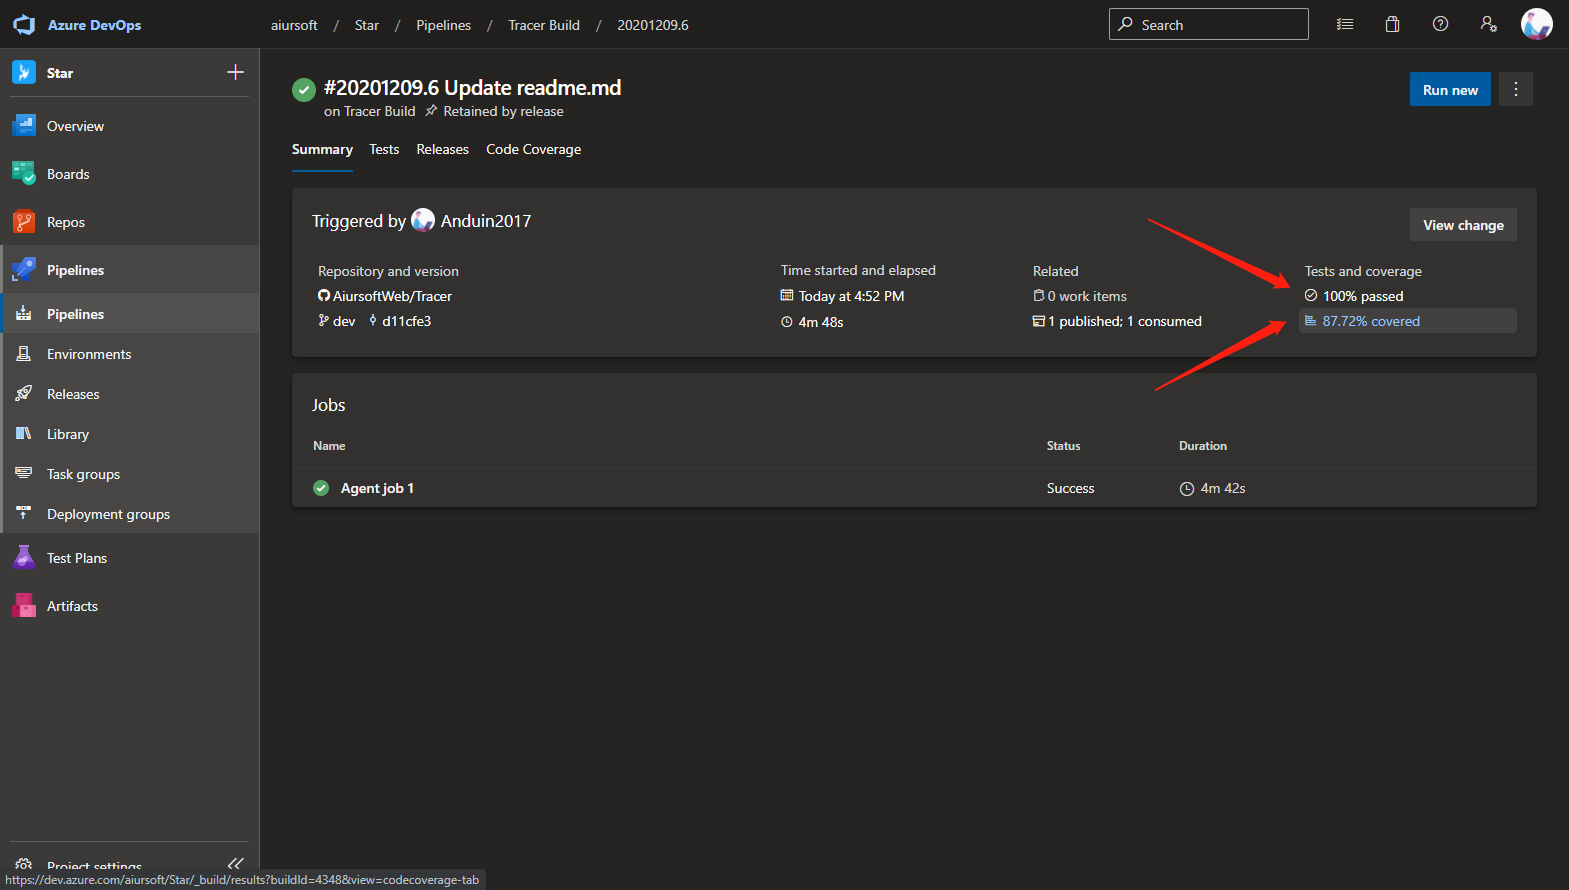
In my example, my code coverage is 87%.
To get the badge URL, first, copy the following parts in your URL.
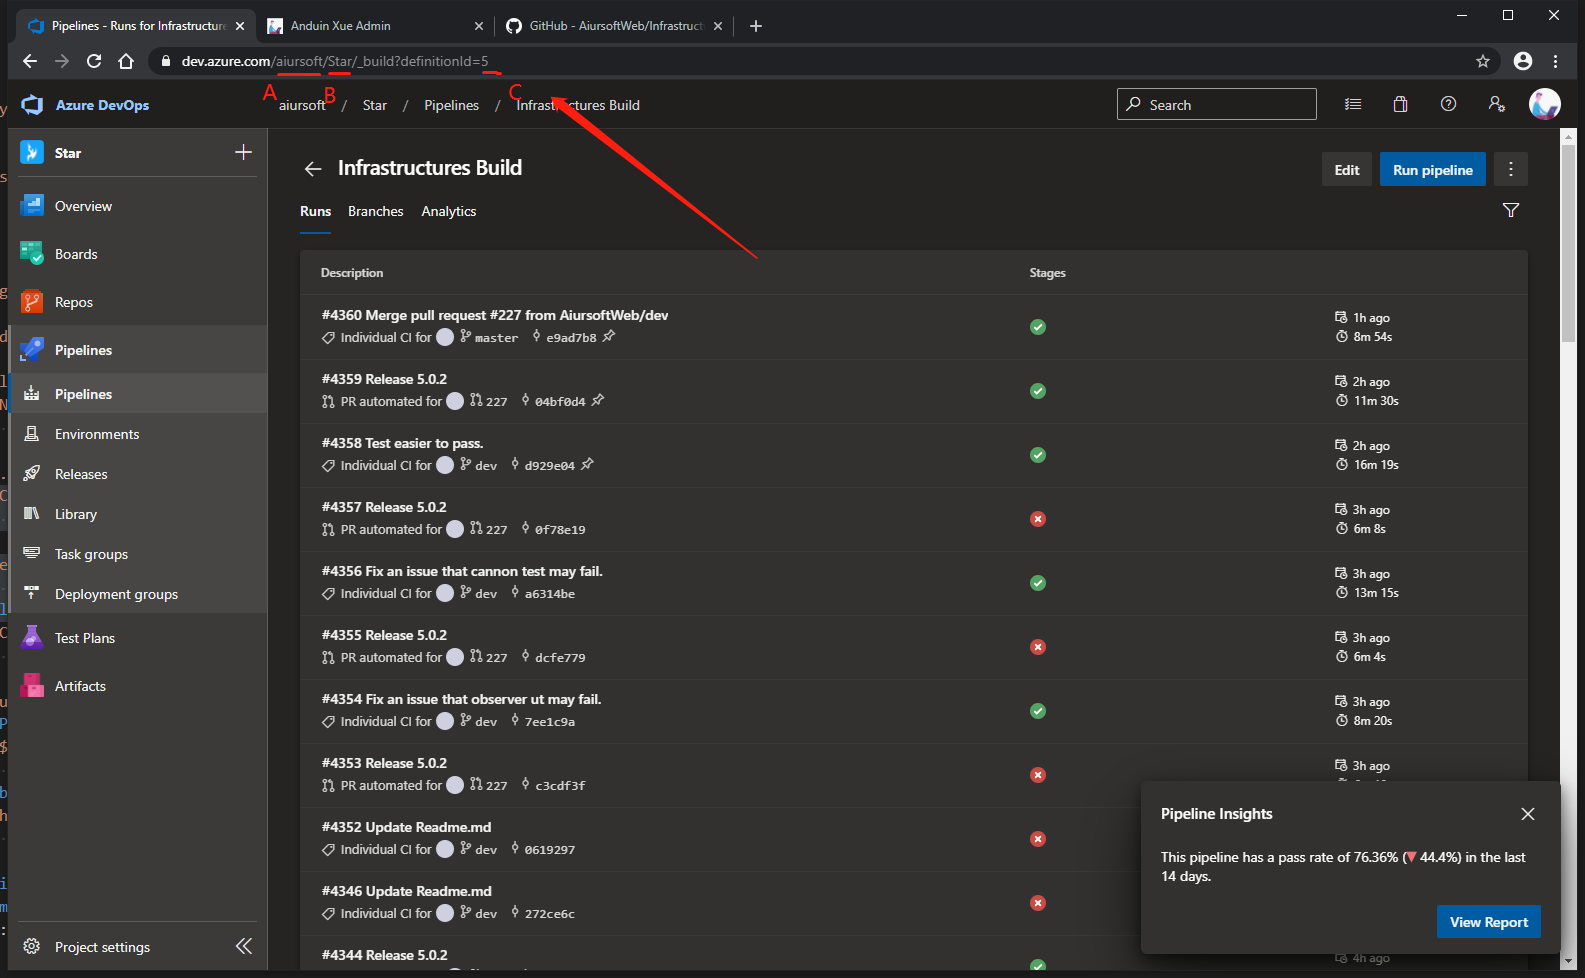
Copy the three parts of the URL. Like in my example:
- A is aiursoft
- B is star
- C is 5
Now copy the following markdown text:

Change the A, B and C to the value you copied. Like:

Now save that in your readme.md.
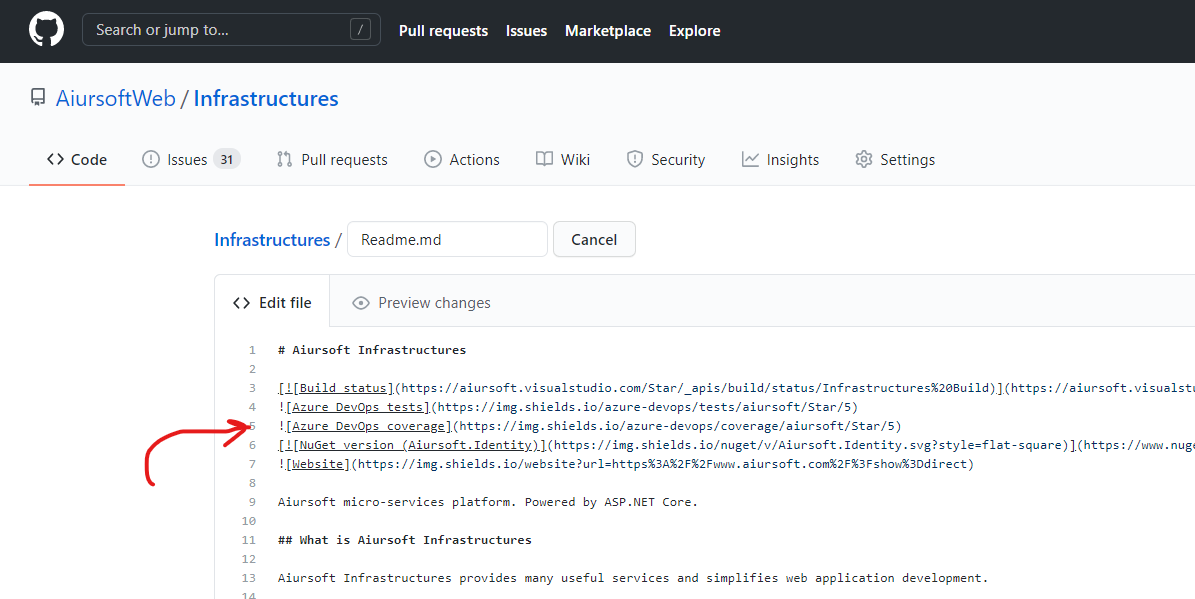
All done. Enjoy coding!

这篇文章为开发者在Azure DevOps中集成.NET Core项目代码覆盖率提供了清晰的操作指南,具有很强的实用价值。作者通过分步骤说明和配套的截图链接,有效降低了读者理解和实施的门槛。文章最大的闪光点在于其"可操作性"——从构建管道配置到覆盖率徽章生成的完整流程都给出了具体参数示例,特别是对经典设计器和YAML两种配置方式的差异化说明,这种兼顾不同用户需求的写法值得赞赏。
在技术实现层面,文章准确指出了Windows平台与Linux平台的关键差异,这是对Azure DevOps当前功能限制的客观呈现。但建议补充说明这种限制的底层原因(如VSTest在Linux环境的兼容性问题),并提供替代方案的可能性(如使用JaCoCo等跨平台工具),以帮助开发者做出更全面的技术决策。
文章可改进的方面包括:1)部分技术细节需要更深层的解释,例如"testRunTitle"参数在覆盖率数据聚合中的作用机制;2)关于代码覆盖率指标的解读缺乏指导(如87%覆盖率的行业基准参考值);3)未提及测试用例的优先级与覆盖率的关系,可能误导读者简单追求数字;4)部分截图链接可能因时间推移失效,建议改用GitHub等更稳定的图床服务。
建议作者在后续文章中延伸讨论:如何结合SonarQube进行代码质量分析,如何设置覆盖率阈值触发构建失败,以及如何通过条件语句实现不同环境的覆盖率策略差异。同时,可补充说明代码覆盖率与测试有效性的辩证关系,避免读者陷入"盲目追求100%覆盖率"的误区。整体而言,这篇文章为CI/CD流程优化提供了实用起点,期待看到更多关于自动化测试优化的深度内容。
这篇文章提供了一个清晰而详细的指南,说明如何在Azure DevOps中设置和显示.NET Core项目的代码覆盖率。作者通过逐步的步骤和插图,使读者能够轻松跟随并实施所描述的过程。
优点:
核心理念:
作者的核心理念是通过自动化构建和持续集成工具(Azure DevOps)来提高开发流程中的代码质量。代码覆盖率是一个重要的指标,它帮助开发者了解测试覆盖的程度,并激励编写更全面的测试用例。
改进建议:
增加上下文解释:
错误处理和故障排除:
深入分析代码覆盖率报告:
平台兼容性讨论:
扩展内容:
总结:
这篇文章是一个很好的起点,帮助开发者快速上手设置代码覆盖率。通过增加背景信息、故障排除指南和深入分析内容,可以使文章更具实用性和教育意义,从而更好地帮助读者不仅完成配置,还能有效地利用这些数据来提升项目质量。
The blog post provides a detailed and well-illustrated guide on how to display code coverage information for a .NET Core project using Azure DevOps. The author breaks down the process step-by-step, making it easy for readers to follow along and implement the solution in their own projects.
One of the key strengths of this blog post is the use of clear and informative screenshots. These visuals help readers understand the process better and ensure they are on the right track. Additionally, the author provides specific code snippets and examples, which are beneficial for readers who might be new to Azure DevOps or .NET Core projects.
The blog post also highlights an important limitation - that the code coverage generator does not support Linux platforms. This information is valuable for readers who might be considering using a different platform for their projects.
However, there is room for improvement in the blog post. It would be helpful to provide some background information on the importance of code coverage and why developers might want to display this information for their projects. This context would help readers understand the value of the tutorial and motivate them to follow the steps provided.
Additionally, it would be beneficial to include some information on potential issues or common pitfalls that readers might encounter while implementing this solution. This would help readers troubleshoot any problems they might face and ensure a smoother experience.
In conclusion, the blog post offers a valuable guide for displaying code coverage information in .NET Core projects using Azure DevOps. The use of clear visuals and specific examples make it easy for readers to follow along. By providing some additional context on the importance of code coverage and addressing potential issues, the blog post could be even more helpful for readers looking to implement this solution in their projects.