
This tutorial only for existing Windows users which needs to install the second Windows along-side it without USB disk or CD.
How
When you have the Windows installer, you can directly unzip the install.wim to a new partition. This process does not need to restart or enter the PE environment, so no USB storage disk nor CD is required.
After the extraction, you can directly boot the new partition, which is the new Windows. The old system will still be there.
You can format the old Windows to delete it.
Steps
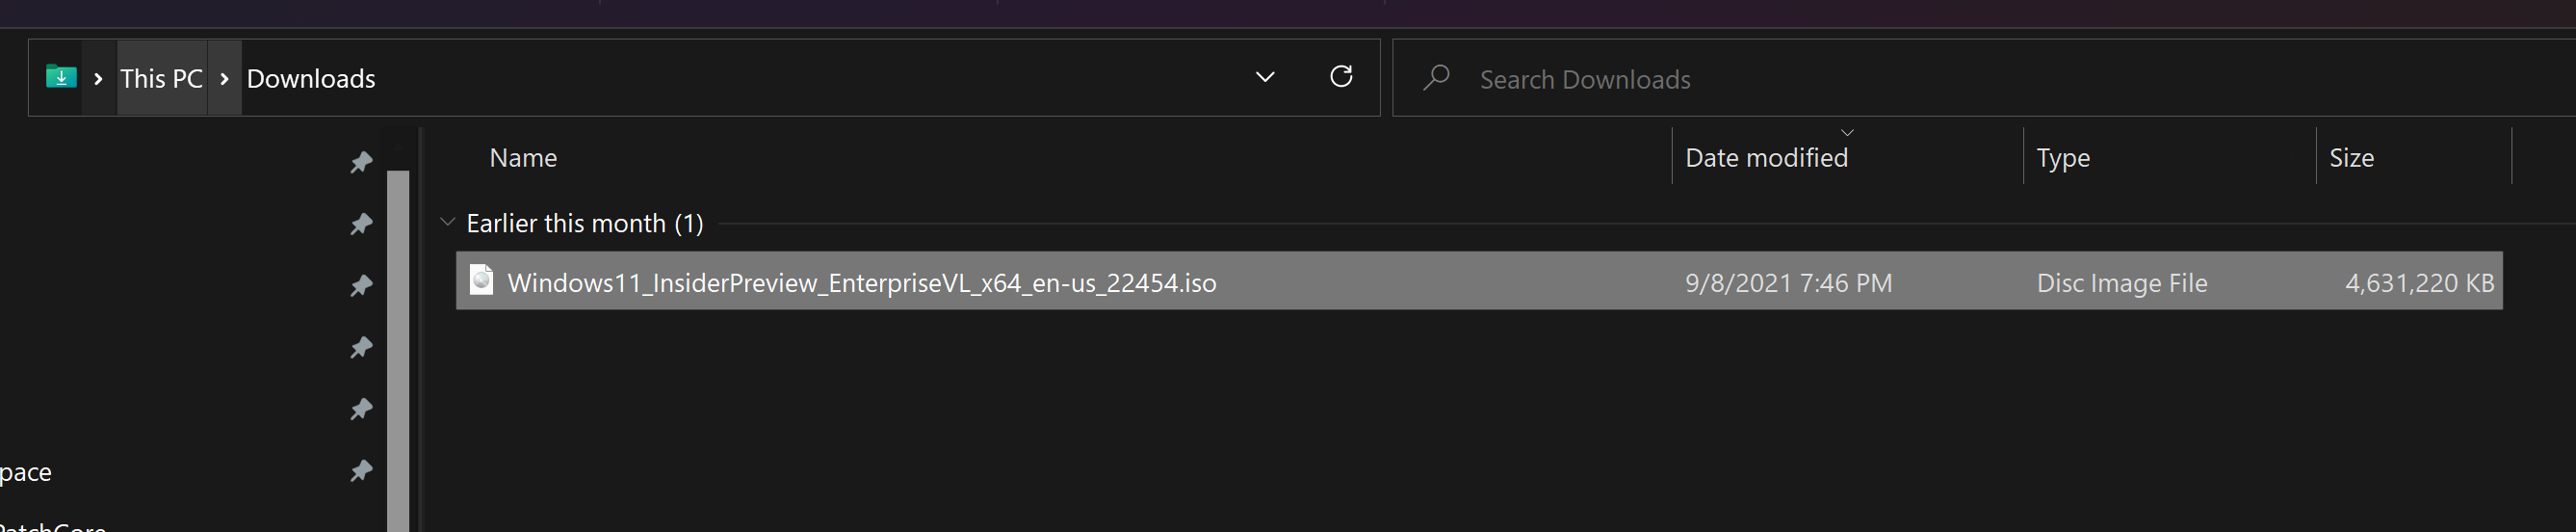
Step 1. Download the Windows installation ISO.
You can download Windows ISO from the official website:
- Windows 10: Download Windows 10 (microsoft.com)
- Windows 11: Download Windows 11 (microsoft.com)
- Windows Insider: Download Windows 10 Insider Preview ISO (microsoft.com)
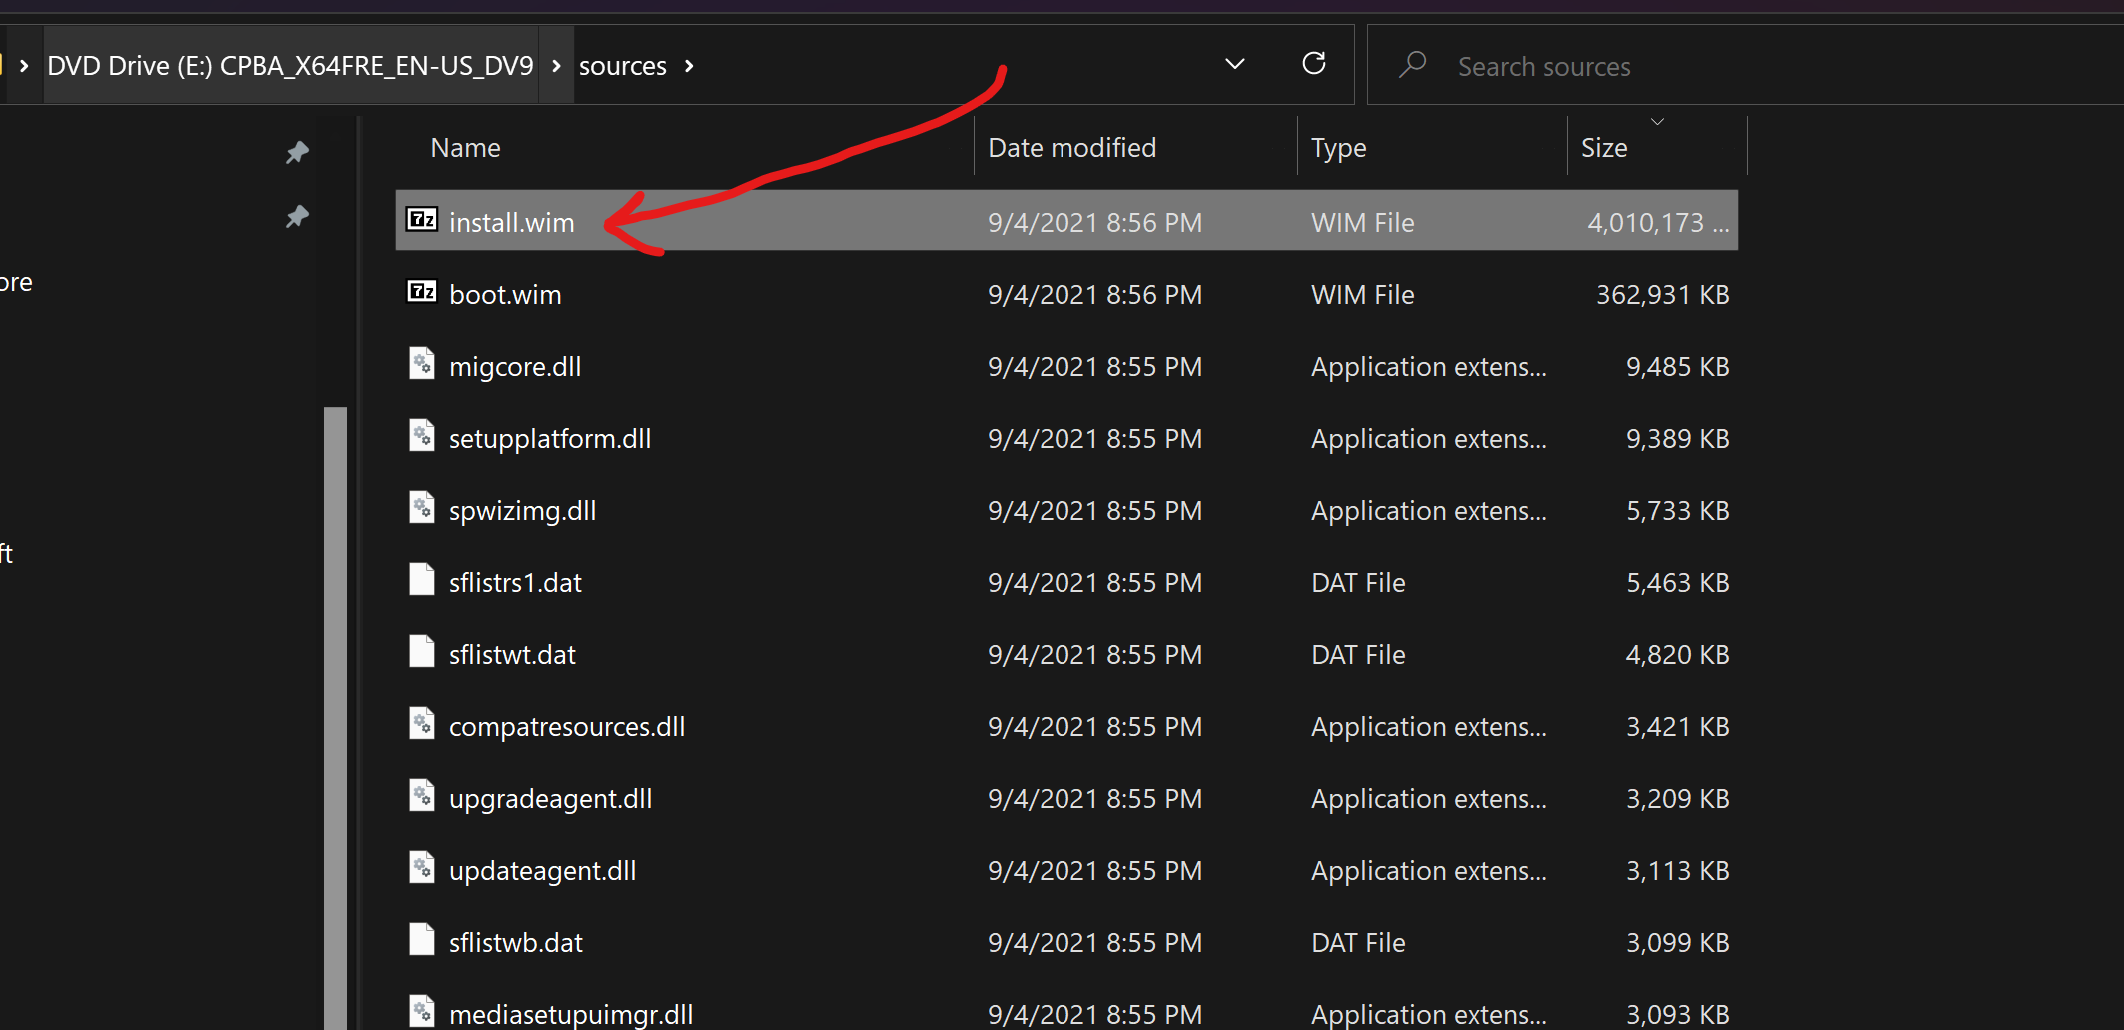
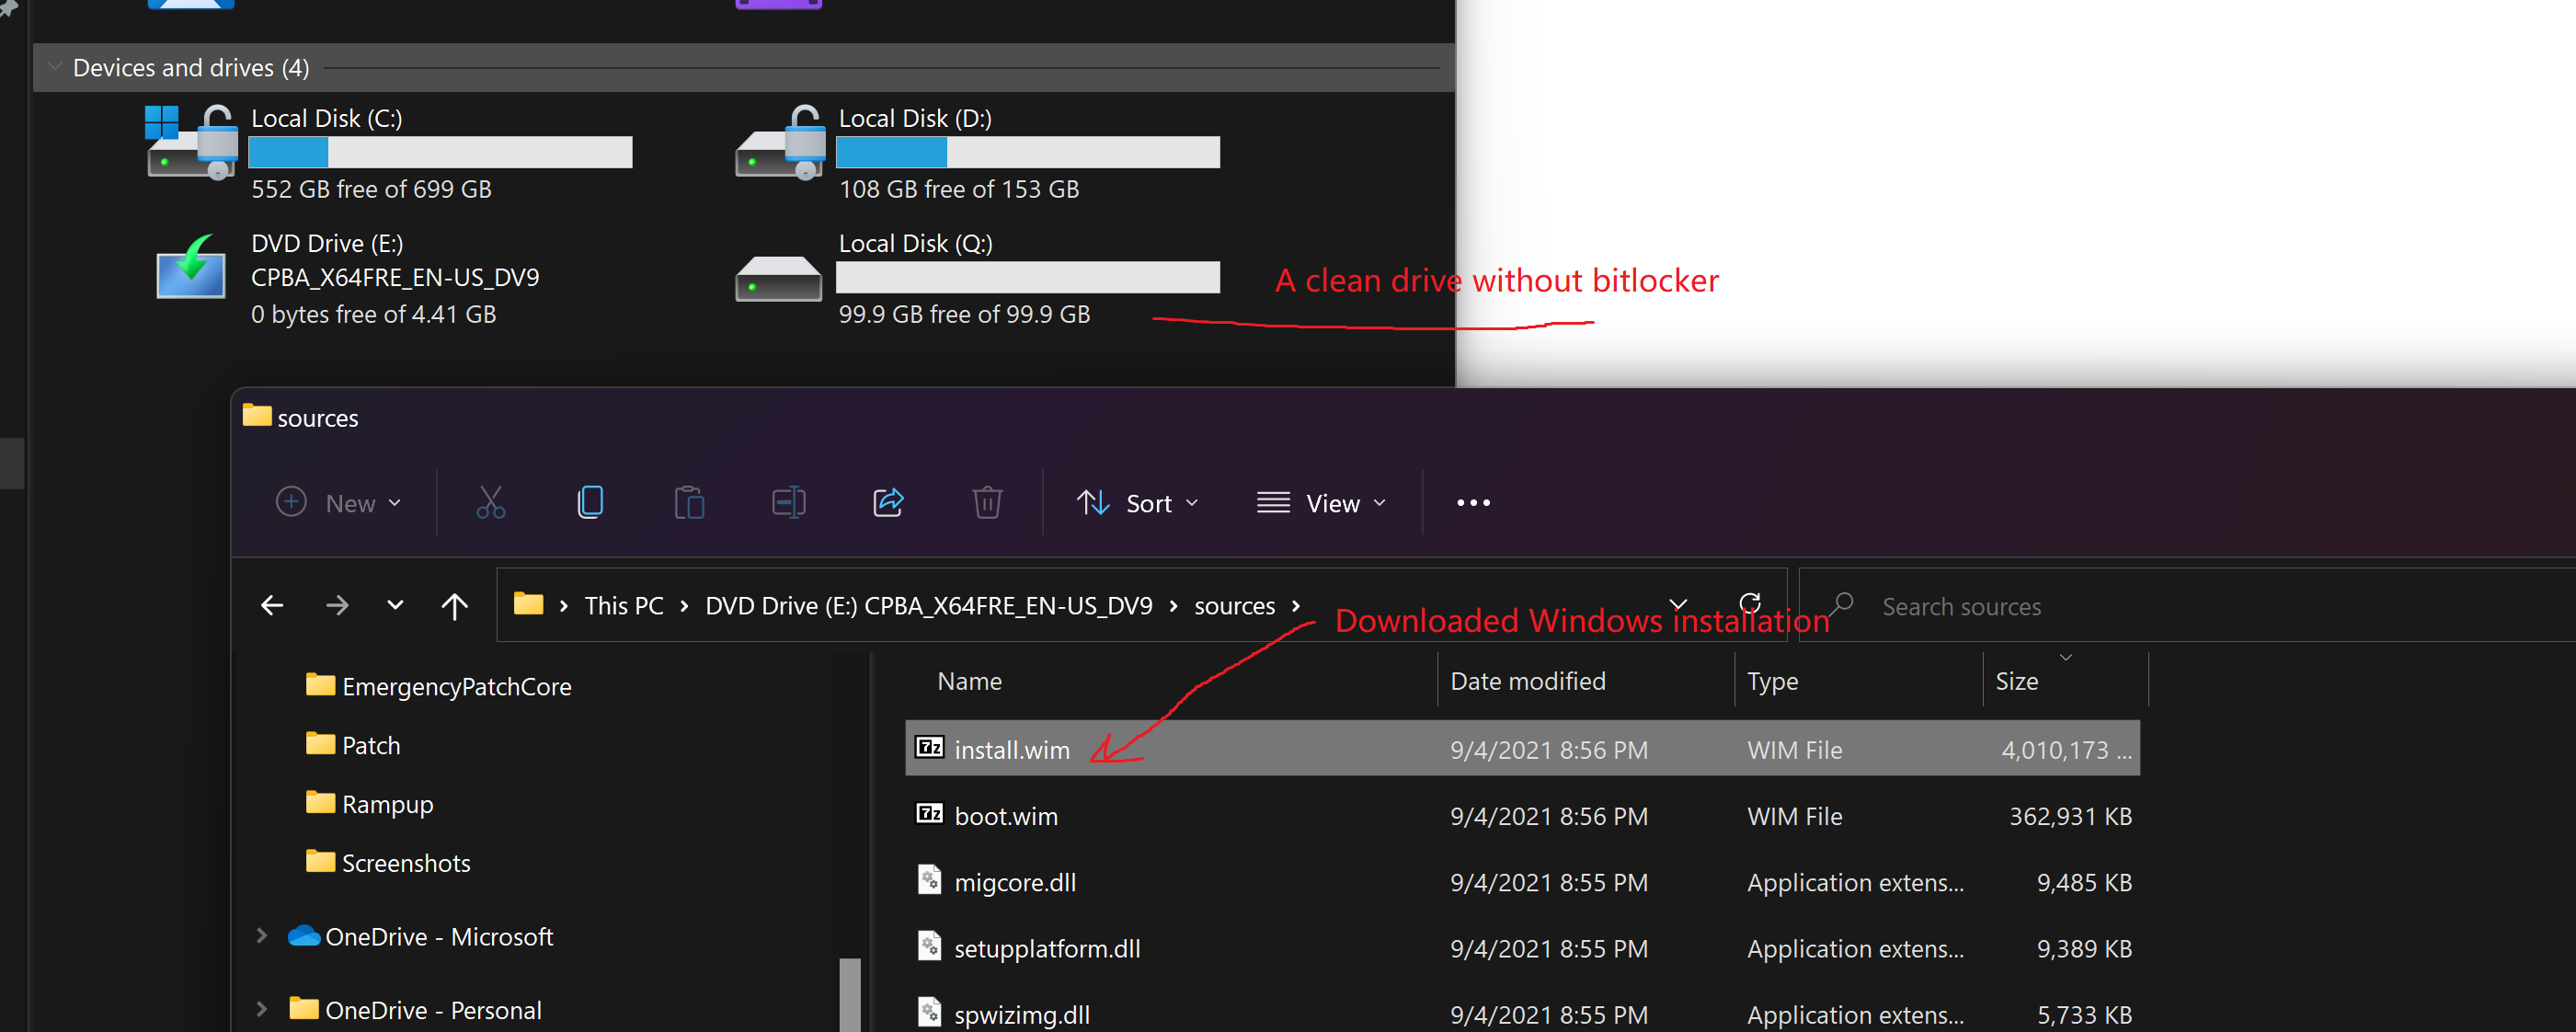
When you have the ISO file, you can locate the Install.wim(Or Instal.esd) here:
Mount the iso. And you can see the install.wim(.esd) located under the sources folder.
This file is the only file that needed.
Step 2. Get a new clean partition
You need a new clean partition for the new Windows.
Solutions:
- You can use existing partition like your D drive.
- You can shrink an existing partition to generate a new partition.
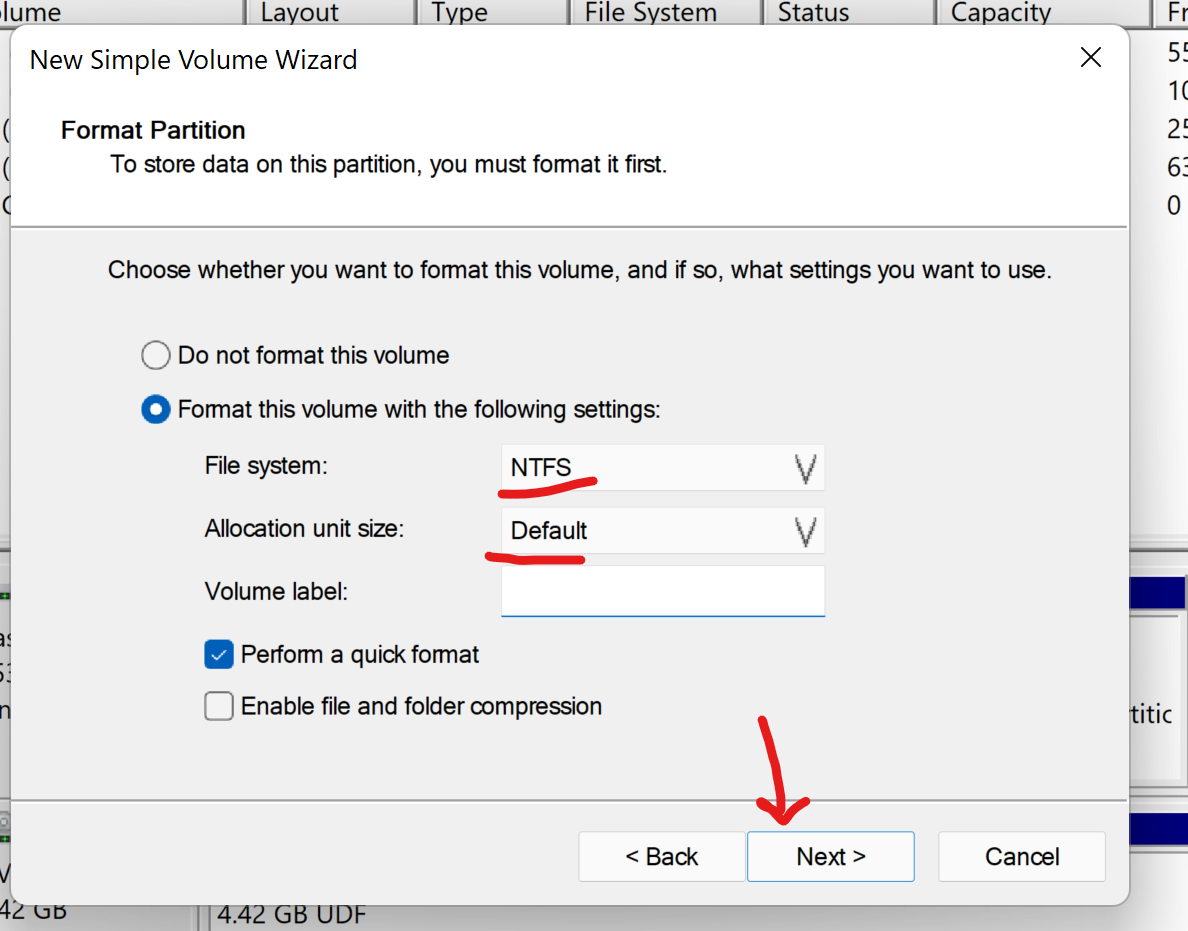
If you decide to use an existing partition like your D drive, make sure it is larger than 40GB first. And simply format it with NTFS file system.
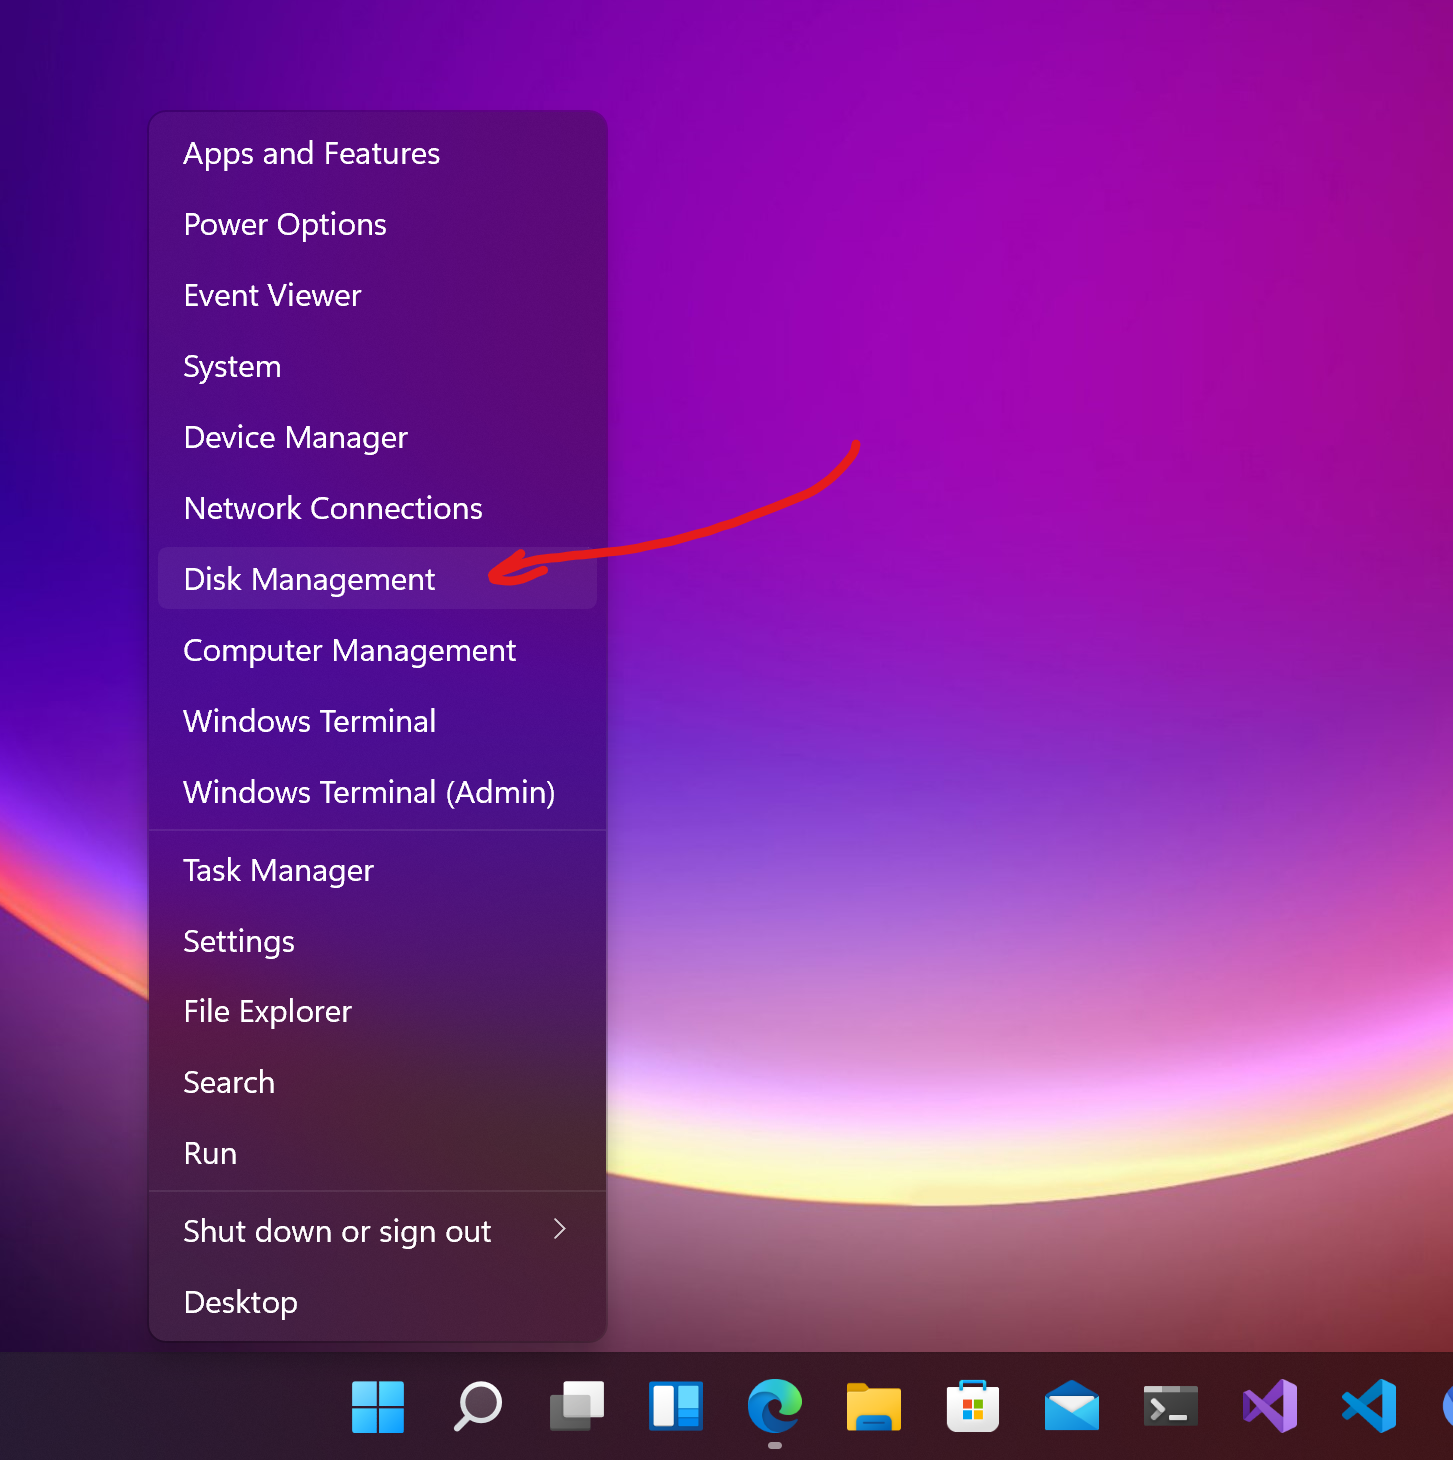
If you decide to shrink an existing partition to generate a new partition, right click the start button and click Disk management.
Click Shrink Volume.

At least shrink 40GB (100GB suggested) to get a new clean partition.
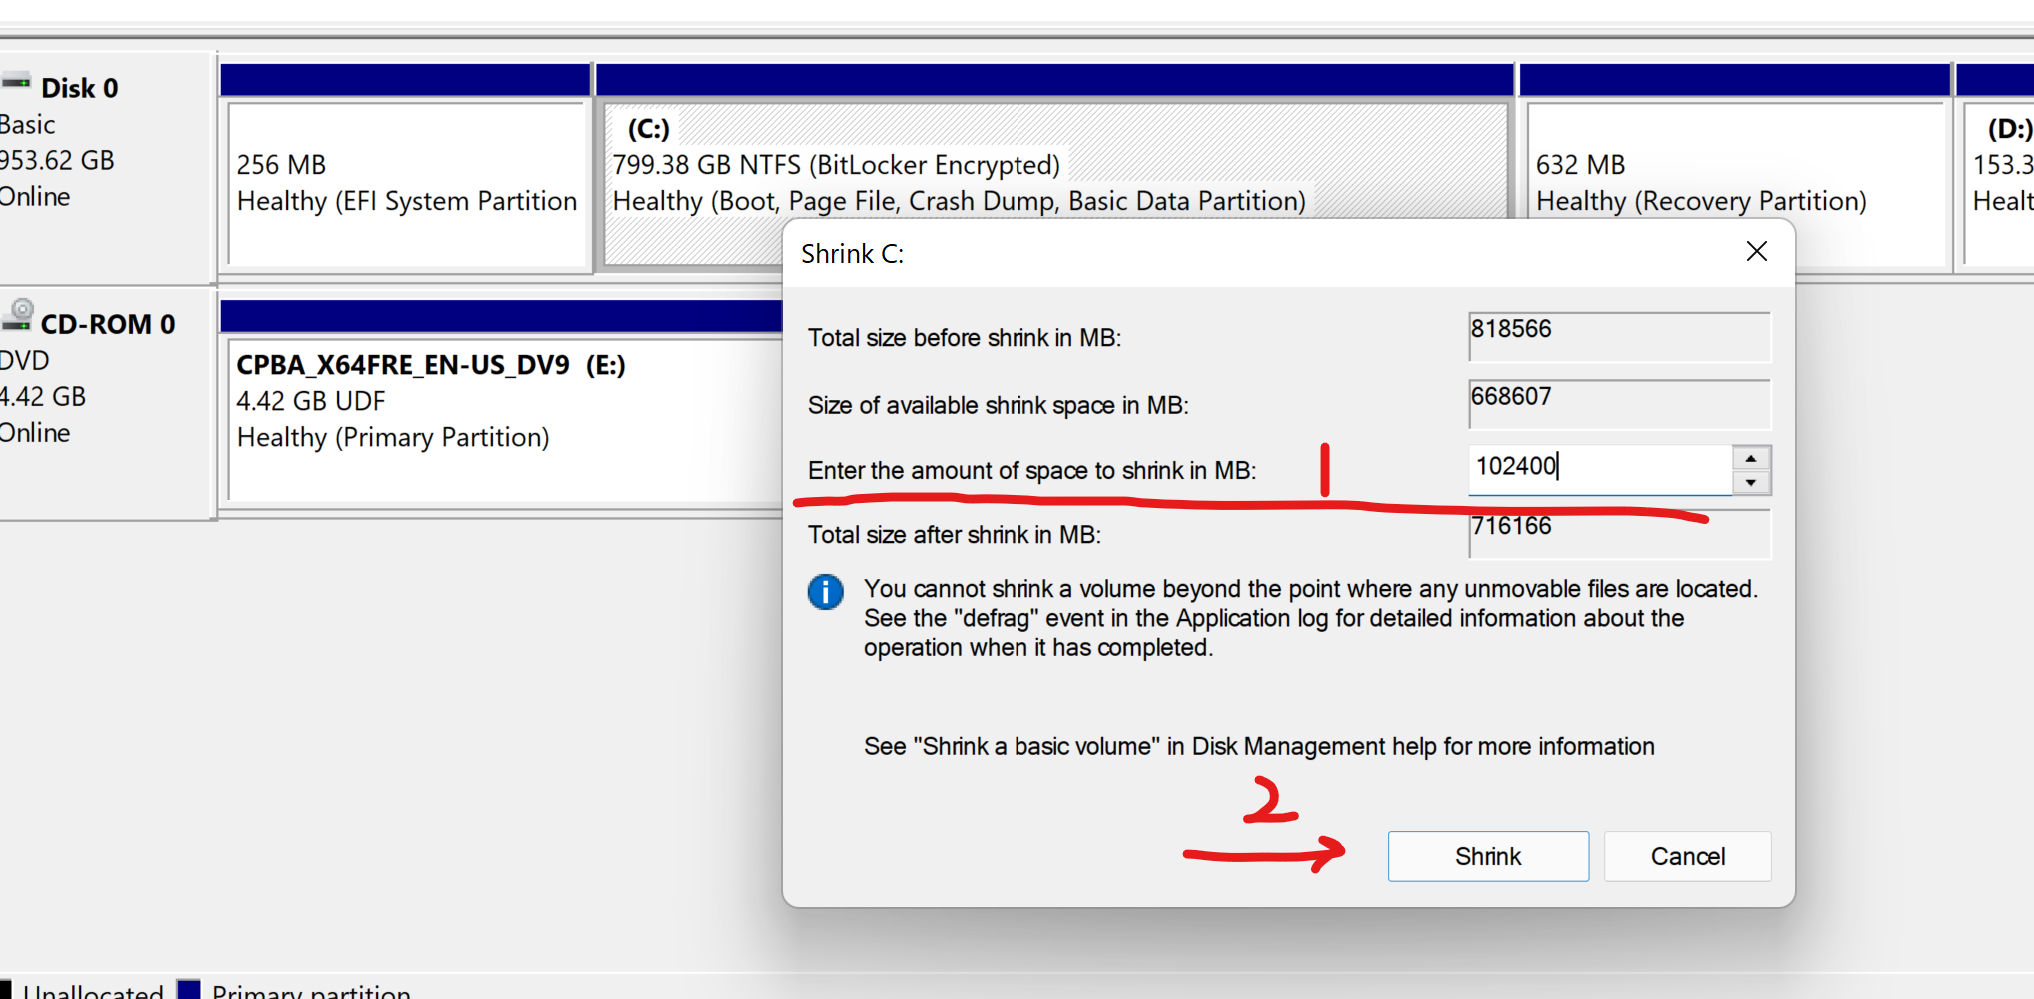
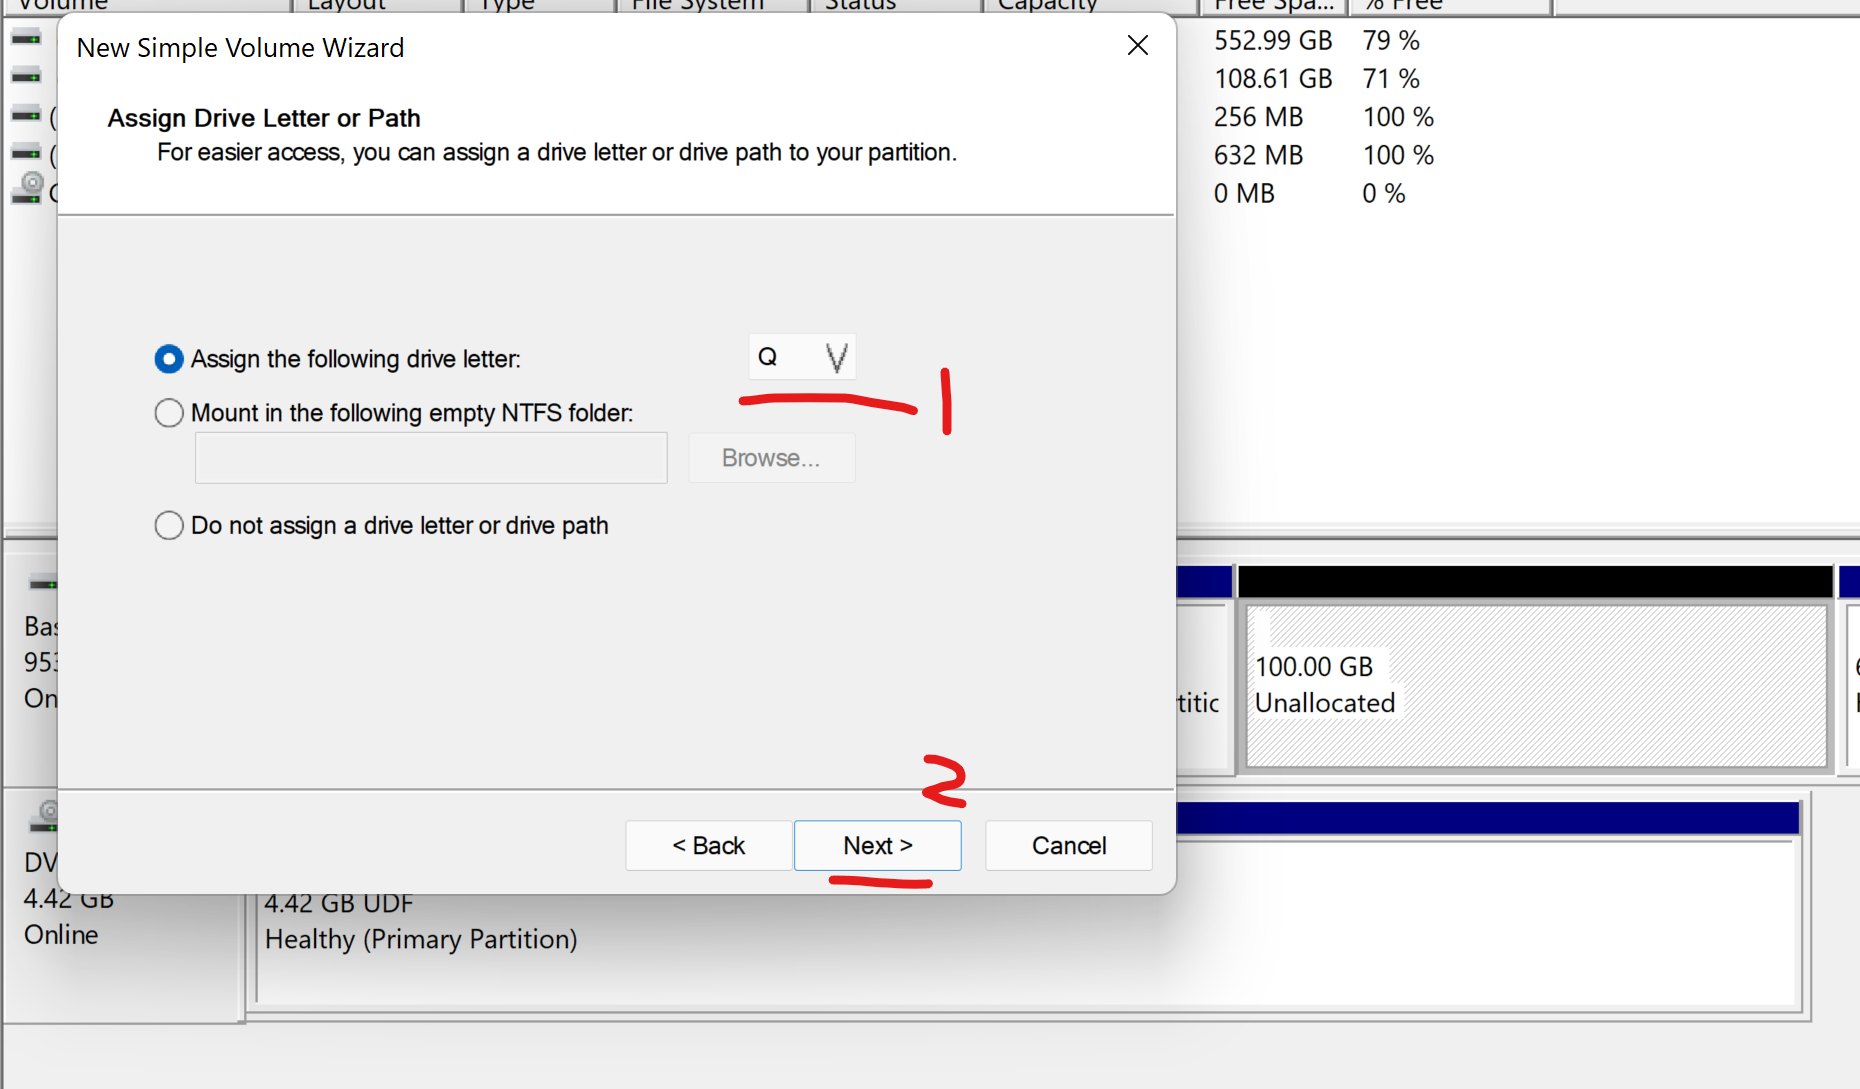
After shrinking, you can get a new drive like Q. Format it with NTFS.
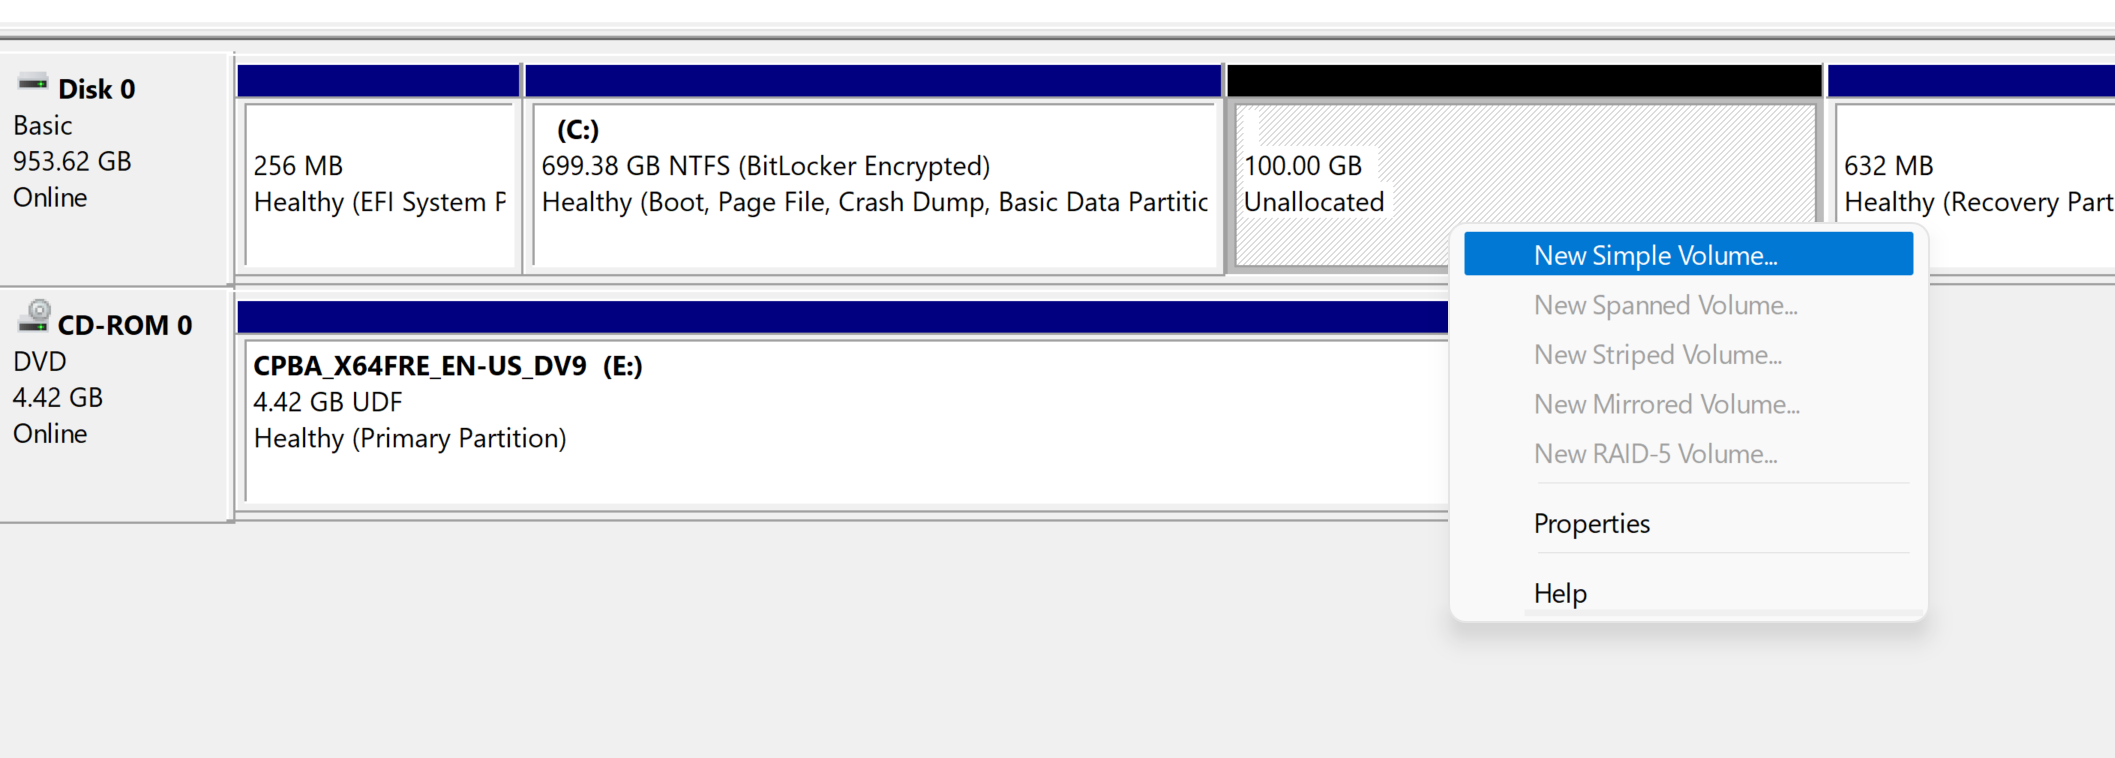
Do not let BitLocker encrypt your new partition!!
Step 3. Extract the install.wim(esd) to your new partiton
Now you have a clean drive and downloaded installation program. You can prepare extract the install.wim(esd) to your clean drive now.
Before extracting, you need to choose the correct version for the new installation.
Open the install.wim(esd) with 7zip. You will find an xml file here.
Now you need to find the image index with the Windows edition which you want to install.
Open a new terminal (cmd.exe) with Administrator privilege. Go the the install.wim(esd) folder.
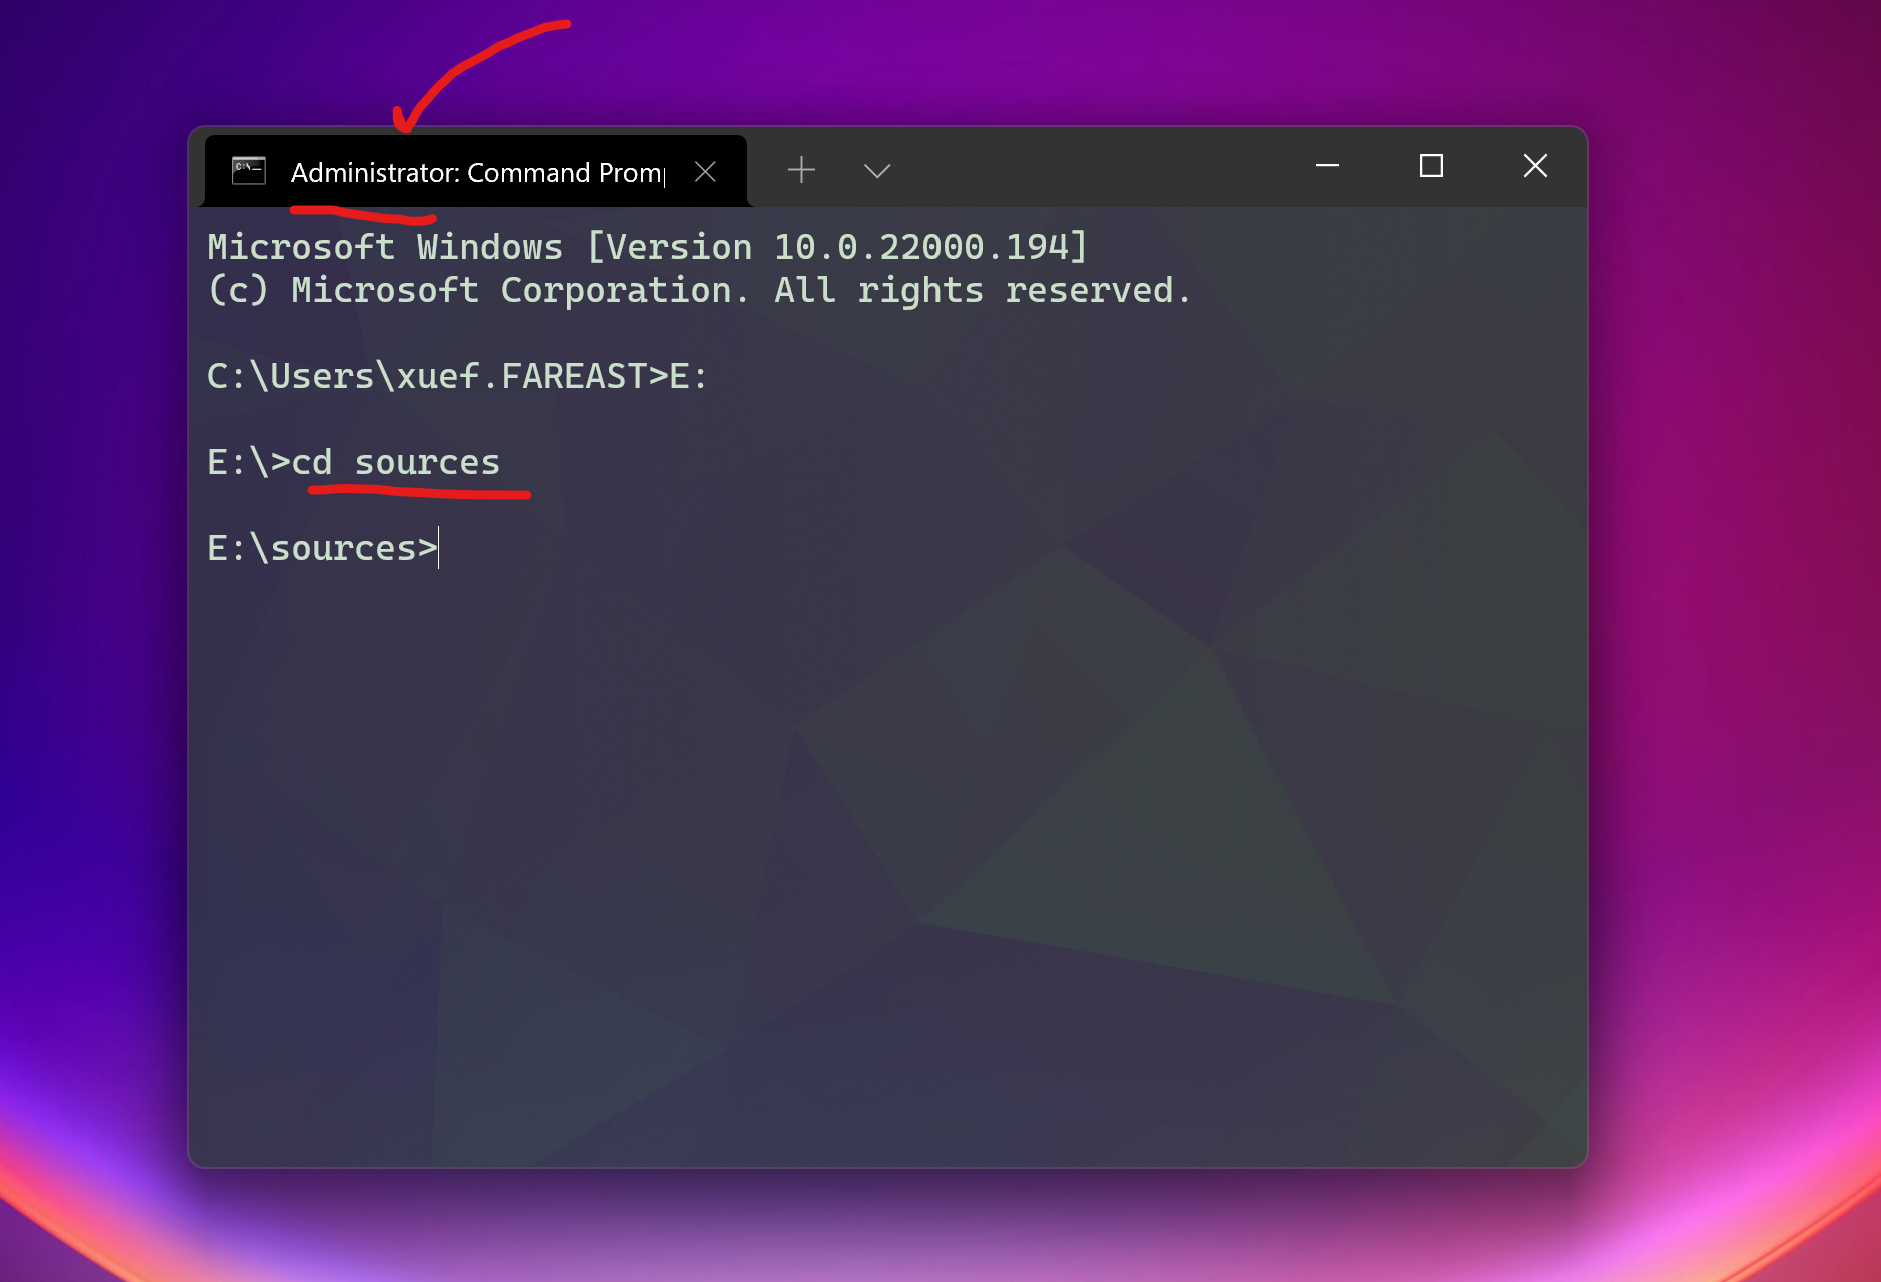
Run command here to get the image list:
dism /Get-ImageInfo /imagefile:install.wim
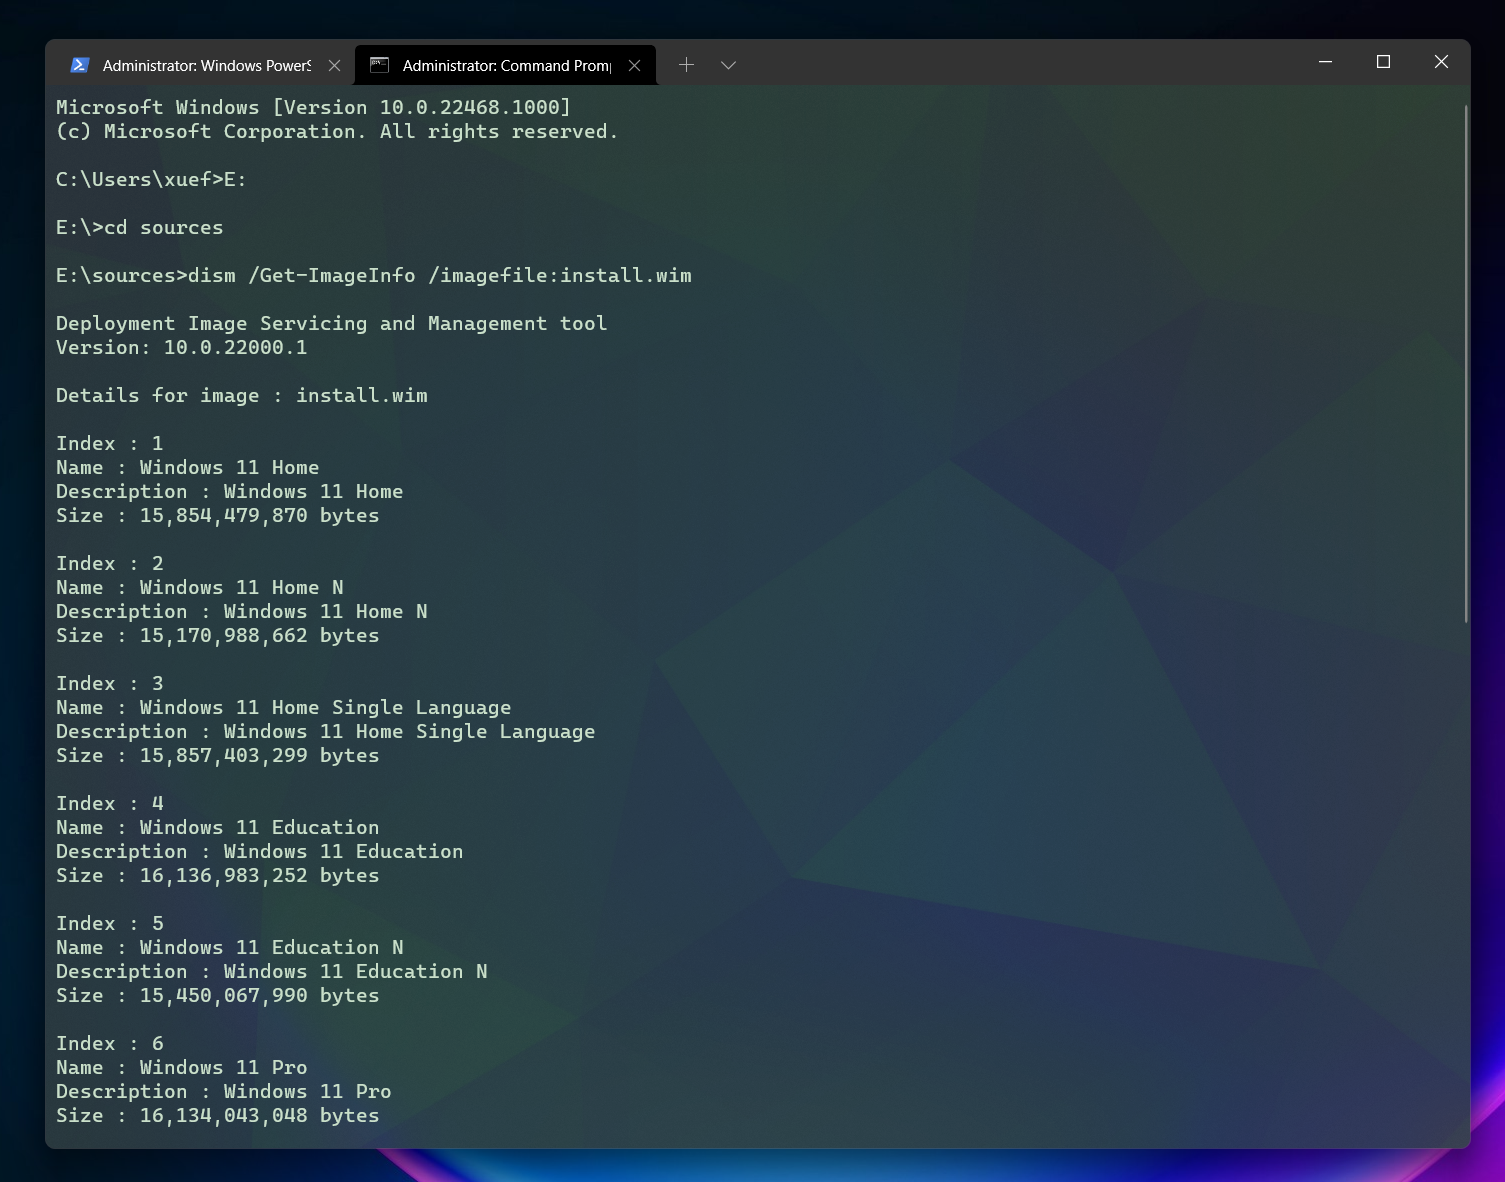
For example, I want to install Windows 11 Pro, and it's image index is 6. Remember the index of the OS image you want to install (6).
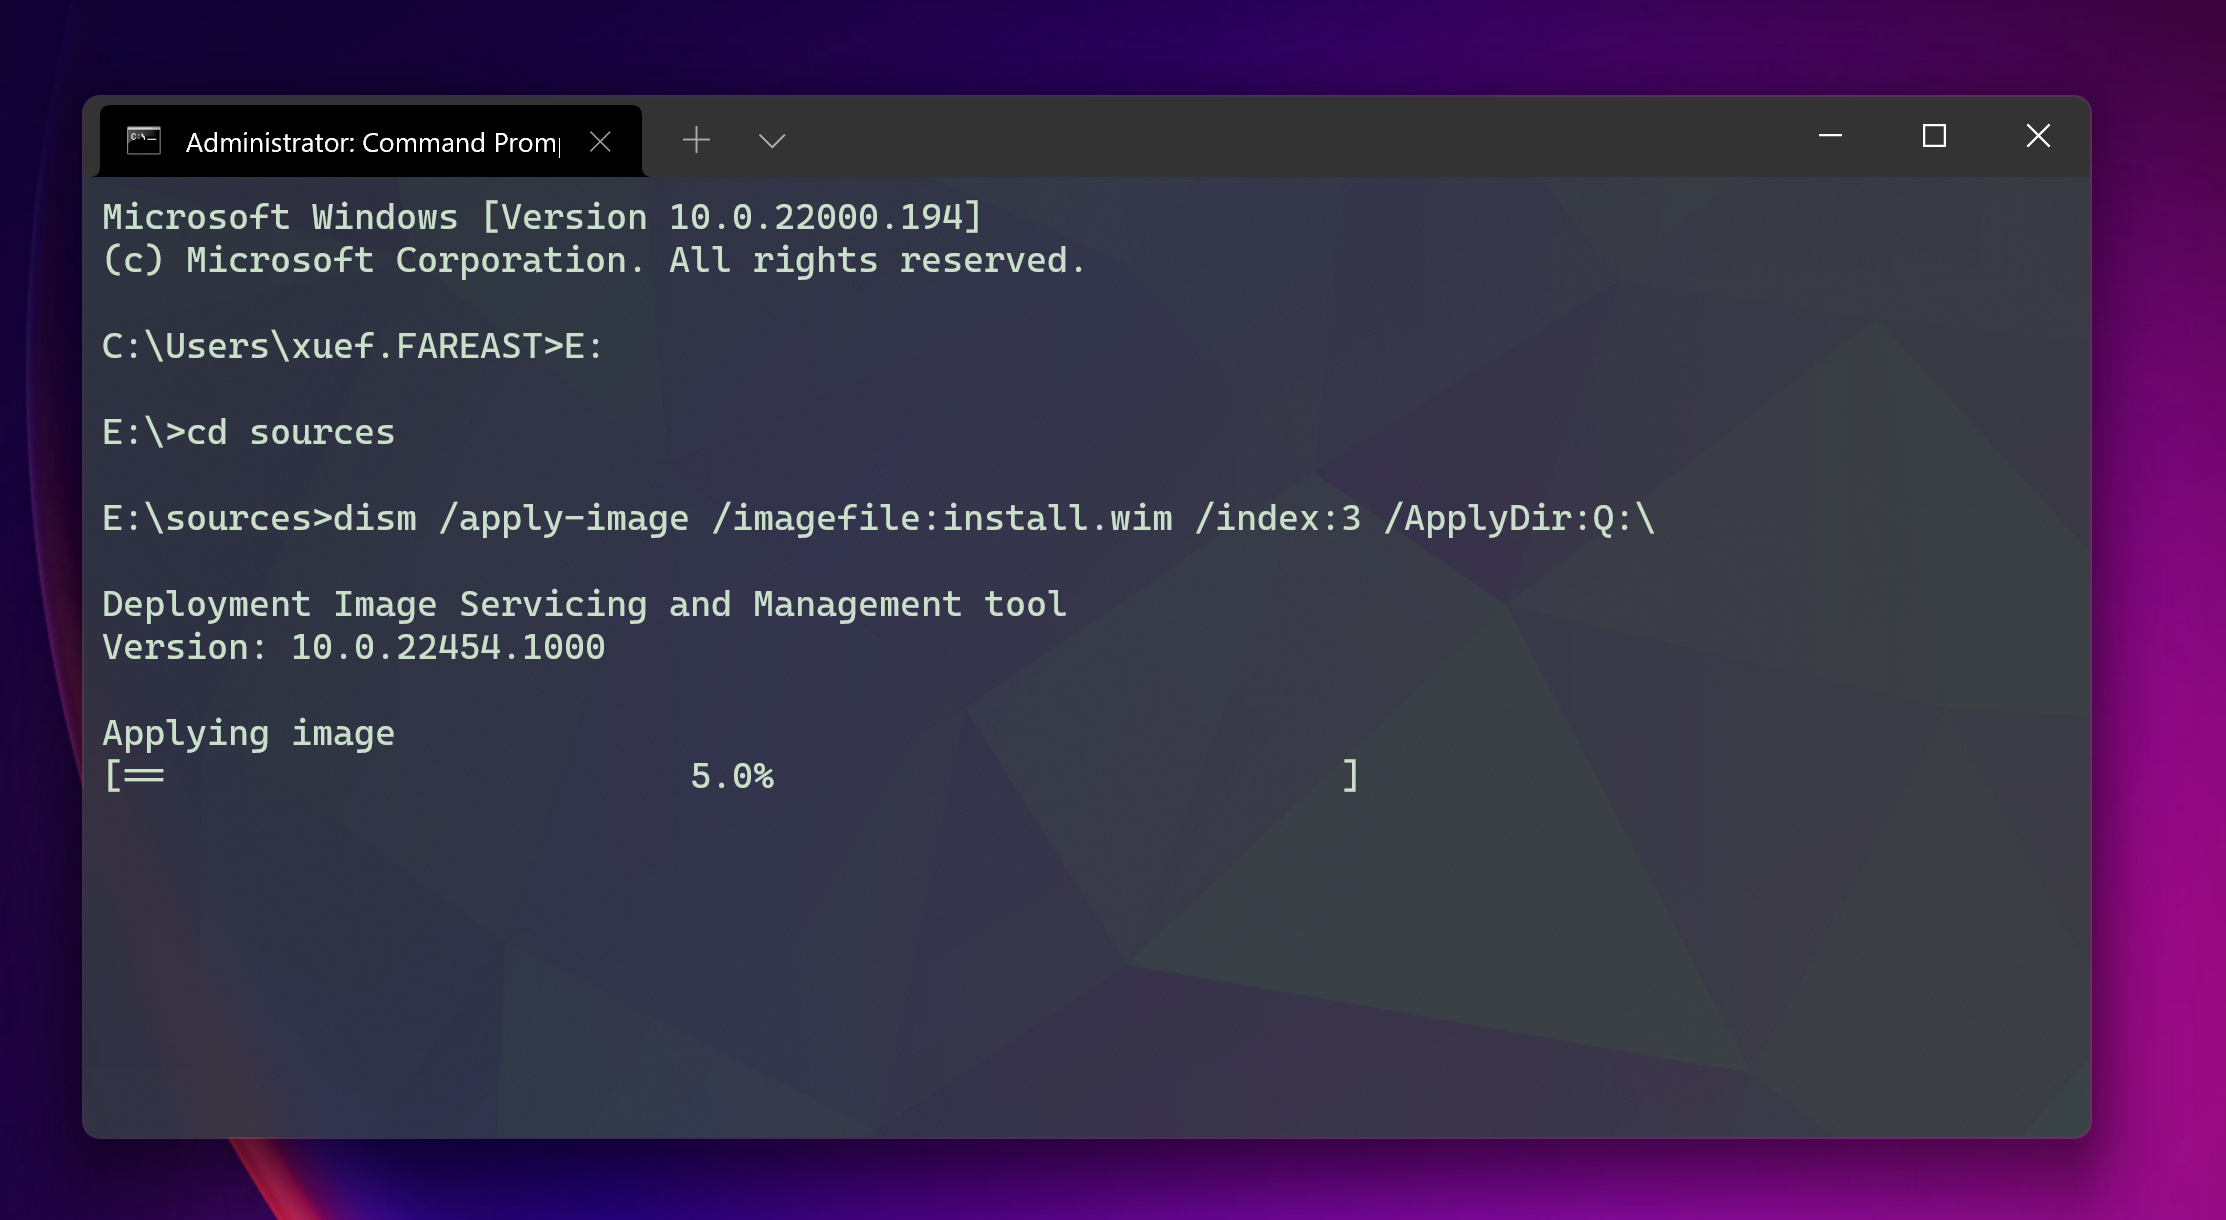
Run this command to extract the files:
dism /apply-image /imagefile:install.wim /index:6 /ApplyDir:Q:\
Change the index:6 to your image index.
Change the Q:\ to your new clean NTFS drive without BitLocker.
You can try this command instead if any error happened:
C:\Windows\System32\Dism.exe /apply-image /imagefile:install.wim /index:6 /ApplyDir:Q:\
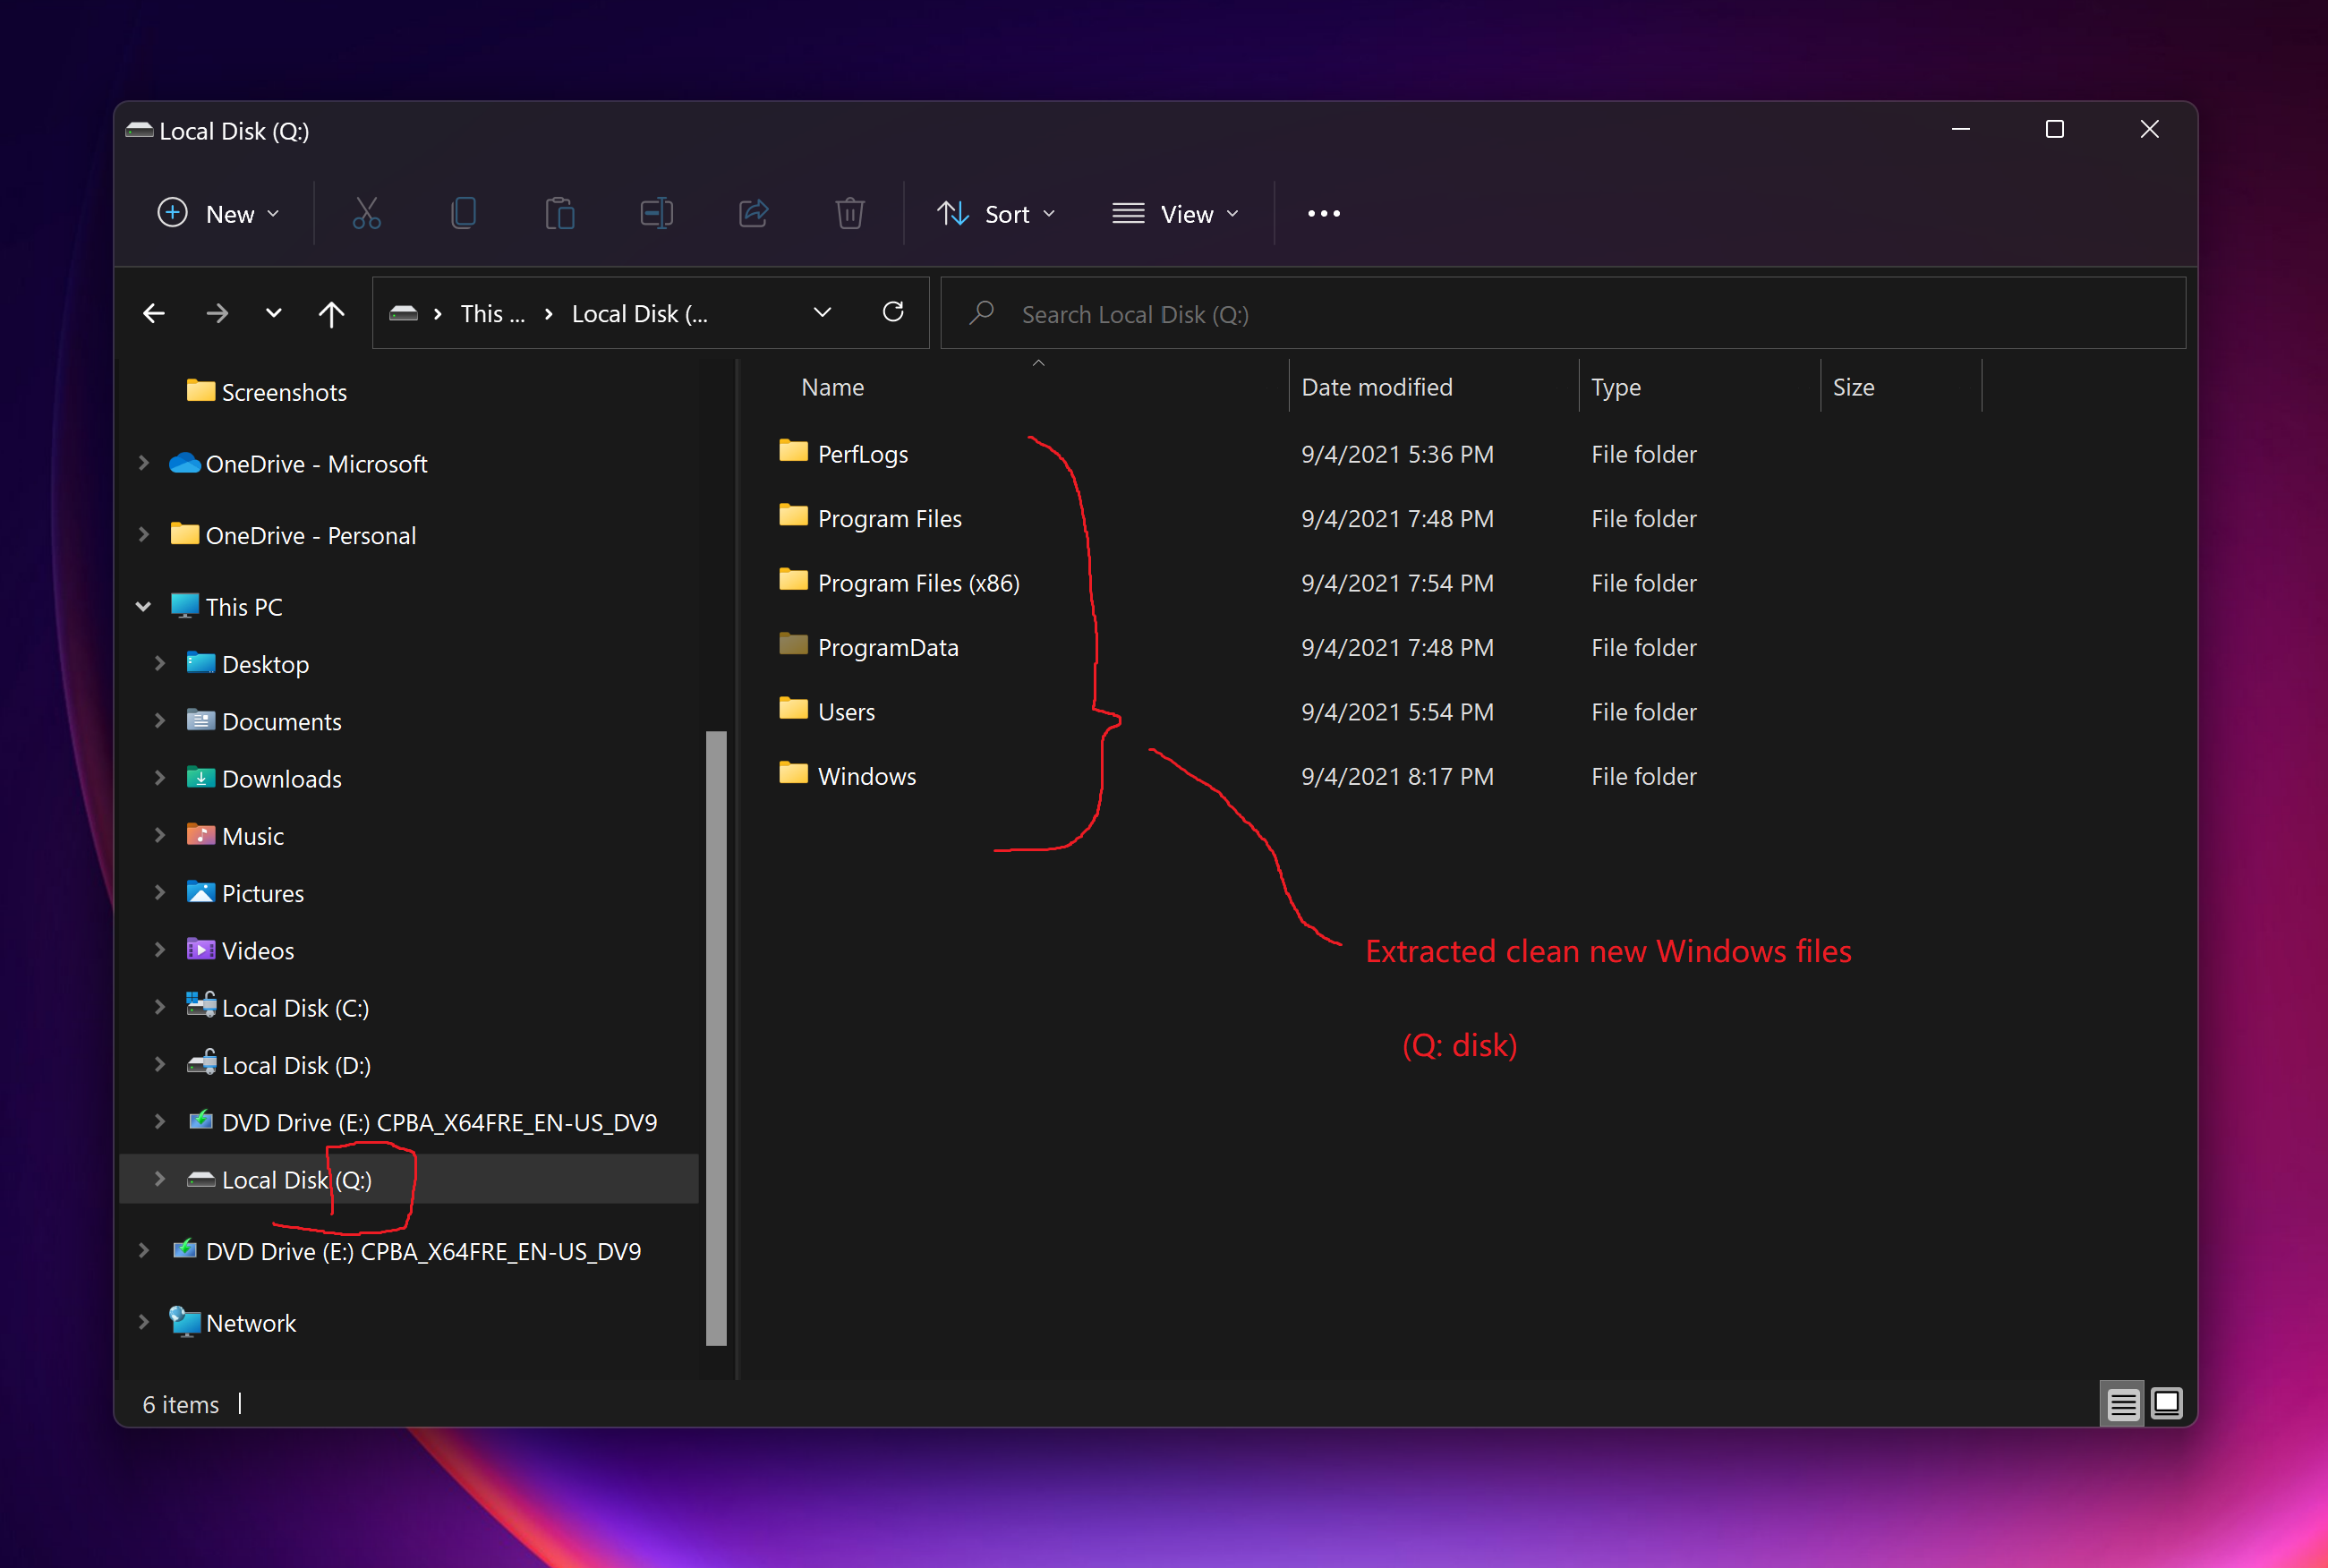
Wait a while for the extracting to finish. (Usually 5-8 minutes)
Step 4. Add boot entry for the new Windows.
Now you have a new Q drive with a clean Windows files. We need to let it know that Q is bootable.
Run this command to register Q as a new boot entry:
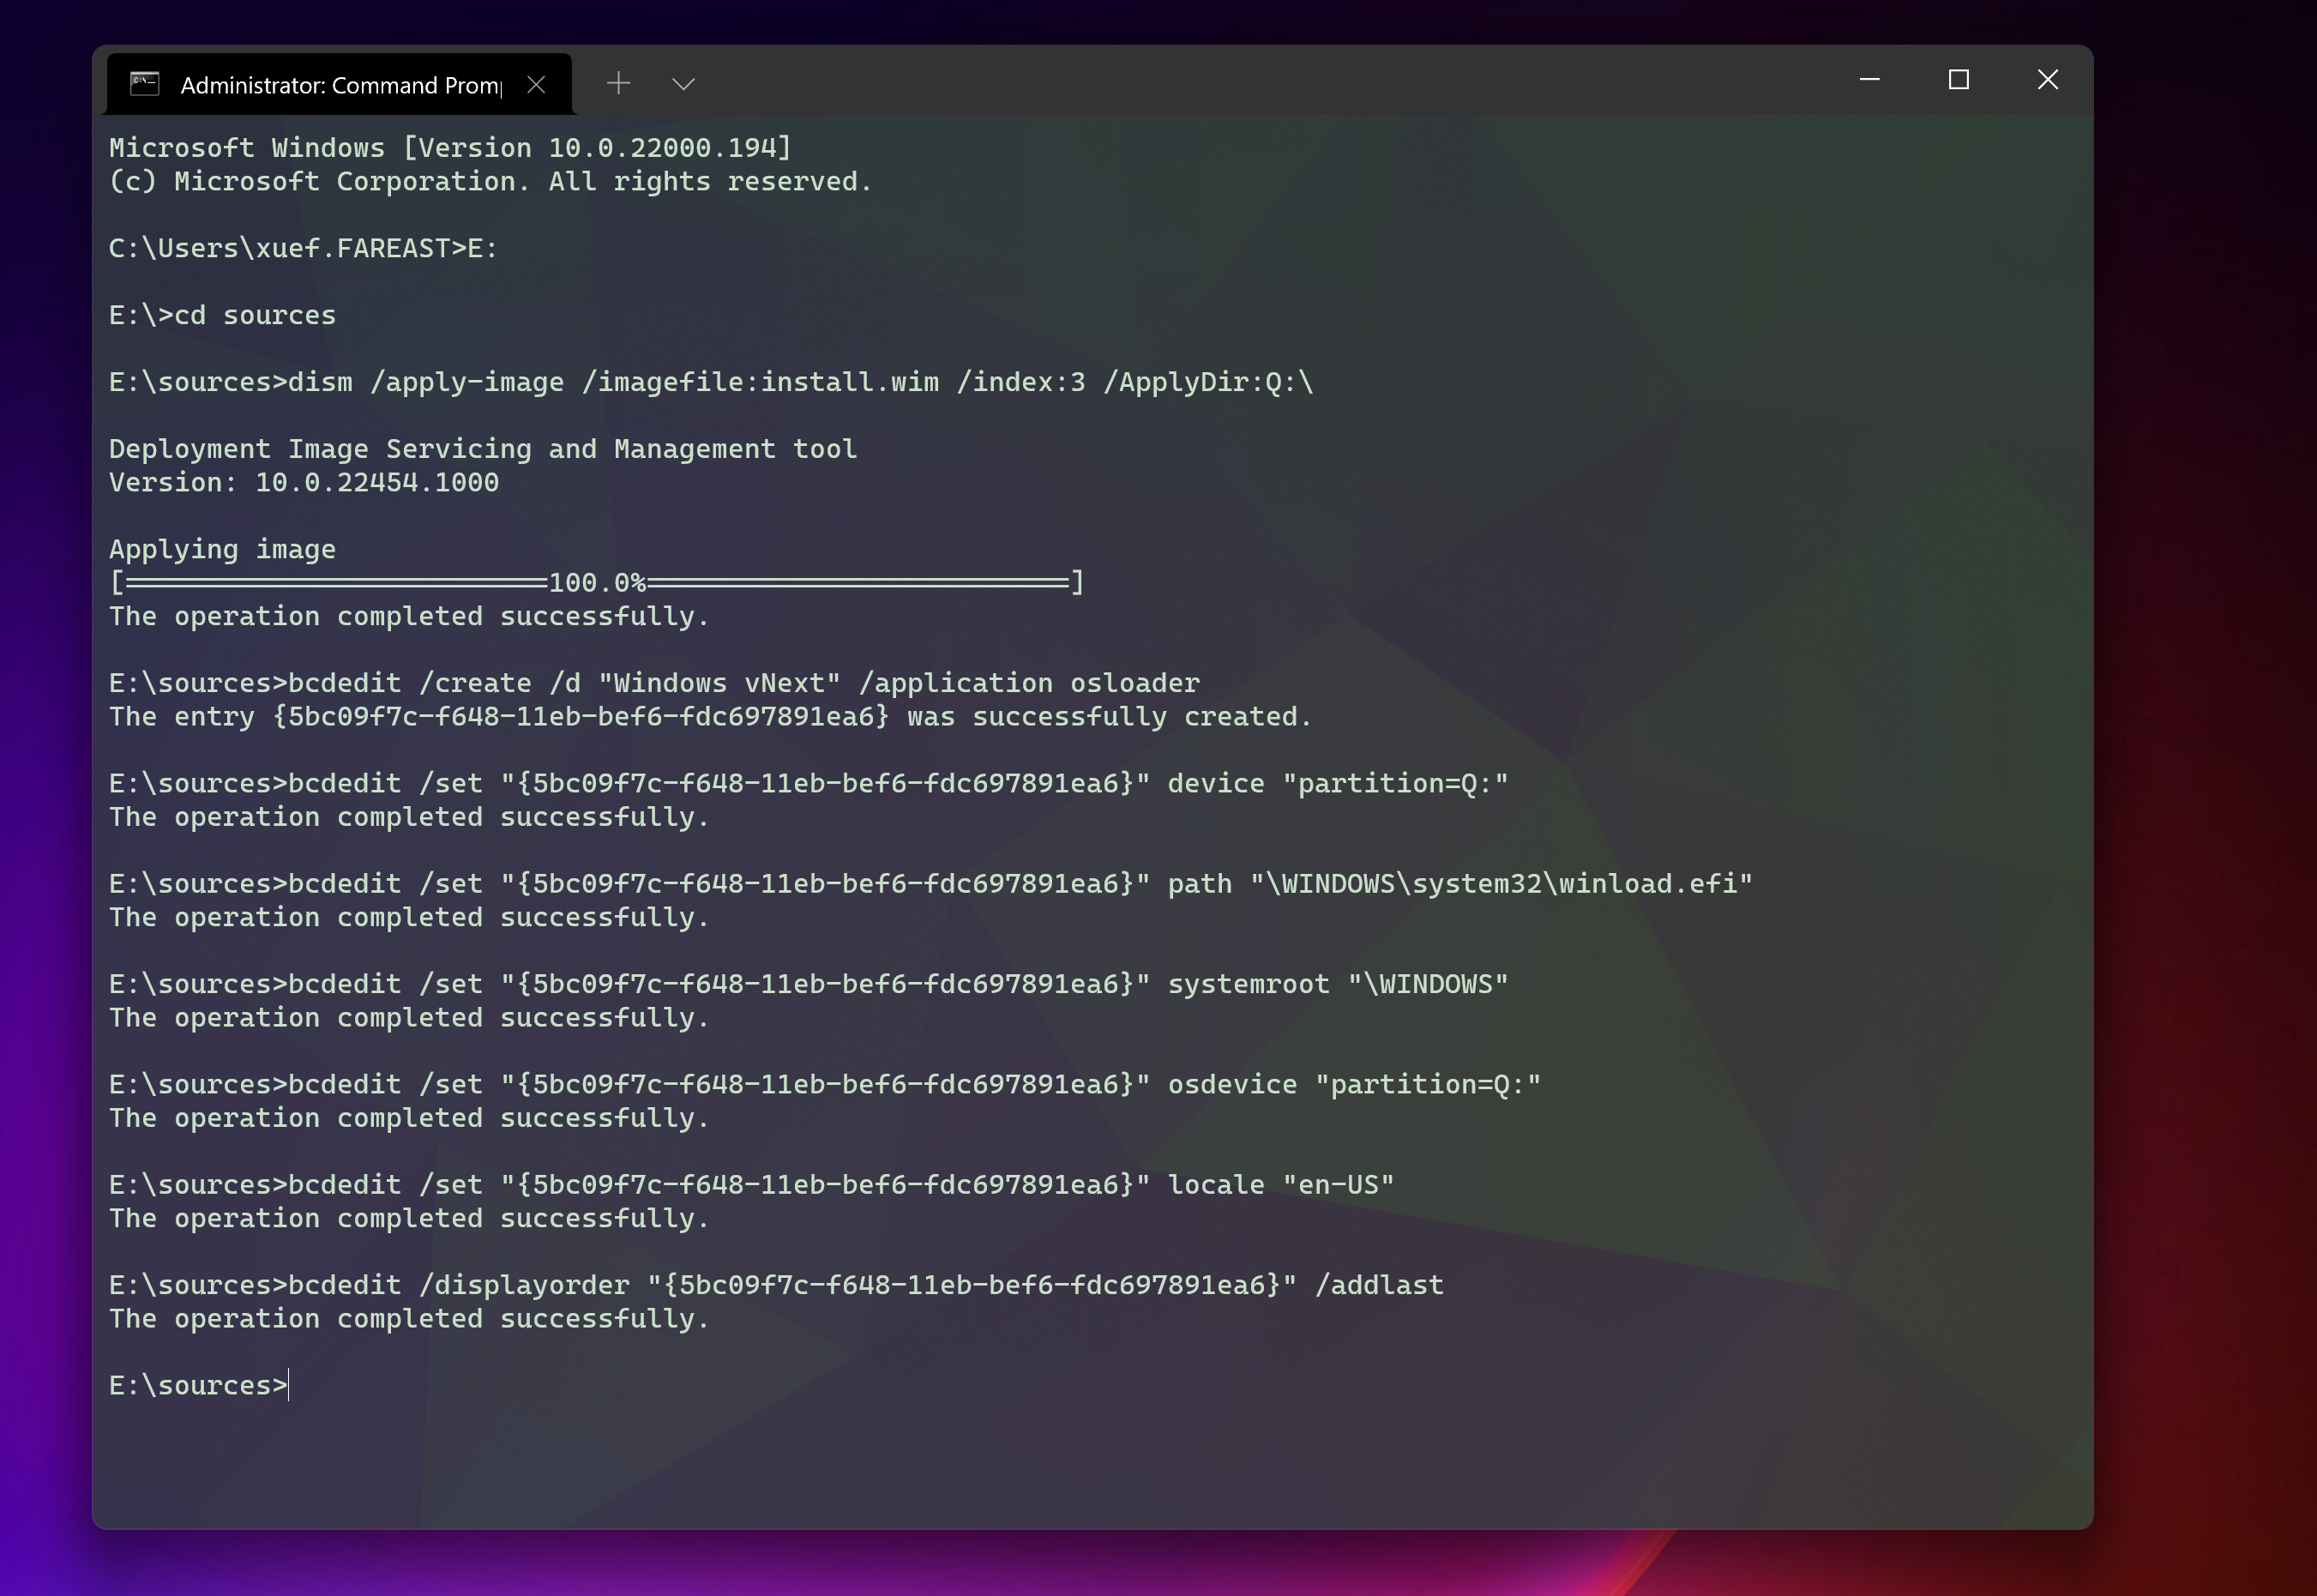
E:\sources>bcdedit /create /d "Windows vNext" /application osloader
The entry {5bc09f7c-f648-11eb-bef6-fdc697891ea6} was successfully created.
Copy the created entry ID.

Now run the following commands with the ID just copied.
E:\> bcdedit /set "{5bc09f7c-f648-11eb-bef6-fdc697891ea6}" device "partition=Q:"
The operation completed successfully.

E:\> bcdedit /set "{5bc09f7c-f648-11eb-bef6-fdc697891ea6}" path "\WINDOWS\system32\winload.efi"
The operation completed successfully.

E:\> bcdedit /set "{5bc09f7c-f648-11eb-bef6-fdc697891ea6}" systemroot "\WINDOWS"
The operation completed successfully.

E:\> bcdedit /set "{5bc09f7c-f648-11eb-bef6-fdc697891ea6}" osdevice "partition=Q:"
The operation completed successfully.

E:\> bcdedit /set "{5bc09f7c-f648-11eb-bef6-fdc697891ea6}" locale "en-US"
The operation completed successfully.

E:\> bcdedit /displayorder "{5bc09f7c-f648-11eb-bef6-fdc697891ea6}" /addlast
The operation completed successfully.
The commands will run like this:
Now it's all set.
There is still some optional commands suggested to run. You can directly run the template below in PowerShell.
Just paste it to your terminal and it will finish the job.
$created = bcdedit /create /d "Windows vNext" /application osloader
$osID = $created | Select-String -Pattern '{[-0-9A-F]+?}' -AllMatches | Select-Object -ExpandProperty Matches | Select-Object -ExpandProperty Value
bcdedit /set "$osID" device "partition=Q:"
bcdedit /set "$osID" path "\WINDOWS\system32\winload.efi"
bcdedit /set "$osID" systemroot "\WINDOWS"
bcdedit /set "$osID" osdevice "partition=Q:"
bcdedit /set "$osID" locale "en-US"
bcdedit /set "$osID" inherit "{bootloadersettings}"
bcdedit /set "$osID" nx "OptIn"
bcdedit /set "$osID" bootmenupolicy "Standard"
bcdedit /set "$osID" displaymessageoverride "Recovery"
bcdedit /set "$osID" recoveryenabled "Yes"
bcdedit /set "$osID" isolatedcontext "Yes"
bcdedit /set "$osID" flightsigning "Yes"
bcdedit /set "$osID" allowedinmemorysettings "0x15000075"
bcdedit /displayorder "$osID" /addlast
bcdedit /set "{bootmgr}" default "$osID"
Step 5. Reboot to the new OS.
Reboot from the old Windows now.
Before the new OS starts, you can see a screen allowing to select which OS you want to boot.
Choose the new OS.
这篇关于双系统安装Windows 11的教程结构清晰,技术细节完整,对有基础的用户具有较高参考价值。以下是具体分析:
核心价值与亮点:
可改进方向:
技术原理补充:
install.wim解压后为何能直接启动(需依赖现有系统引导链)。建议补充说明Windows引导流程(如BCD数据库如何指向新分区)以增强可信度。潜在风险警示:
操作容错设计:
/logFile参数示例以帮助用户定位错误。bcdedit /enum检查配置有效性),建议增加校验环节。内容扩展建议:
/index参数选择的注意事项。格式优化建议:
/ApplyDir字段用粗体),提升可读性。技术准确性核查:
bootrec /fixmbr等工具)。总体而言,本文为技术爱好者提供了一个极具实用价值的解决方案,通过系统性补充风险提示和扩展案例,可进一步提升其权威性与可操作性。
这篇文章为我们详细介绍了如何通过磁盘管理、分区调整以及配置启动项,在现有操作系统的基础上添加一个新的引导选项,以便于启动到另一个安装的操作系统。这对于需要同时运行多个操作系统的用户来说非常实用。
首先,文章指导我们使用磁盘管理工具扩展C盘空间,并强调了在进行磁盘操作前备份数据的重要性。这提醒我们在处理分区和文件系统时必须谨慎,以防止数据丢失。接下来,更新系统确保兼容性也是一个关键点,但需注意更新可能带来的潜在影响。
获取并挂载ISO镜像的过程中,验证文件的完整性同样不可忽视。使用Diskpart创建新系统分区时,合理规划分区大小和格式至关重要,避免因空间不足或格式错误导致后续问题。
解压ISO镜像并安装Windows是整个流程的核心,需要确保镜像的完整性和系统的兼容性。在配置启动项时,准确指定分区路径和其他参数是成功引导的关键步骤,任何错误都可能导致启动失败。
最后,在重启测试阶段发现问题及时处理,确保新系统稳定运行。总体而言,这篇文章提供了清晰且详细的指南,帮助用户实现多系统共存的需求,但需要读者具备一定的计算机操作基础和安全意识。
In this blog post, the author provides a detailed guide on how to install Windows 11 alongside an existing Windows 10 installation without using a USB drive. The core idea of the article is to help users save time and effort by using a simpler method to set up a dual-boot system with Windows 11. The author does an excellent job of breaking down the process into five easy-to-follow steps, complete with screenshots and specific commands to run.
The blog's major strength is its clarity and thoroughness in explaining each step. The author provides clear instructions, including alternative commands in case of errors, and even offers a PowerShell template for users to copy and paste. This attention to detail makes the process accessible to users of varying technical backgrounds.
However, there are a couple of areas that could be improved. Firstly, the author could have provided more context on why someone might want to install Windows 11 alongside Windows 10, and the potential benefits or drawbacks of doing so. Additionally, the author could have included a brief explanation of the terms and concepts used in the article, such as "partition" and "boot entry," to help less experienced users understand the process better.
Overall, this blog post is an excellent resource for users looking to install Windows 11 on their systems without using a USB drive. The author's clear instructions and attention to detail make the process accessible and straightforward. With a few minor improvements to provide more context and explanations, this guide could become an even more valuable resource for users looking to upgrade their systems.
anduin nb