如何使用Azure DevOps将编译完的应用发布到非Azure Global环境,例如Azure CN。
Publishing an app from Azure DevOps to Azure global is super easy. Simply a few clicks and you can find your azure subscription and publish it in a minute. Like this:
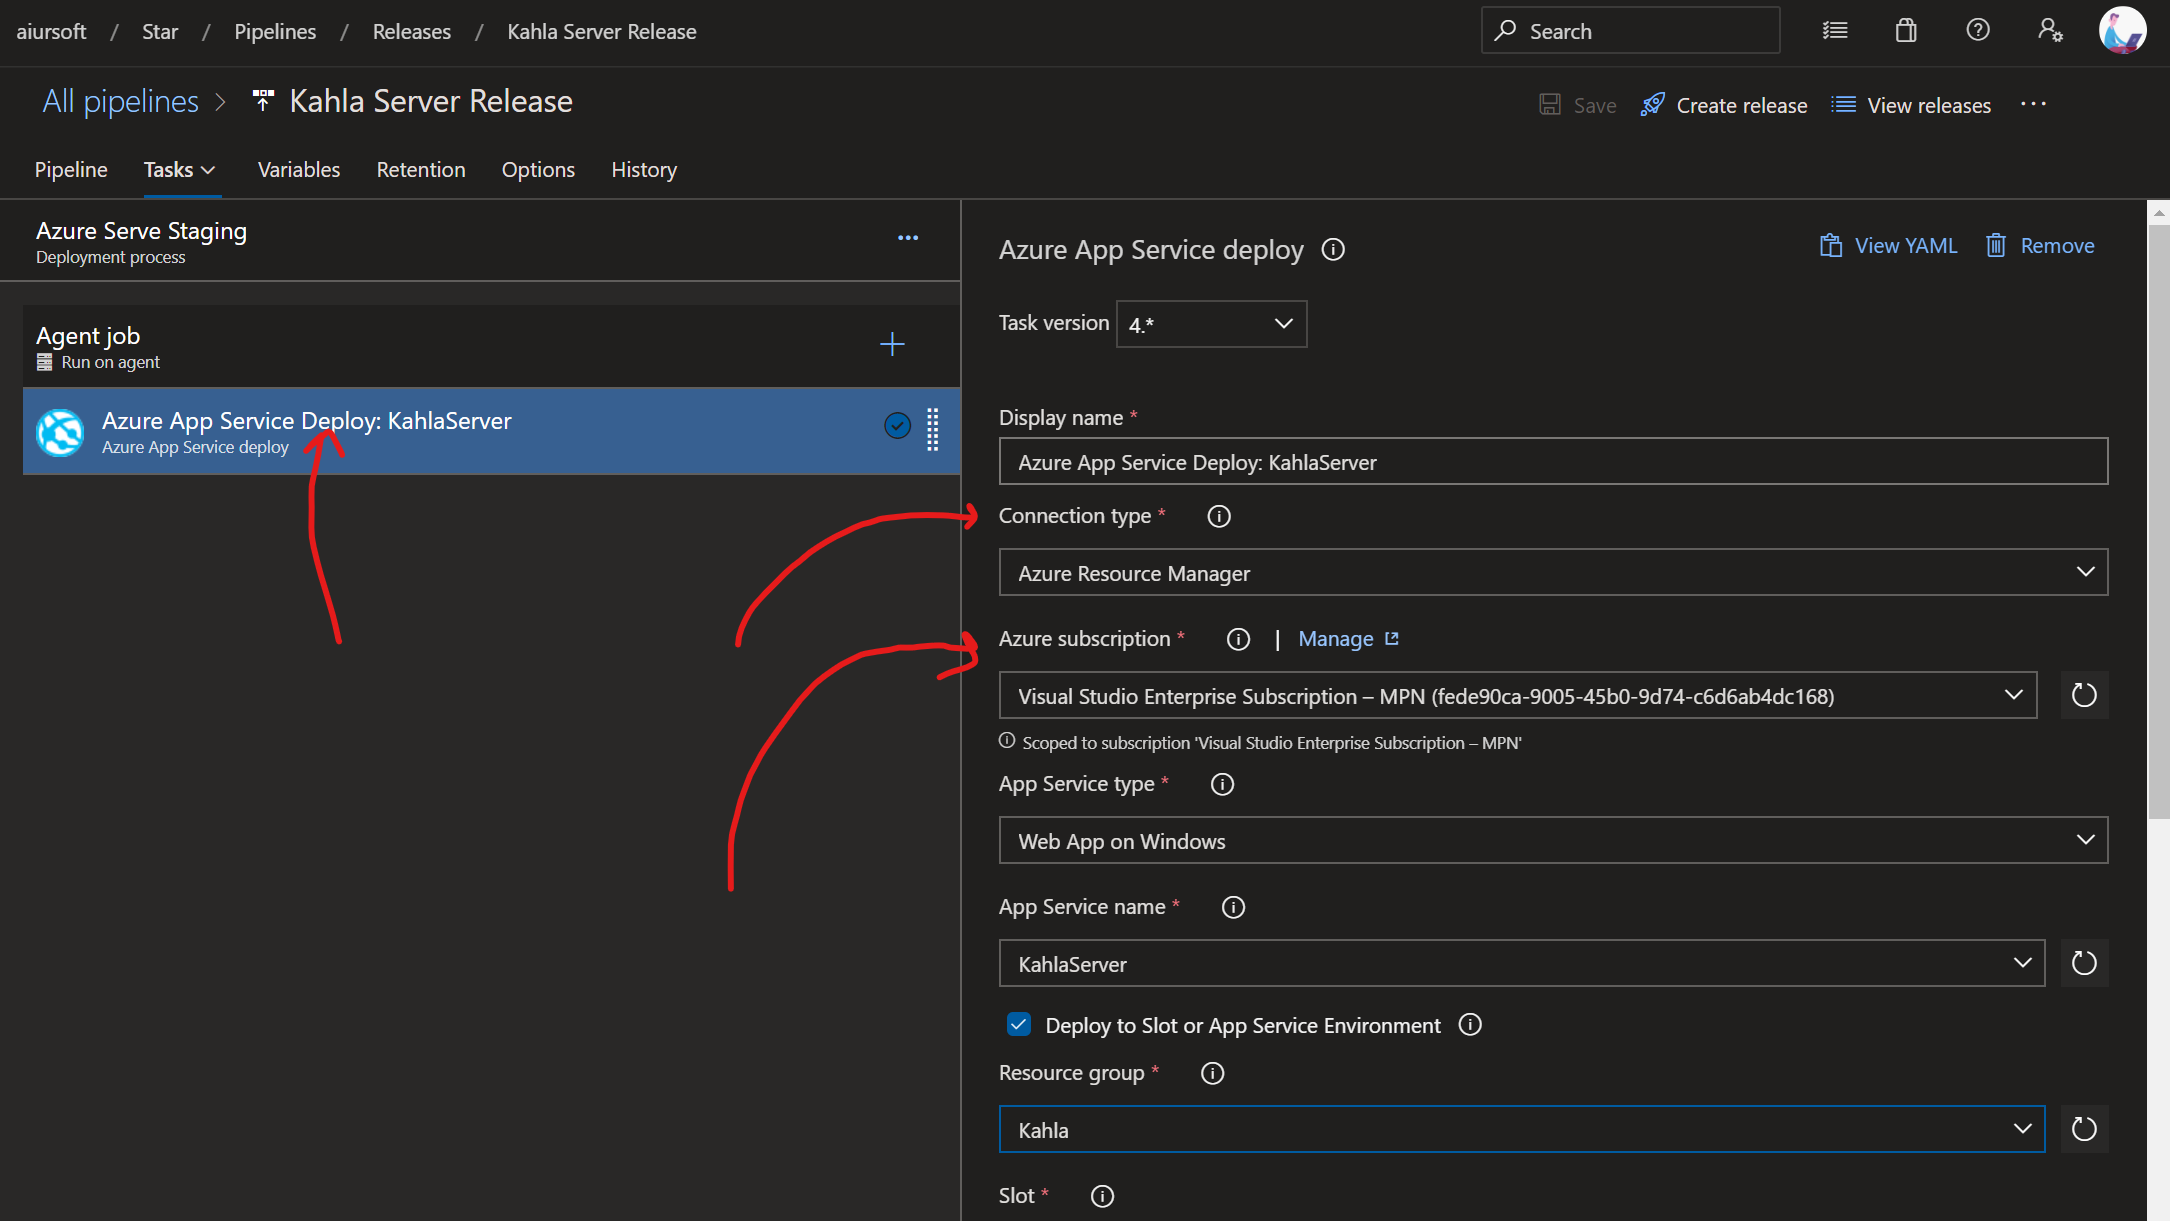
But in some cases, our customers might be using other Azure environments, like Azure Arc, Azure for government and Azure CN. And we can't find our subscriptions easily via the pipeline configuration. How can we publish to the app to our non-global Azure environment?
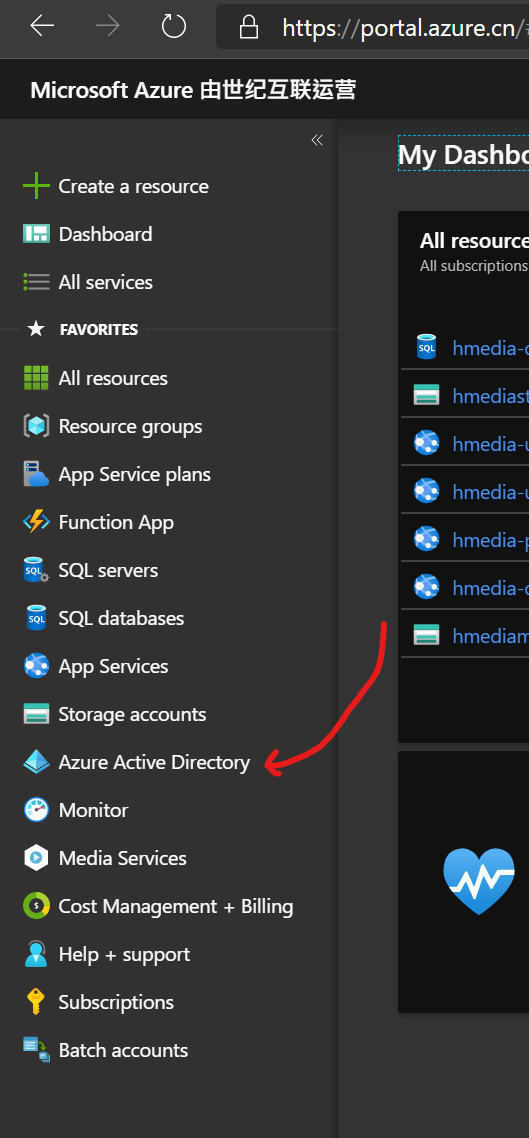
First, we need to create a new app registration. And allow Azure DevOps publishing apps as the app's identity.
Click your Azure Active Directory menu here:
Add click here to add a new registration:
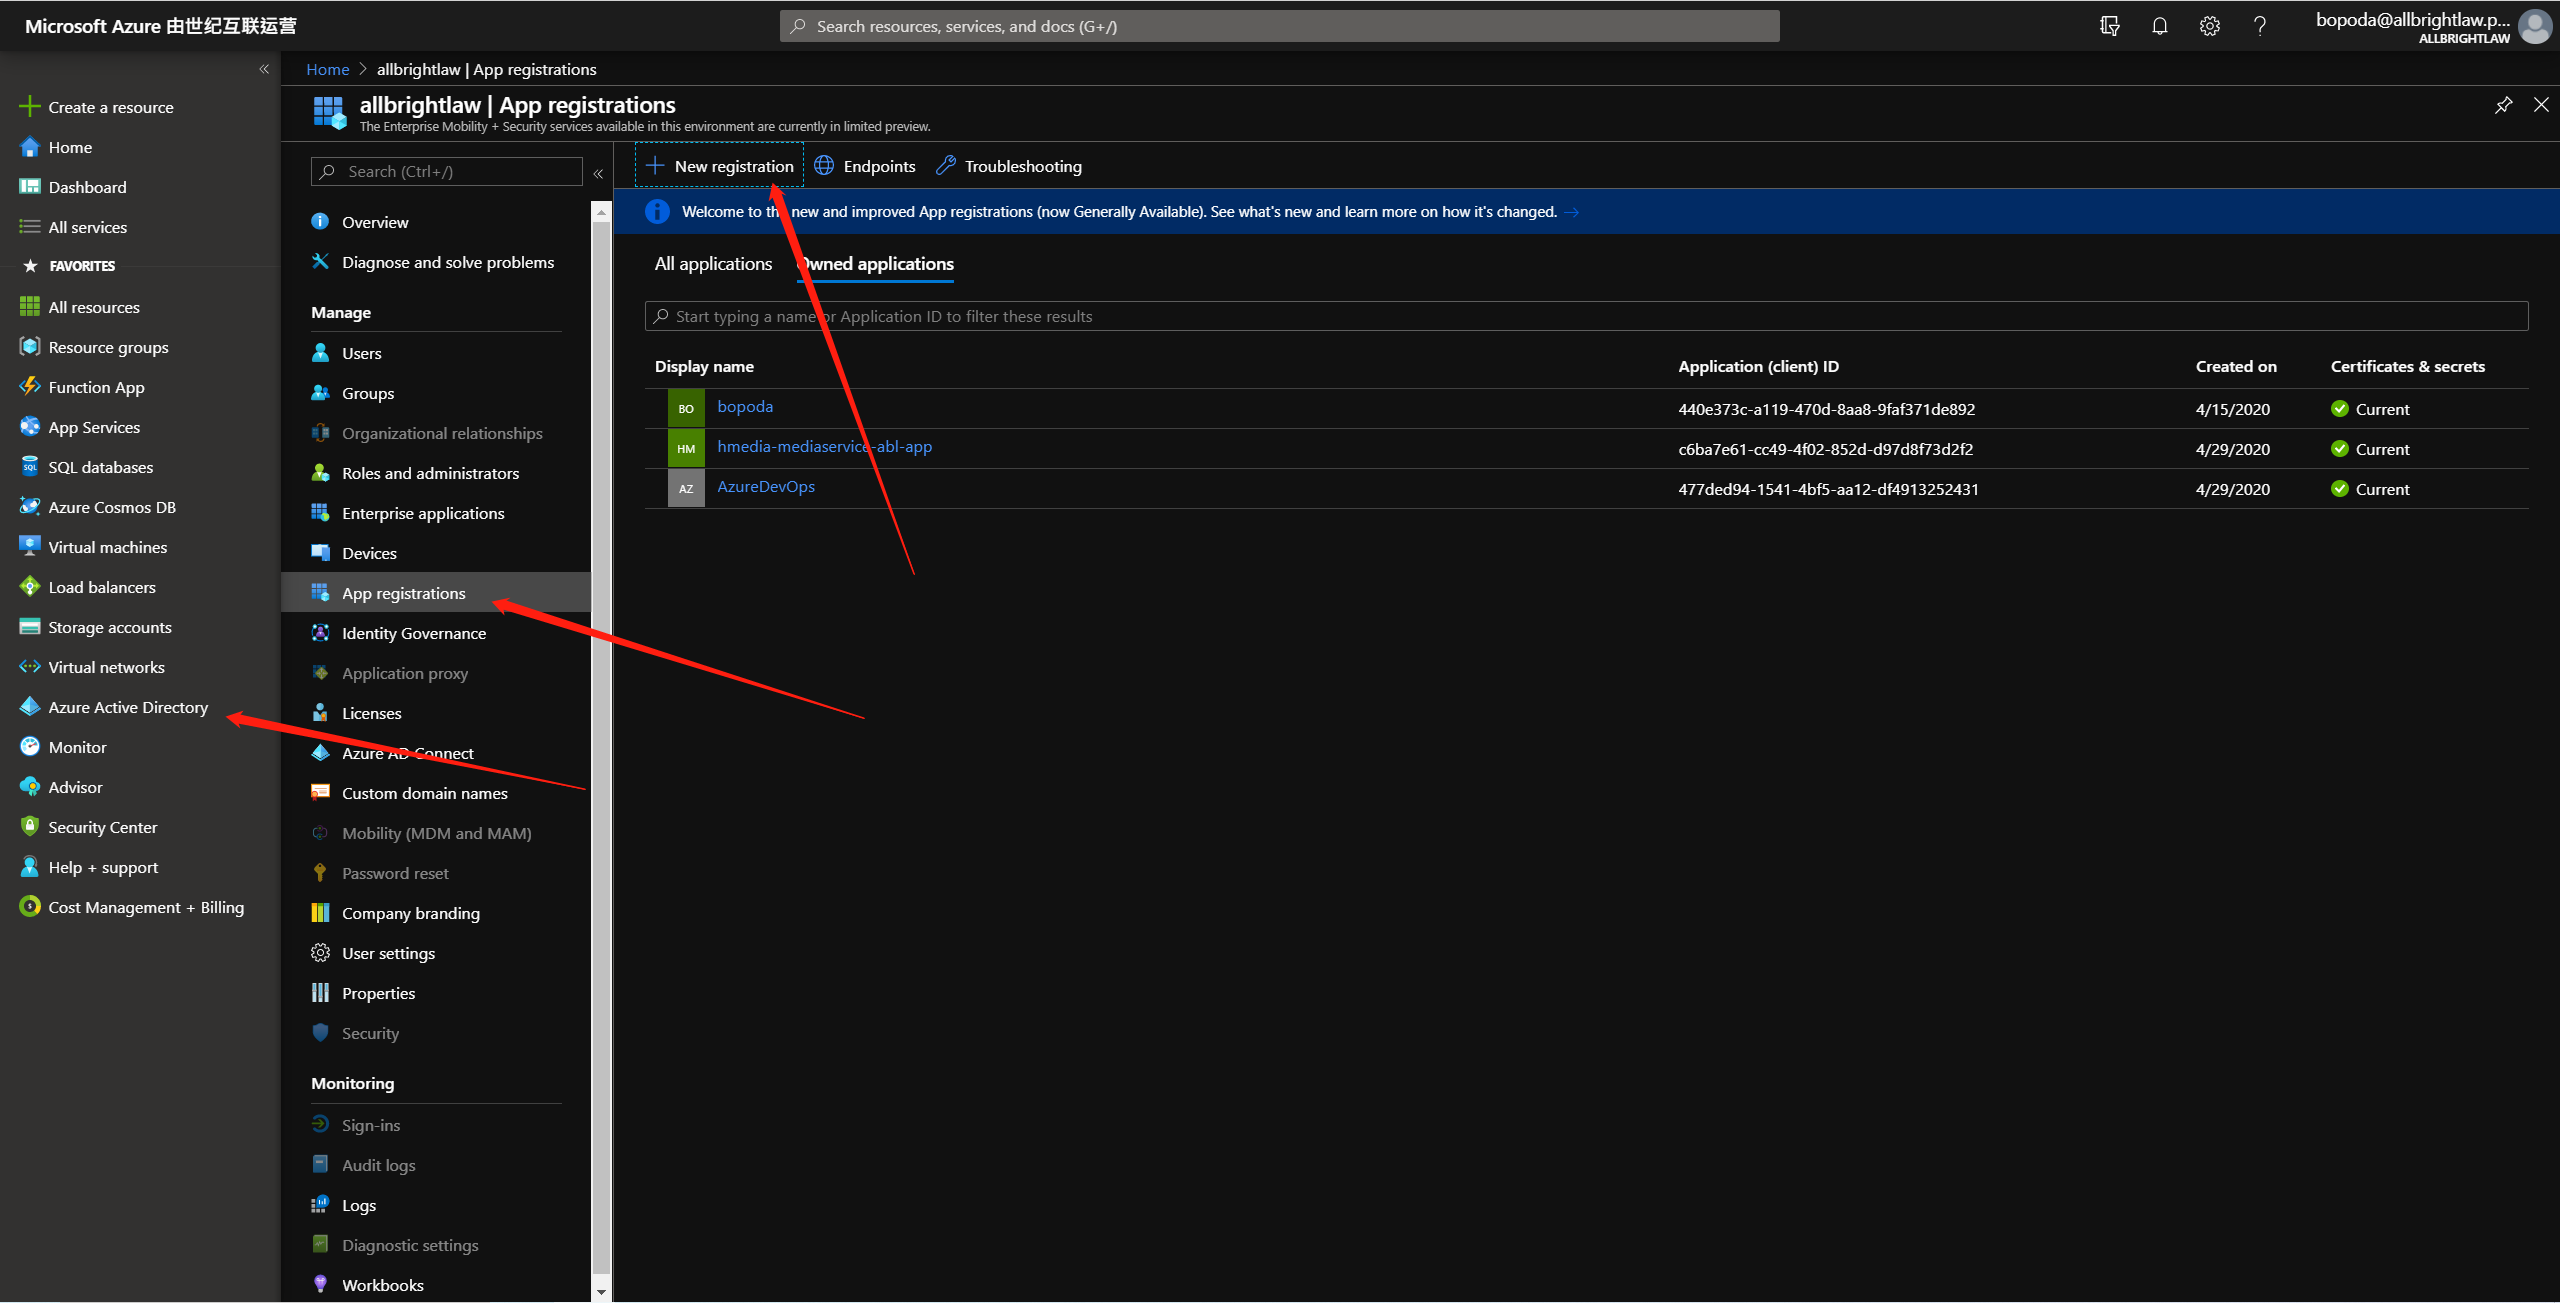
And then name your new app Azure DevOps. Select it access accounts in this organization.

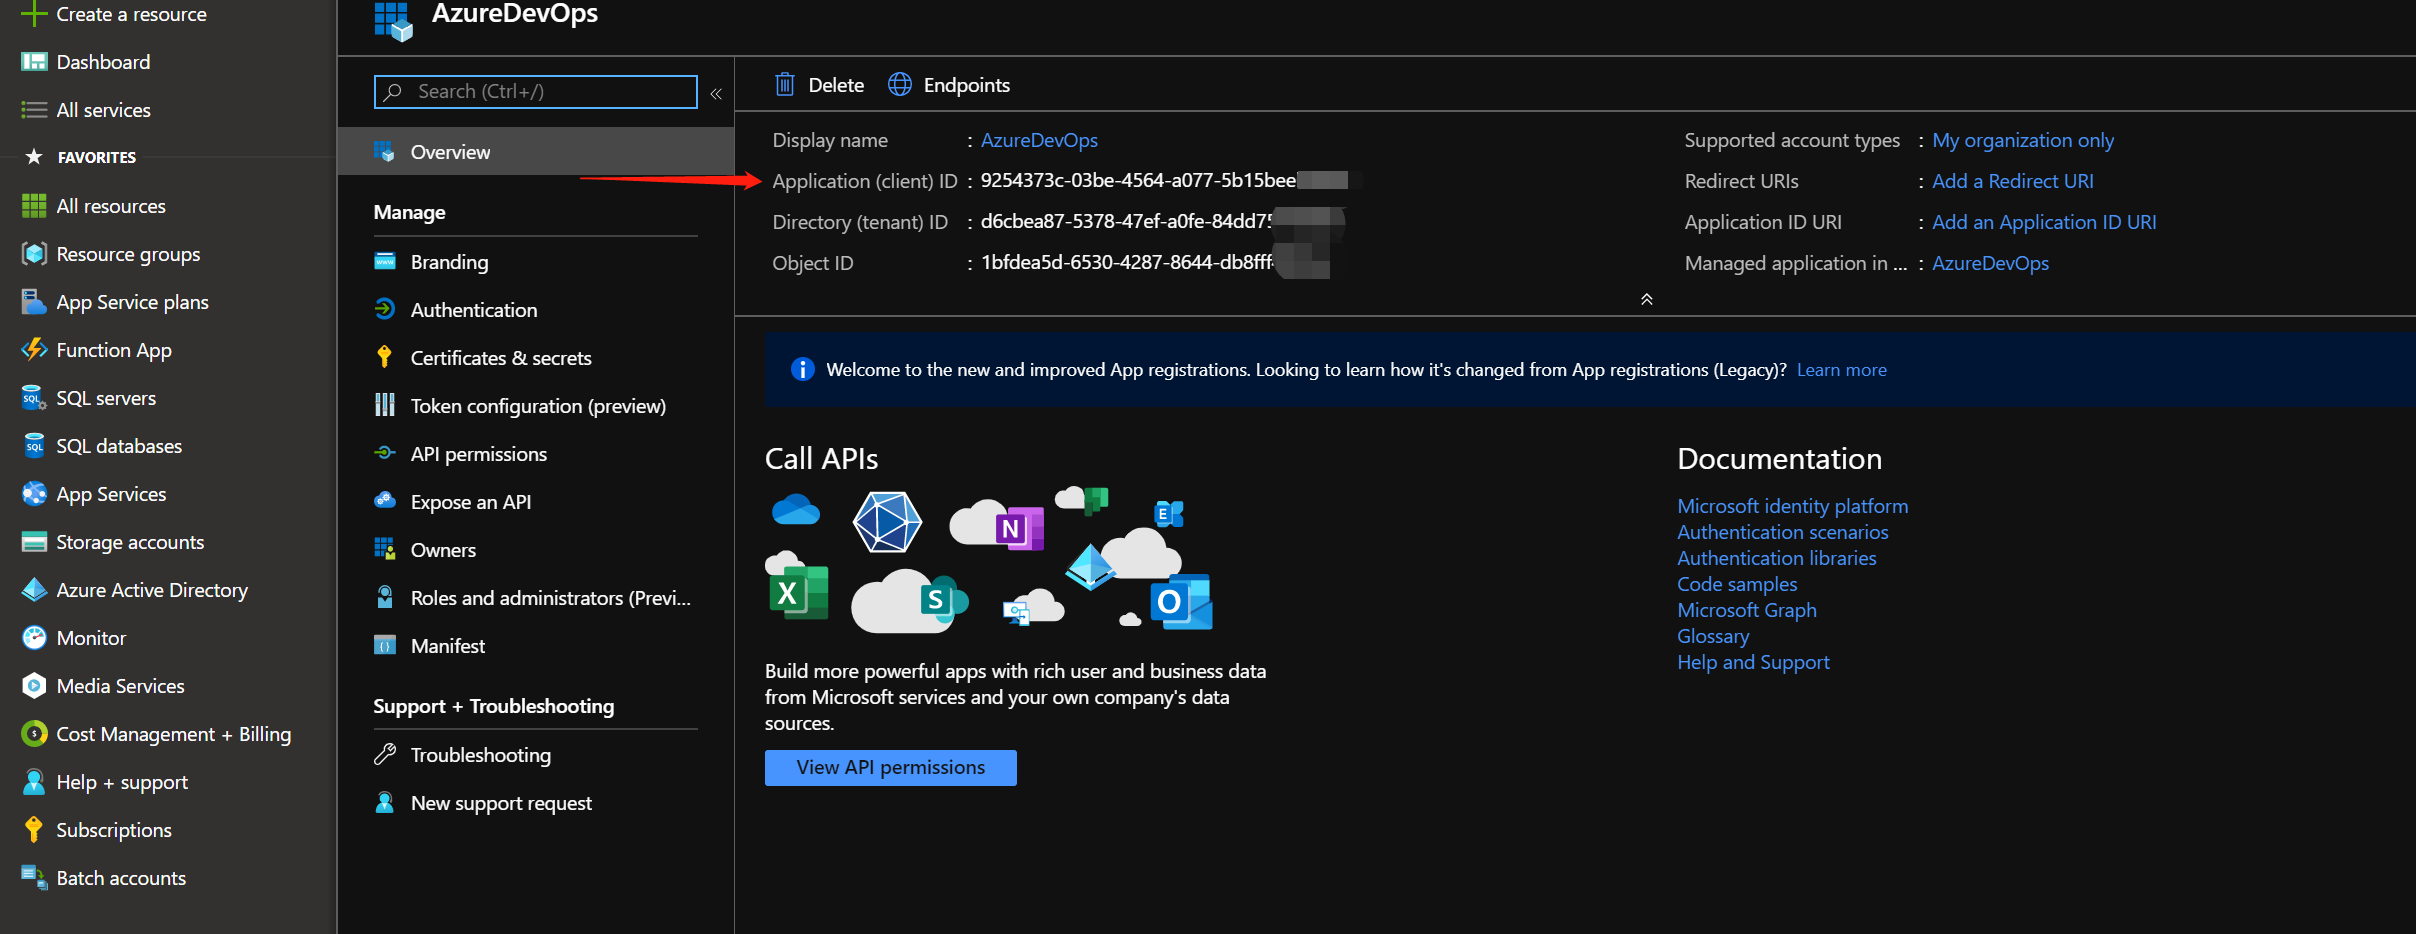
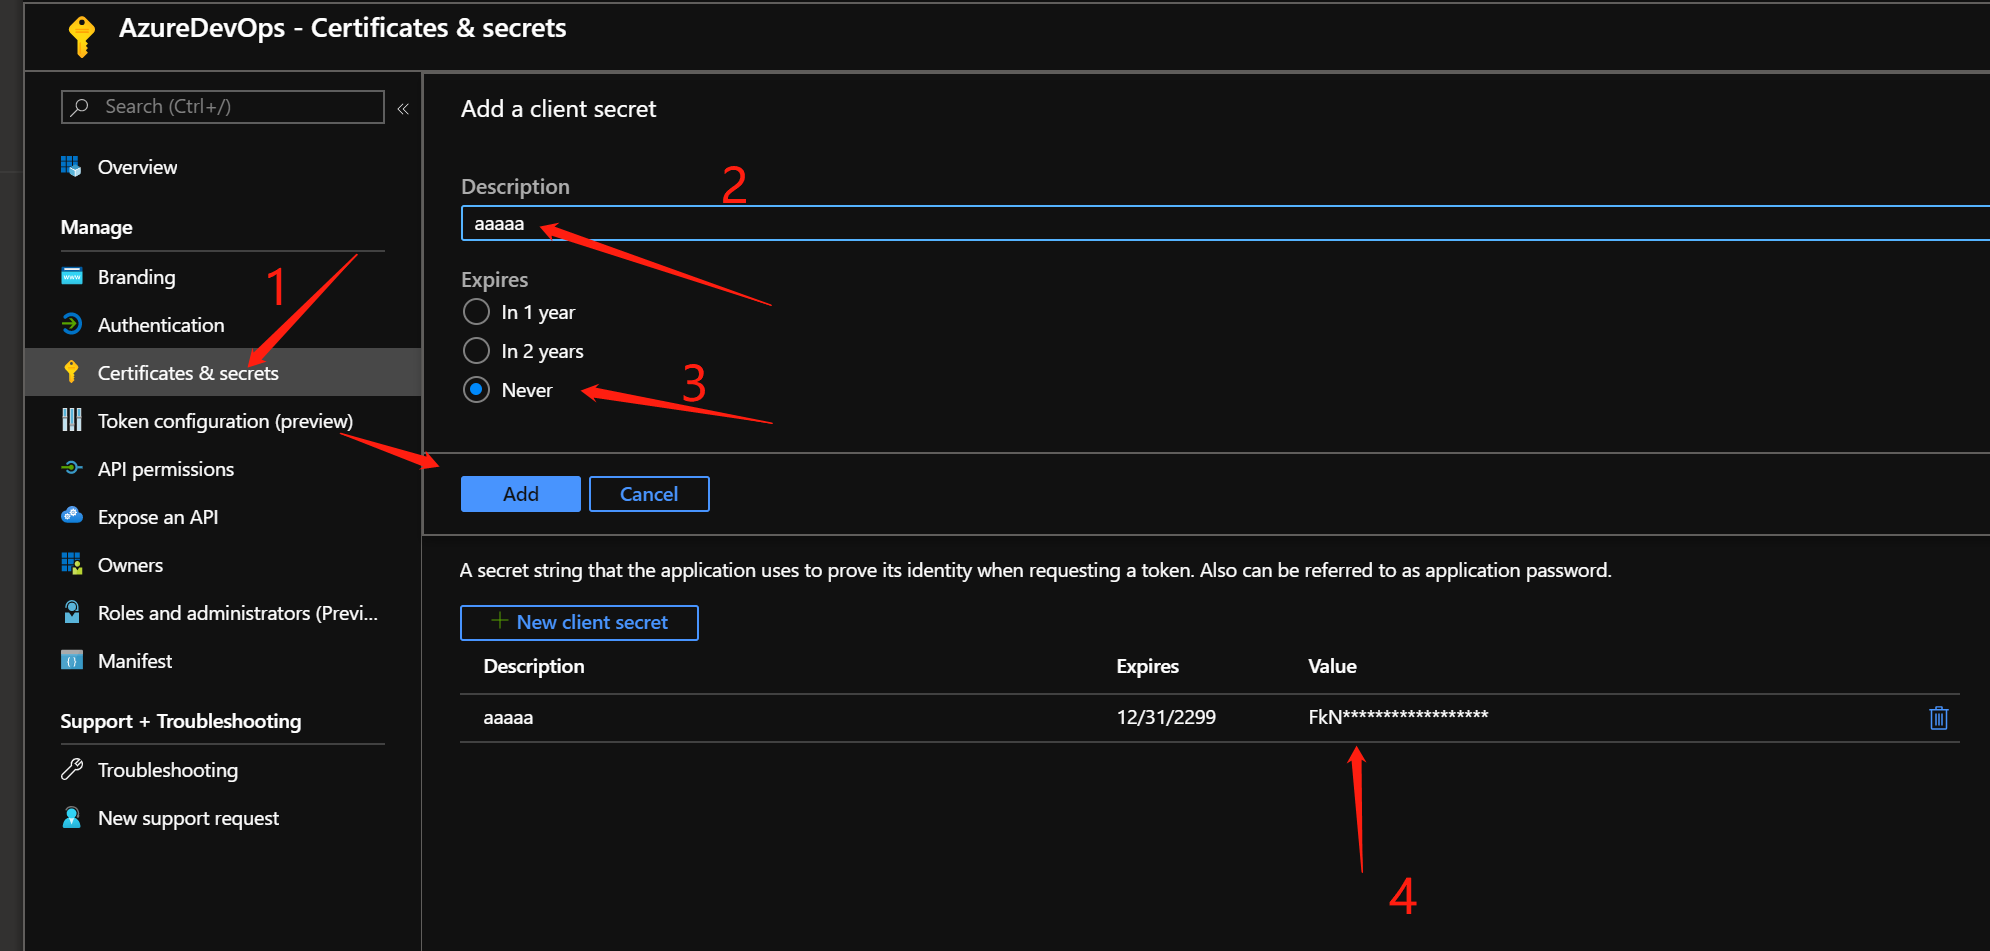
After creation your new app registration, remember to copy your application ID here:
Add a new secret, copy the secret value here:
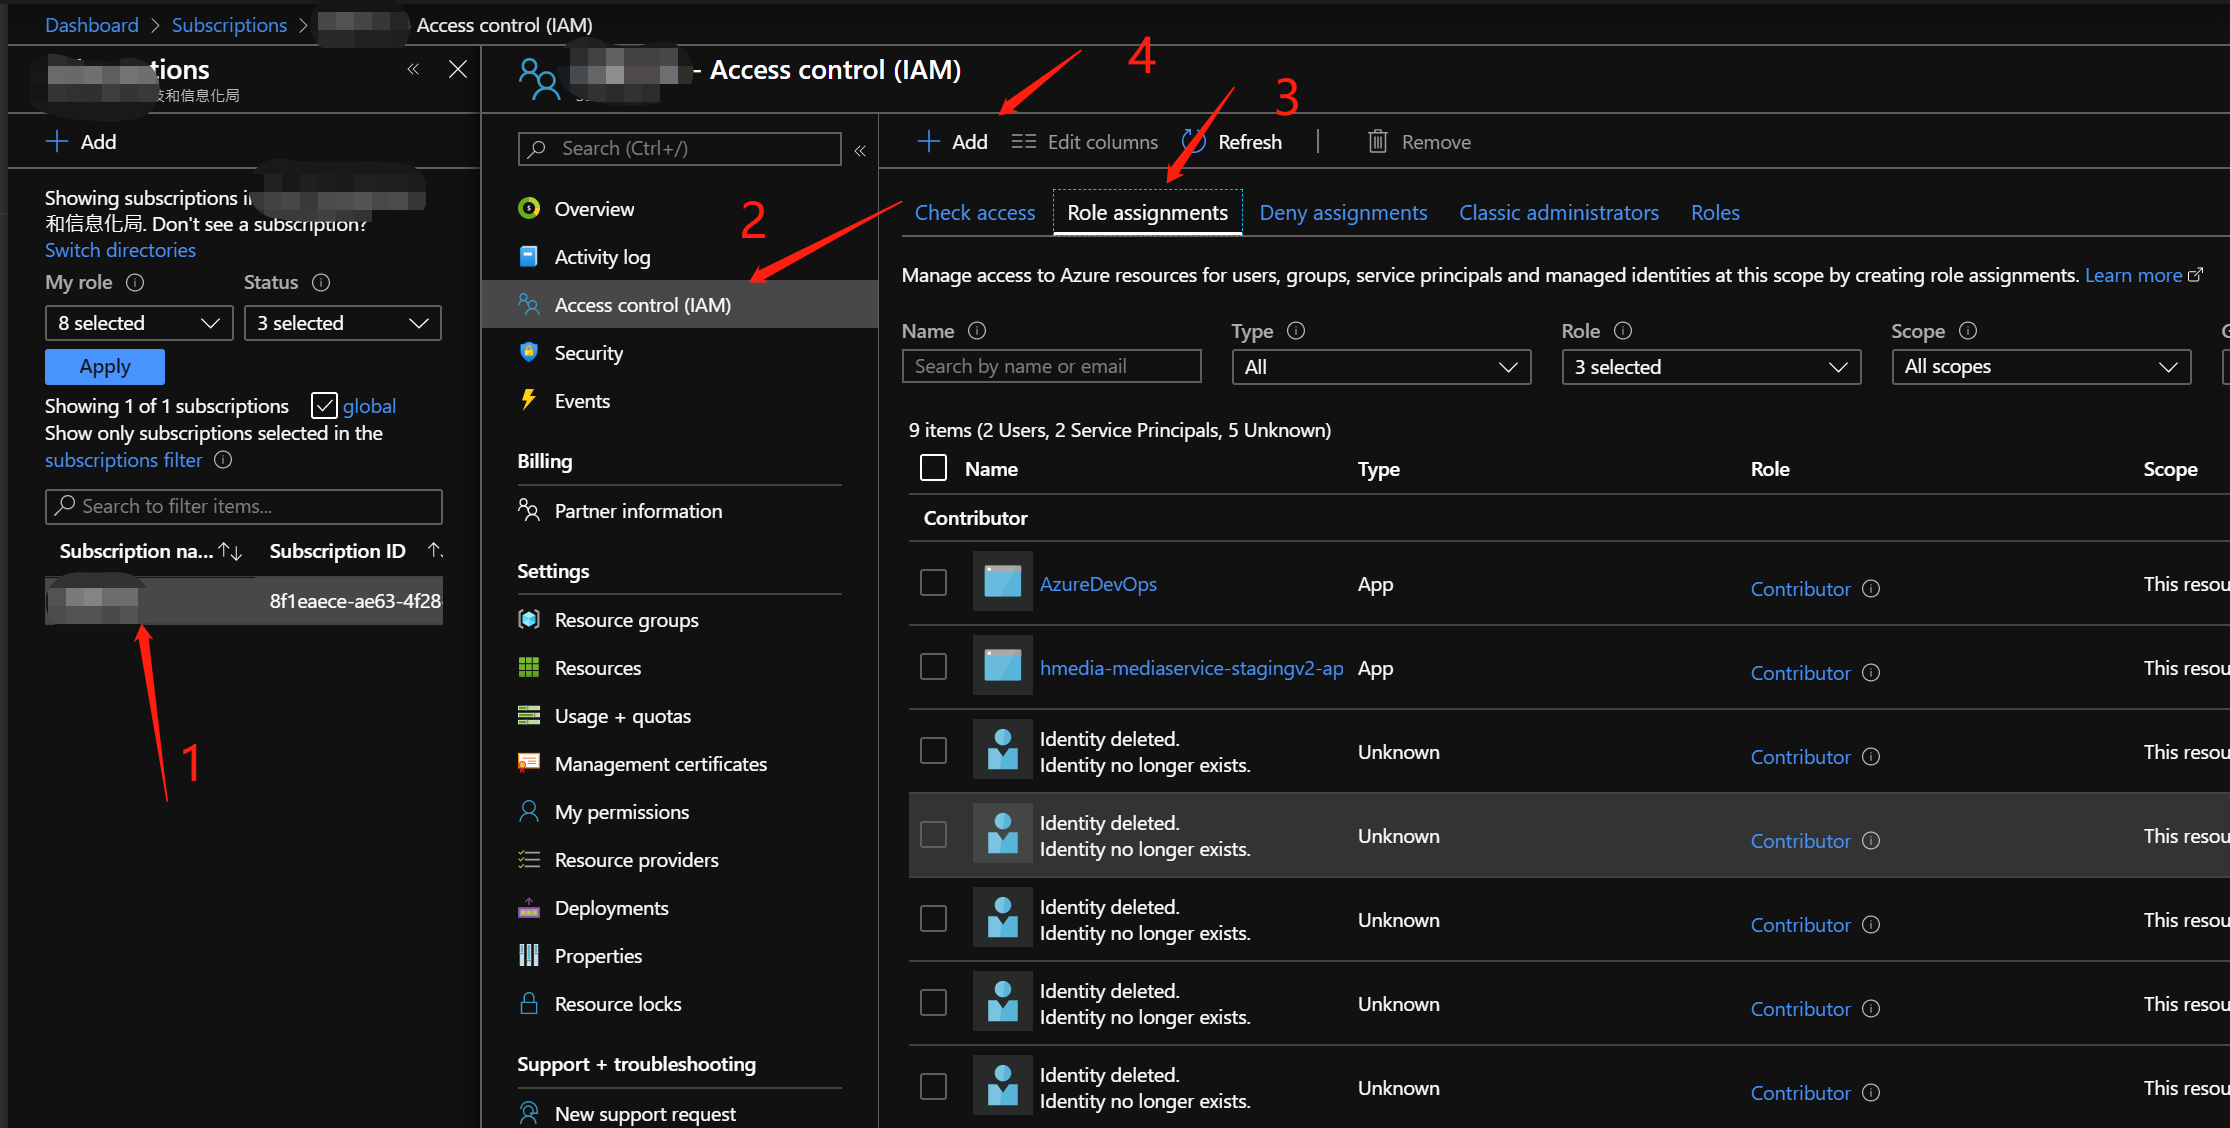
Those steps created a new app in your directory. Anyone with the app id and app secret can access your directory. But for now, the app is not authorized to access your Azure resources. We need to give the app a subscription level role which allows it to manage your resources under the subscription.
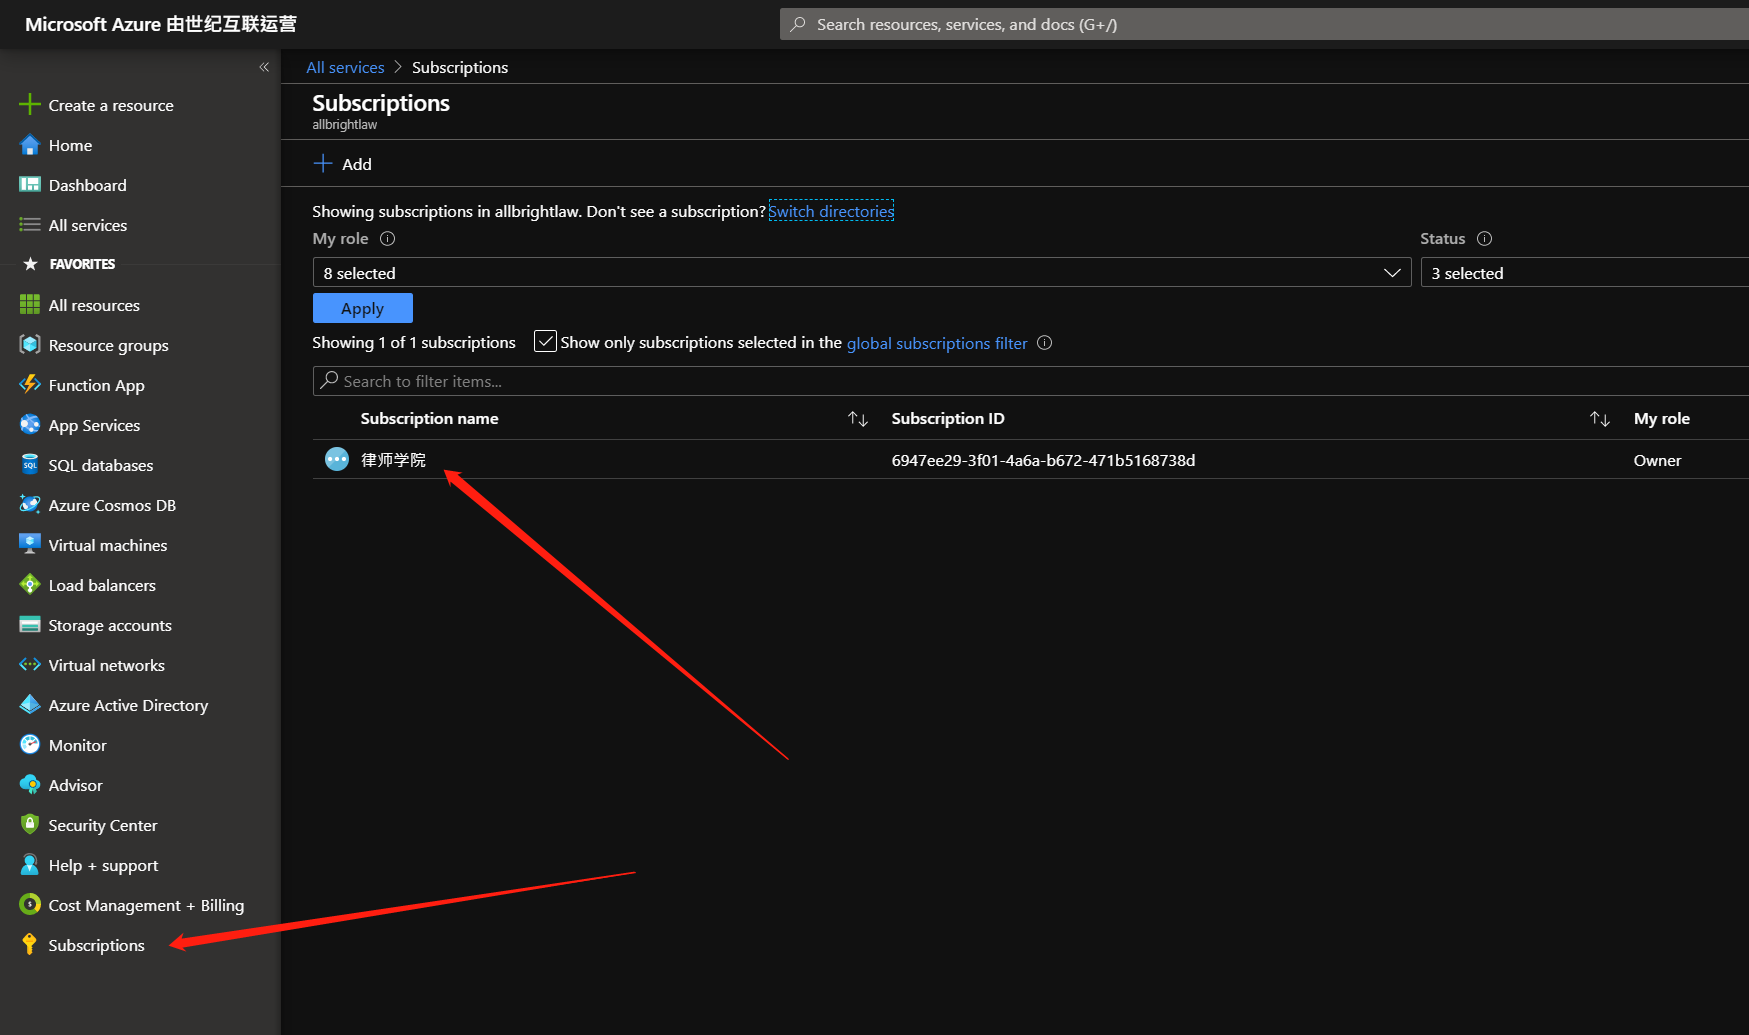
Click subscriptions and select the subscription which you want to deploy.
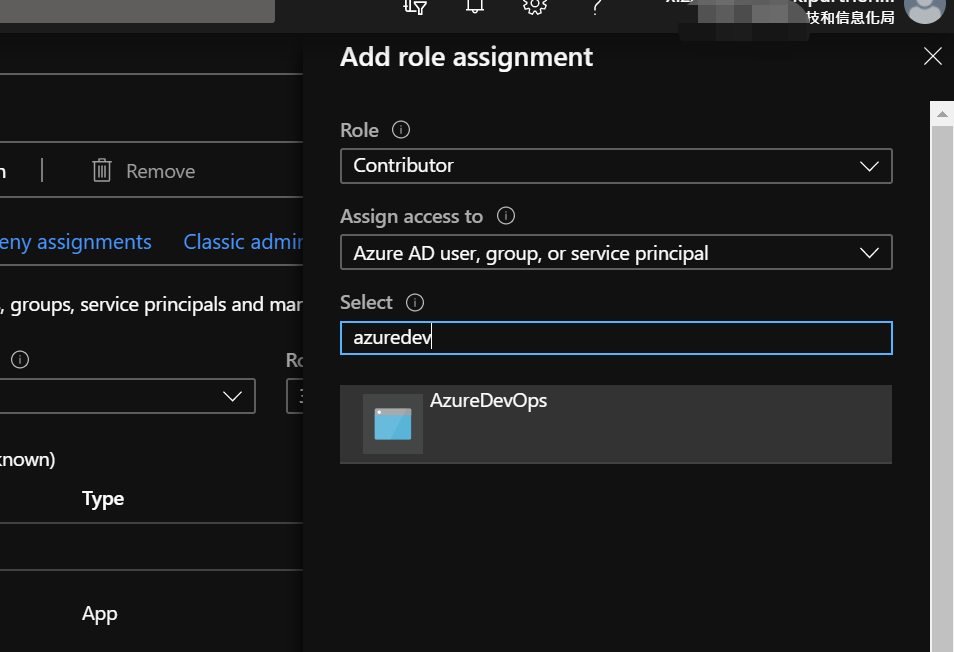
Add a new role assignment.
And add it as a contributor.
Now, steps in the Azure portal are completed. We can add a new service connection in Azure DevOps now.
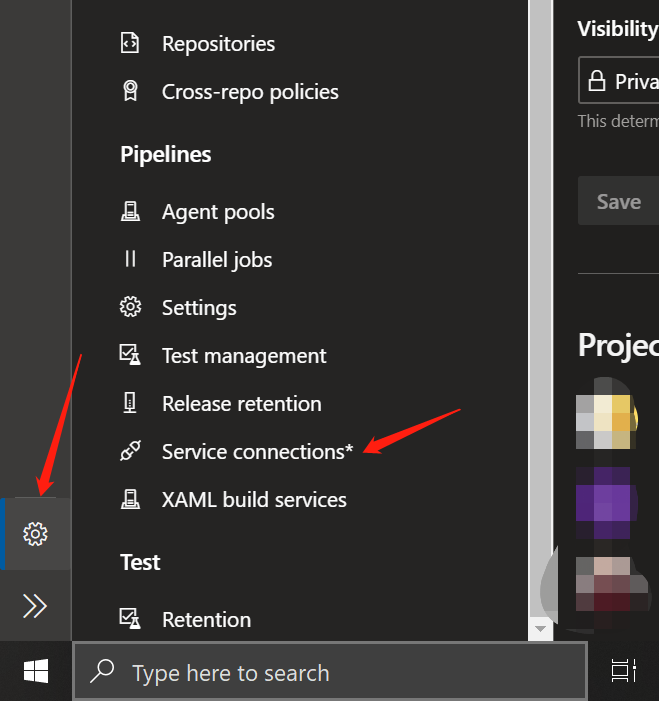
After signing to your Azure DevOps, click the project settings. Then select service connections:
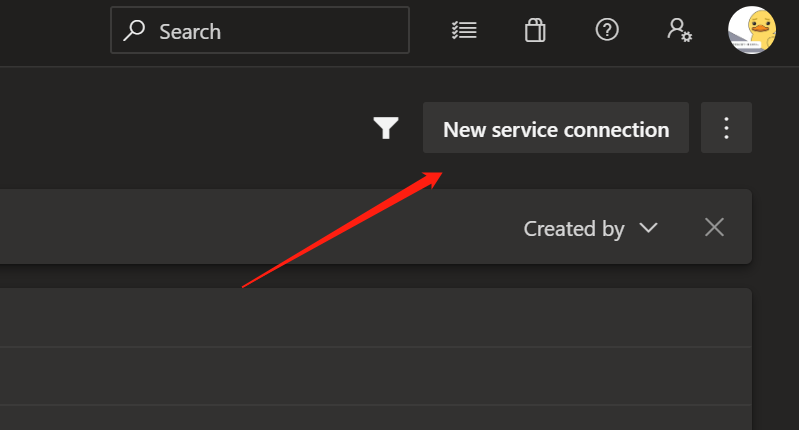
Click here to add a new service connection:
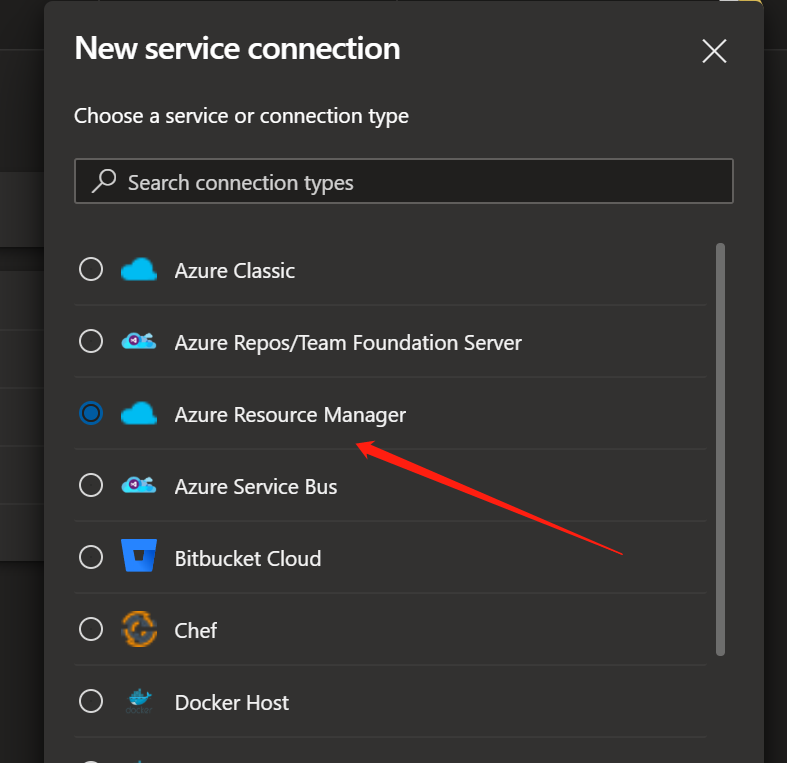
Select the Azure resources manager:
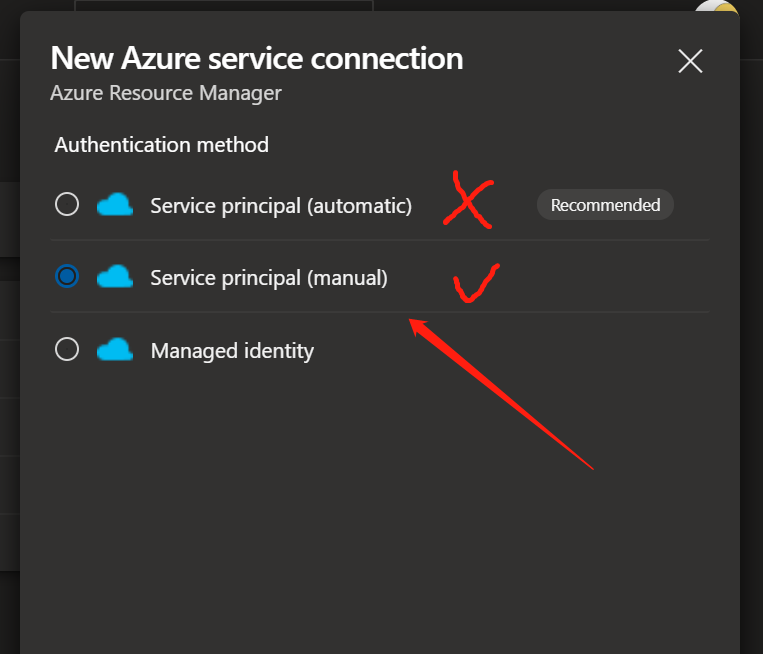
Select the manual config. If you select the automatic config, it only shows the subscriptions from Azure global.
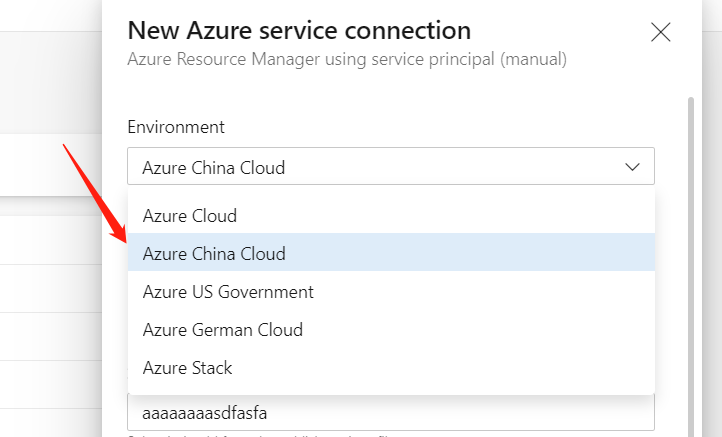
Select your customized Azure environment name. For example, I am configuring a connection for Azure CN. Click Azure China Cloud here.
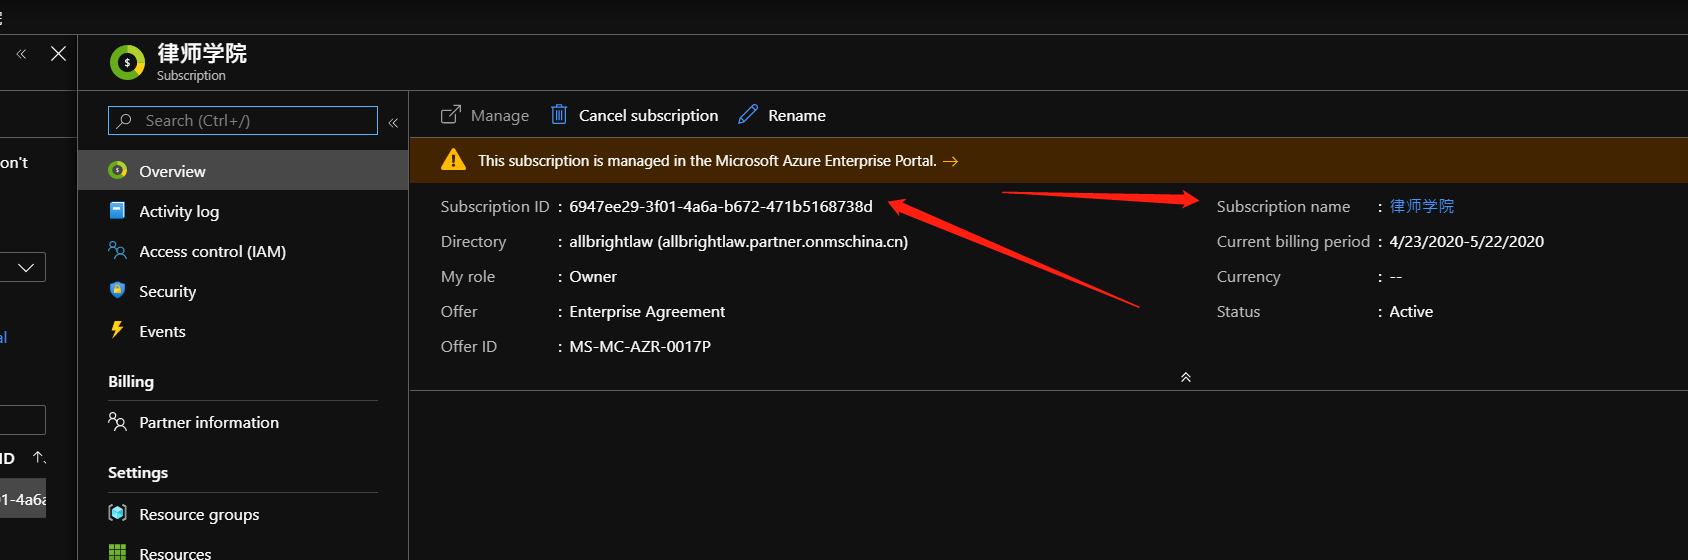
Now fill the subscription ID and subscription name. Those values you can find in your subscription details tab.
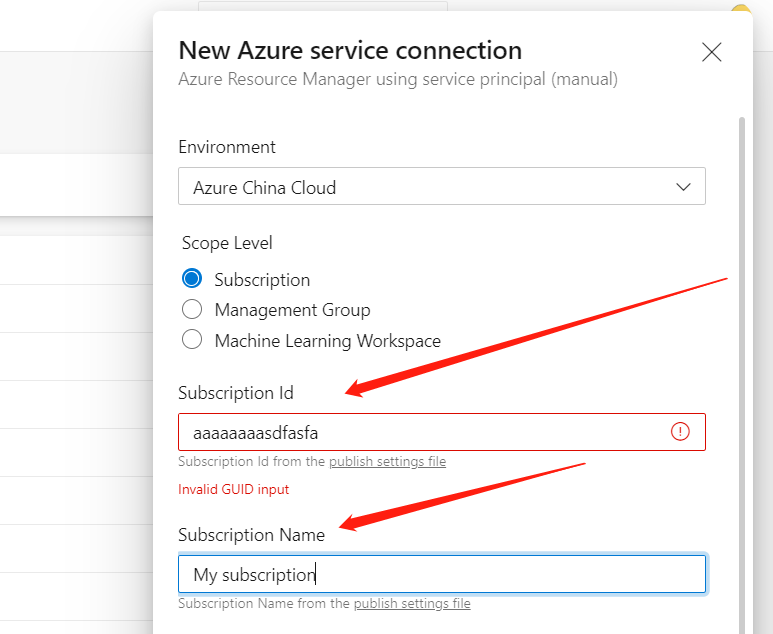
Find those values here:
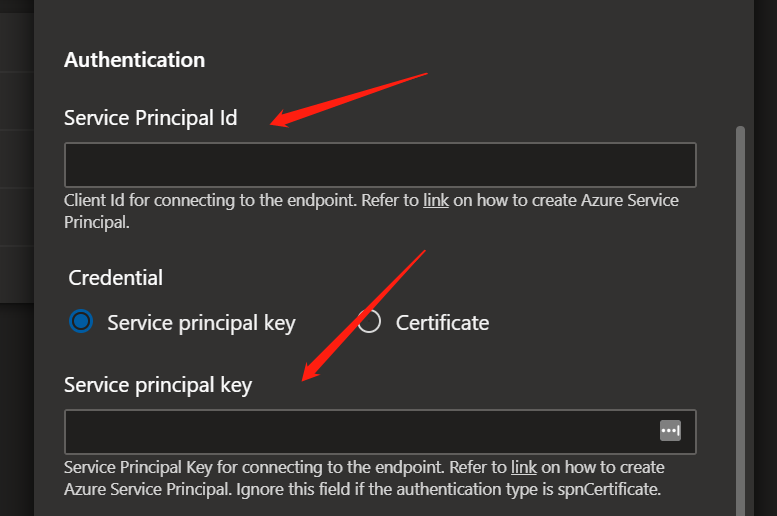
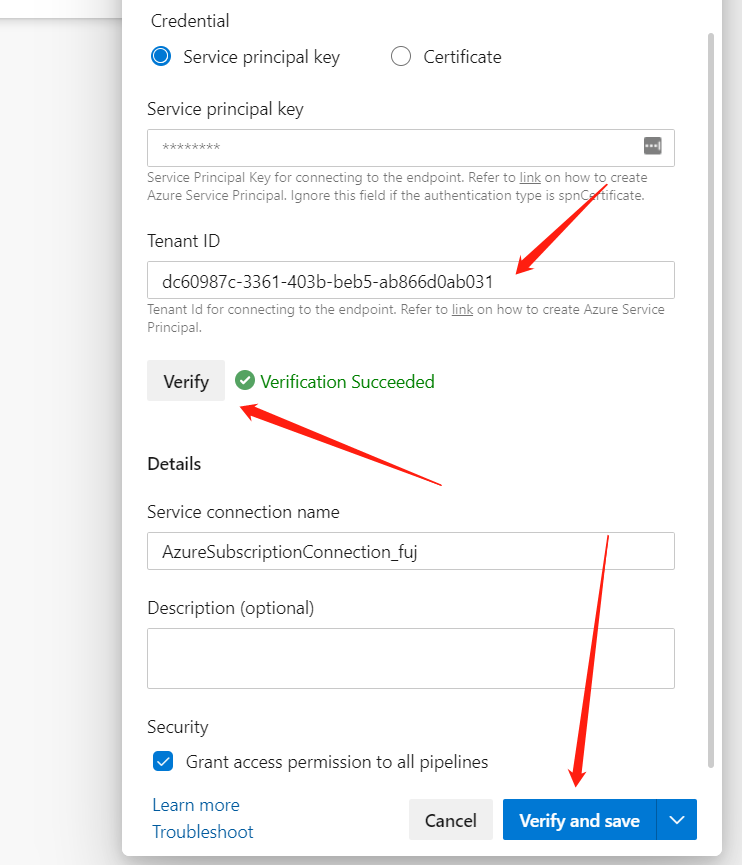
To fill the service principal id and key, just paste your new registered app's application id and secret value.
And for the tenant id, this comes from your Azure AD details page.

Find tenant ID here:
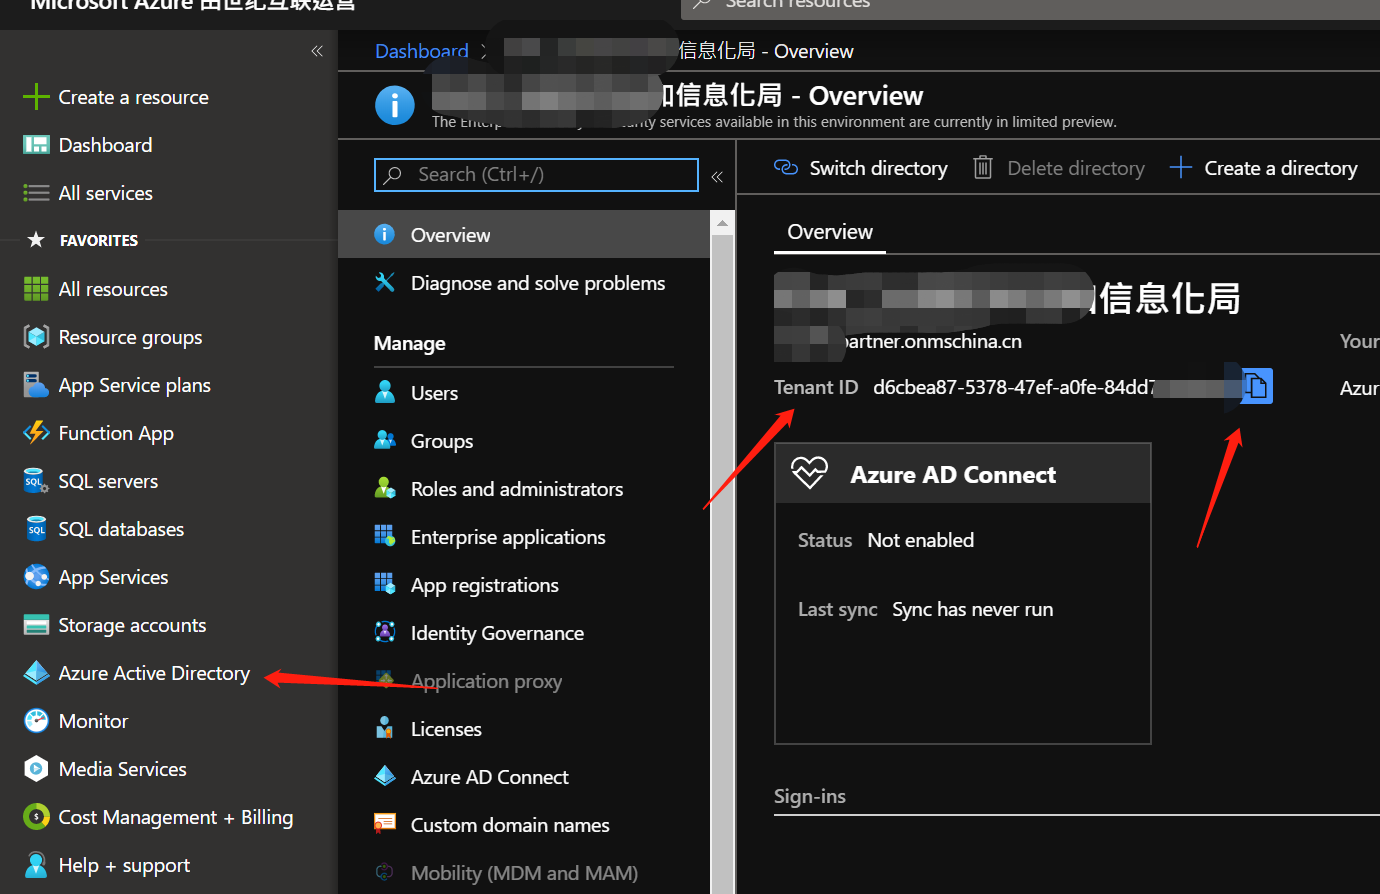
After filling all values above, click verify and the save button.
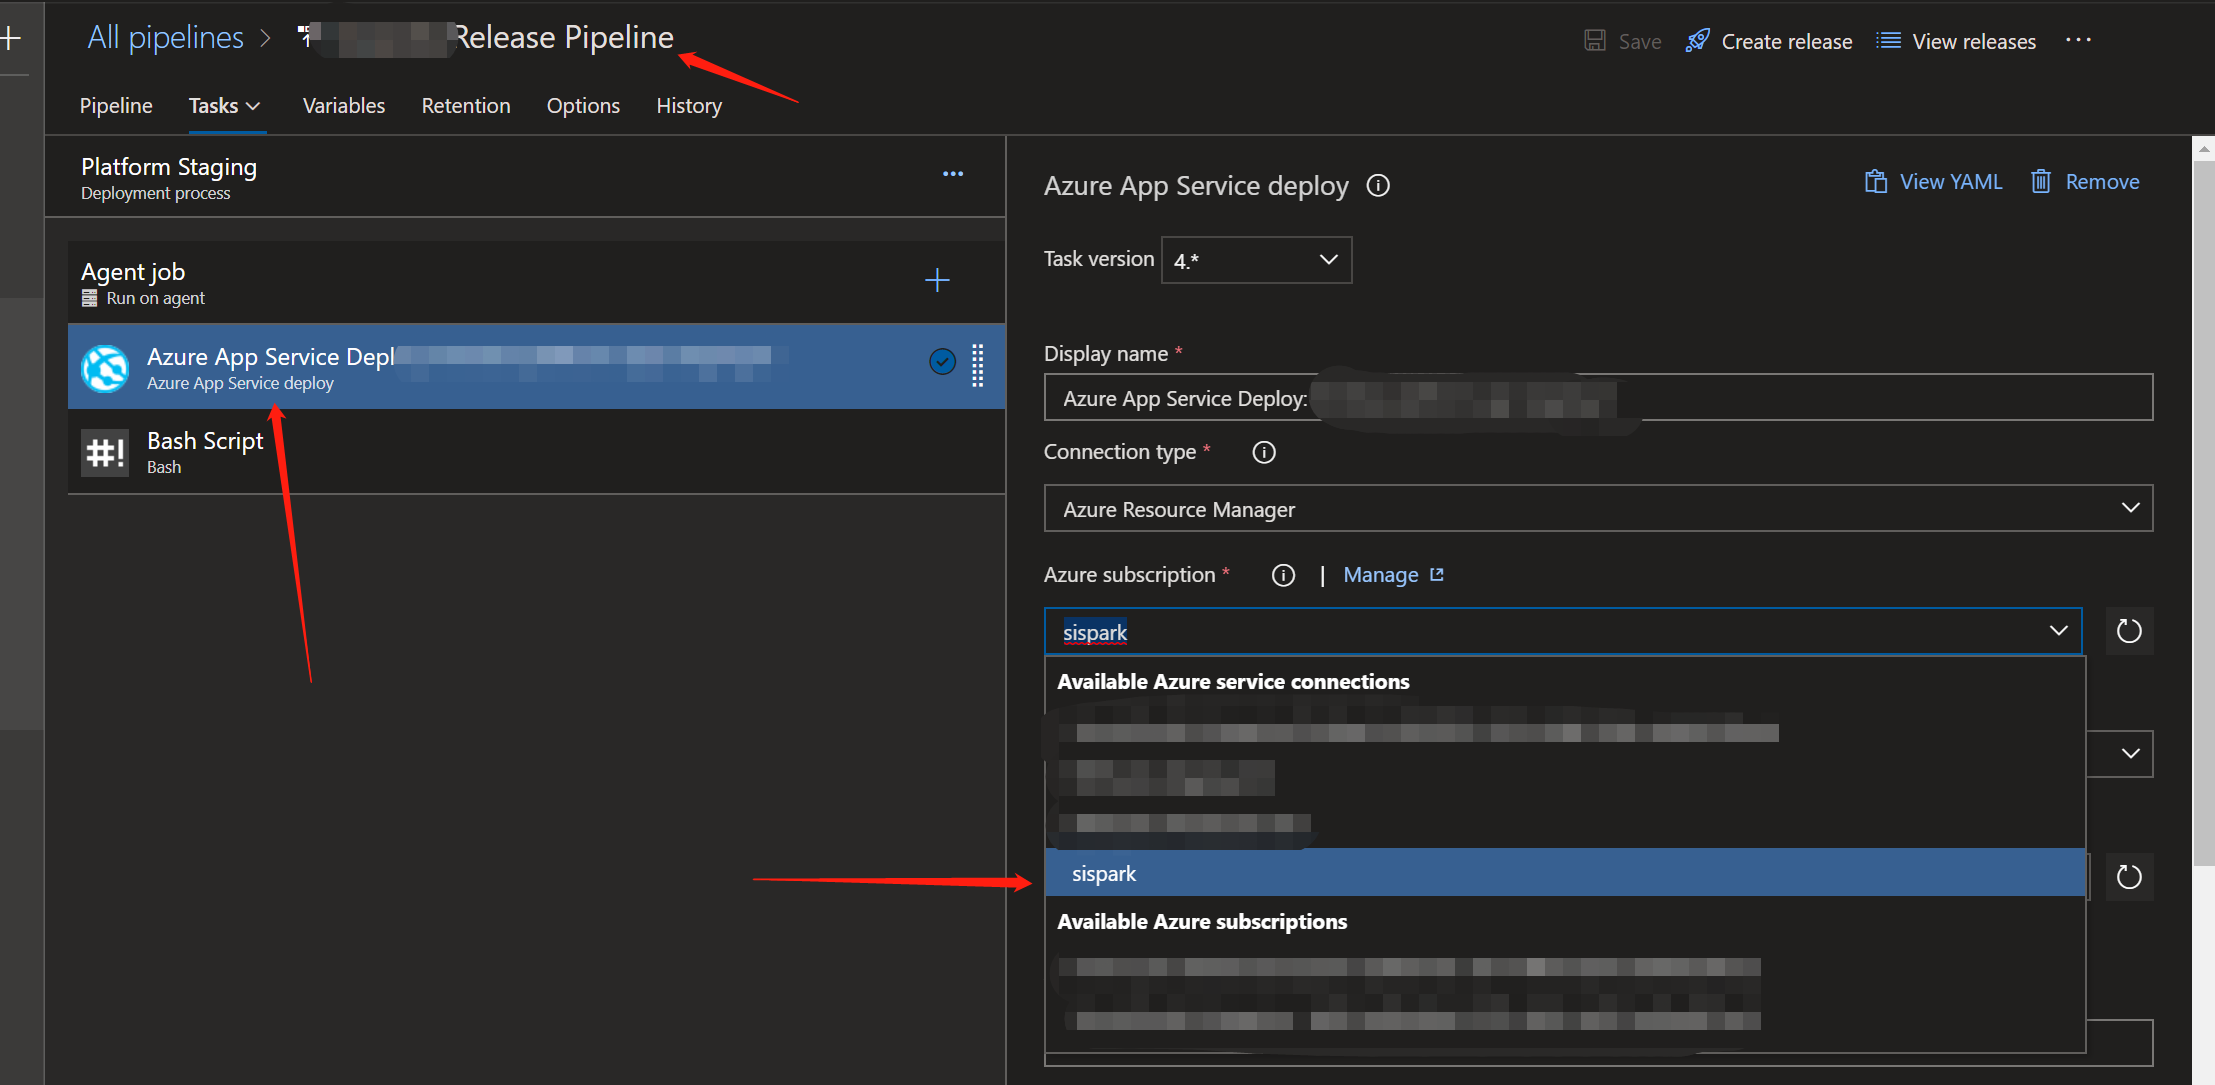
Now you can work on your pipeline and publish your app to this service connection:
这篇文章系统性地梳理了Azure DevOps向非全球Azure环境(如Azure CN)部署应用的完整流程,具有显著的实践价值。作者通过分步骤的图文结合方式,完整覆盖了从Azure AD应用注册、权限配置到服务连接设置的全流程,尤其在解决"自动配置仅支持Azure Global"这一痛点时,精准定位了手动配置的必要性,体现了对Azure多云环境差异的深刻理解。
文章的核心亮点在于:1)通过对比Global环境与非Global环境的配置差异,揭示了服务连接的底层机制;2)强调应用注册的最小权限原则(contributor角色分配),符合云安全最佳实践;3)详细说明了tennant ID等关键参数的获取路径,避免了开发者常见的配置迷航问题。这些设计使文章既可作为操作手册,又能帮助读者建立云服务连接的系统性认知。
建议的改进方向包括:1)增加对环境变量配置的说明(如Azure CN的登录端点差异),避免读者在其他非Global环境(如Azure Government)配置时产生困惑;2)补充密钥安全存储建议(如Azure Key Vault集成),强化安全维度;3)可补充验证服务连接的测试步骤(如部署后资源验证或错误日志定位),提升操作闭环性。此外,部分截图链接若能采用更稳定的托管方式,将更有利于长期知识沉淀。
文章在技术细节的准确性上表现良好,未发现明显逻辑或事实错误。建议作者可延伸探讨:1)多环境部署的自动化配置方案(如通过ARM模板统一配置);2)不同Azure环境下的RBAC权限差异管理;3)与Azure Arc环境的集成扩展,这些方向将进一步提升文章的深度和适用场景。
这篇文章详细介绍了如何将应用程序从 Azure DevOps 发布到非全球 Azure 环境(如 Azure CN)。以下是对此内容的进一步分析和建议:
文章结构与步骤
可能遇到的问题及解决方案
延伸建议
总结
这篇文章为用户提供了清晰的步骤来配置 Azure DevOps 以发布到非Global Azure 环境。通过添加更多细节和安全建议,可以使内容更加全面,帮助读者顺利完成任务并确保系统的安全性。
这篇博客详细地介绍了如何使用Azure DevOps将编译完的应用发布到非Azure Global环境,例如Azure CN。作者通过详细的步骤和截图清晰地展示了整个过程,包括在Azure门户中创建新的应用注册、为应用分配角色以及在Azure DevOps中添加新的服务连接等。
文章的核心理念是帮助用户解决在非全球Azure环境中发布应用的问题。这是一个非常有价值的主题,因为很多用户可能会遇到这个问题,而作者提供了一种简单易行的解决方案。
文章的闪光点在于作者详细的操作步骤和清晰的截图。这些截图使得读者更容易理解并跟随操作,避免在实际操作中出现错误。
然而,文章也存在一些可以改进的地方。首先,作者可以在文章开头简要介绍一下Azure DevOps和非全球Azure环境,以帮助不熟悉这些概念的读者更好地理解文章的内容。其次,文章中的一些截图可能过于局部,导致读者难以看清楚截图中的具体内容。作者可以考虑对截图进行适当的裁剪和放大,以使其更加清晰易读。最后,文章可以在结尾处加入一段总结,回顾整个过程并强调关键点,以便读者在完成操作后加深对文章内容的理解。
总的来说,这是一篇很有价值的博客,作者通过详细的步骤和截图解决了用户在非全球Azure环境中发布应用的问题。希望作者继续分享更多有关Azure DevOps和其他相关技术的文章,帮助读者解决实际问题。
I've figured it out -- it was the name of the app registration! It's working now. Thanks for this wonderful article, saved my life!
I am trying to deploy from Azure DevOps to Azure China Cloud (azure.cn) app service. I followed your instructions and wasn't successful. The one step that I am not clear was when you created the Role Assignment. You've selected Contributor and User, Group or Service Principal, no problem here. But in the last textbox where it says "Select", what are you selecting there? From my end, I only see my name and email address as selectable. What is the "AzureDevOps" you are selecting in your screenshot? Thanks a lot!