
Install Nextcloud
Nextcloud is a powerful software that can work as a storage server, chat server, notes, password manager, etc. And it's open-source and free. You can host your own Nextcloud server on your own!

All steps
- Buy a server and basic configuration
- Point the domain name to it
- Install Web server and database
- Configure MySQL Server
- Download Nextcloud
- Configure Apache
- First start Nextcloud server
- Enable HTTPS
- Configure background jobs
- Install some plugins (Optional)
- Attach a bigger HDD for data (Optional)
- Finish region settings (Optional)
- Finish Email settings (Optional)
- Finish Redis settings (Optional)
- Setup backup (Optional)
- Setting up a reverse proxy? (Optional)
- Enable GPU acceleration for the recognize app (Optional)
Step 1 - Get an Ubuntu server
Here, you can create a local server or purchase an Ubuntu server from a cloud service provider.
You can buy a pure server at Vultr, Azure, or DigitalOcean.
After you installing a pure Ubuntu, or buying a new cloud Ubuntu server, you need to first finish the basic authentication configuration.
Follow instructions here to:
- Delete other accounts.
- Create your own account instead of root.
- Disable password login and force to use SSH key to log in.
- Disable root account.
- Enable sudo without password.
- Enable firewall.
- Adjust timezone.
- Enable BBR
Best-practice for authentication after creating a new Linux server
Of course, you need to make sure that this Ubuntu server can access the Internet and can be accessed by your other servers.
Step 2 - Point the domain name to it
You need to have a valid domain name so you can point it to your server.
Buy one if you don't have. You can try Godaddy.
Set a new A record to point the domain name to your server's IP address.

Step 3 - Install Web server and database
Install Web server and database:
sudo apt install apache2 mysql-server -y
And then enable those:
sudo systemctl enable apache2
sudo systemctl start apache2
sudo systemctl status apache2
sudo systemctl enable mysql
sudo systemctl start mysql
sudo systemctl status mysql
Then install other dependencies:
sudo apt install php zip libapache2-mod-php php-gd php-json php-mysql php-curl php-mbstring php-intl php-imagick php-xml php-zip php-bcmath php-gmp php-imagick imagemagick zip -y
Step 4 - Configure MySQL Server
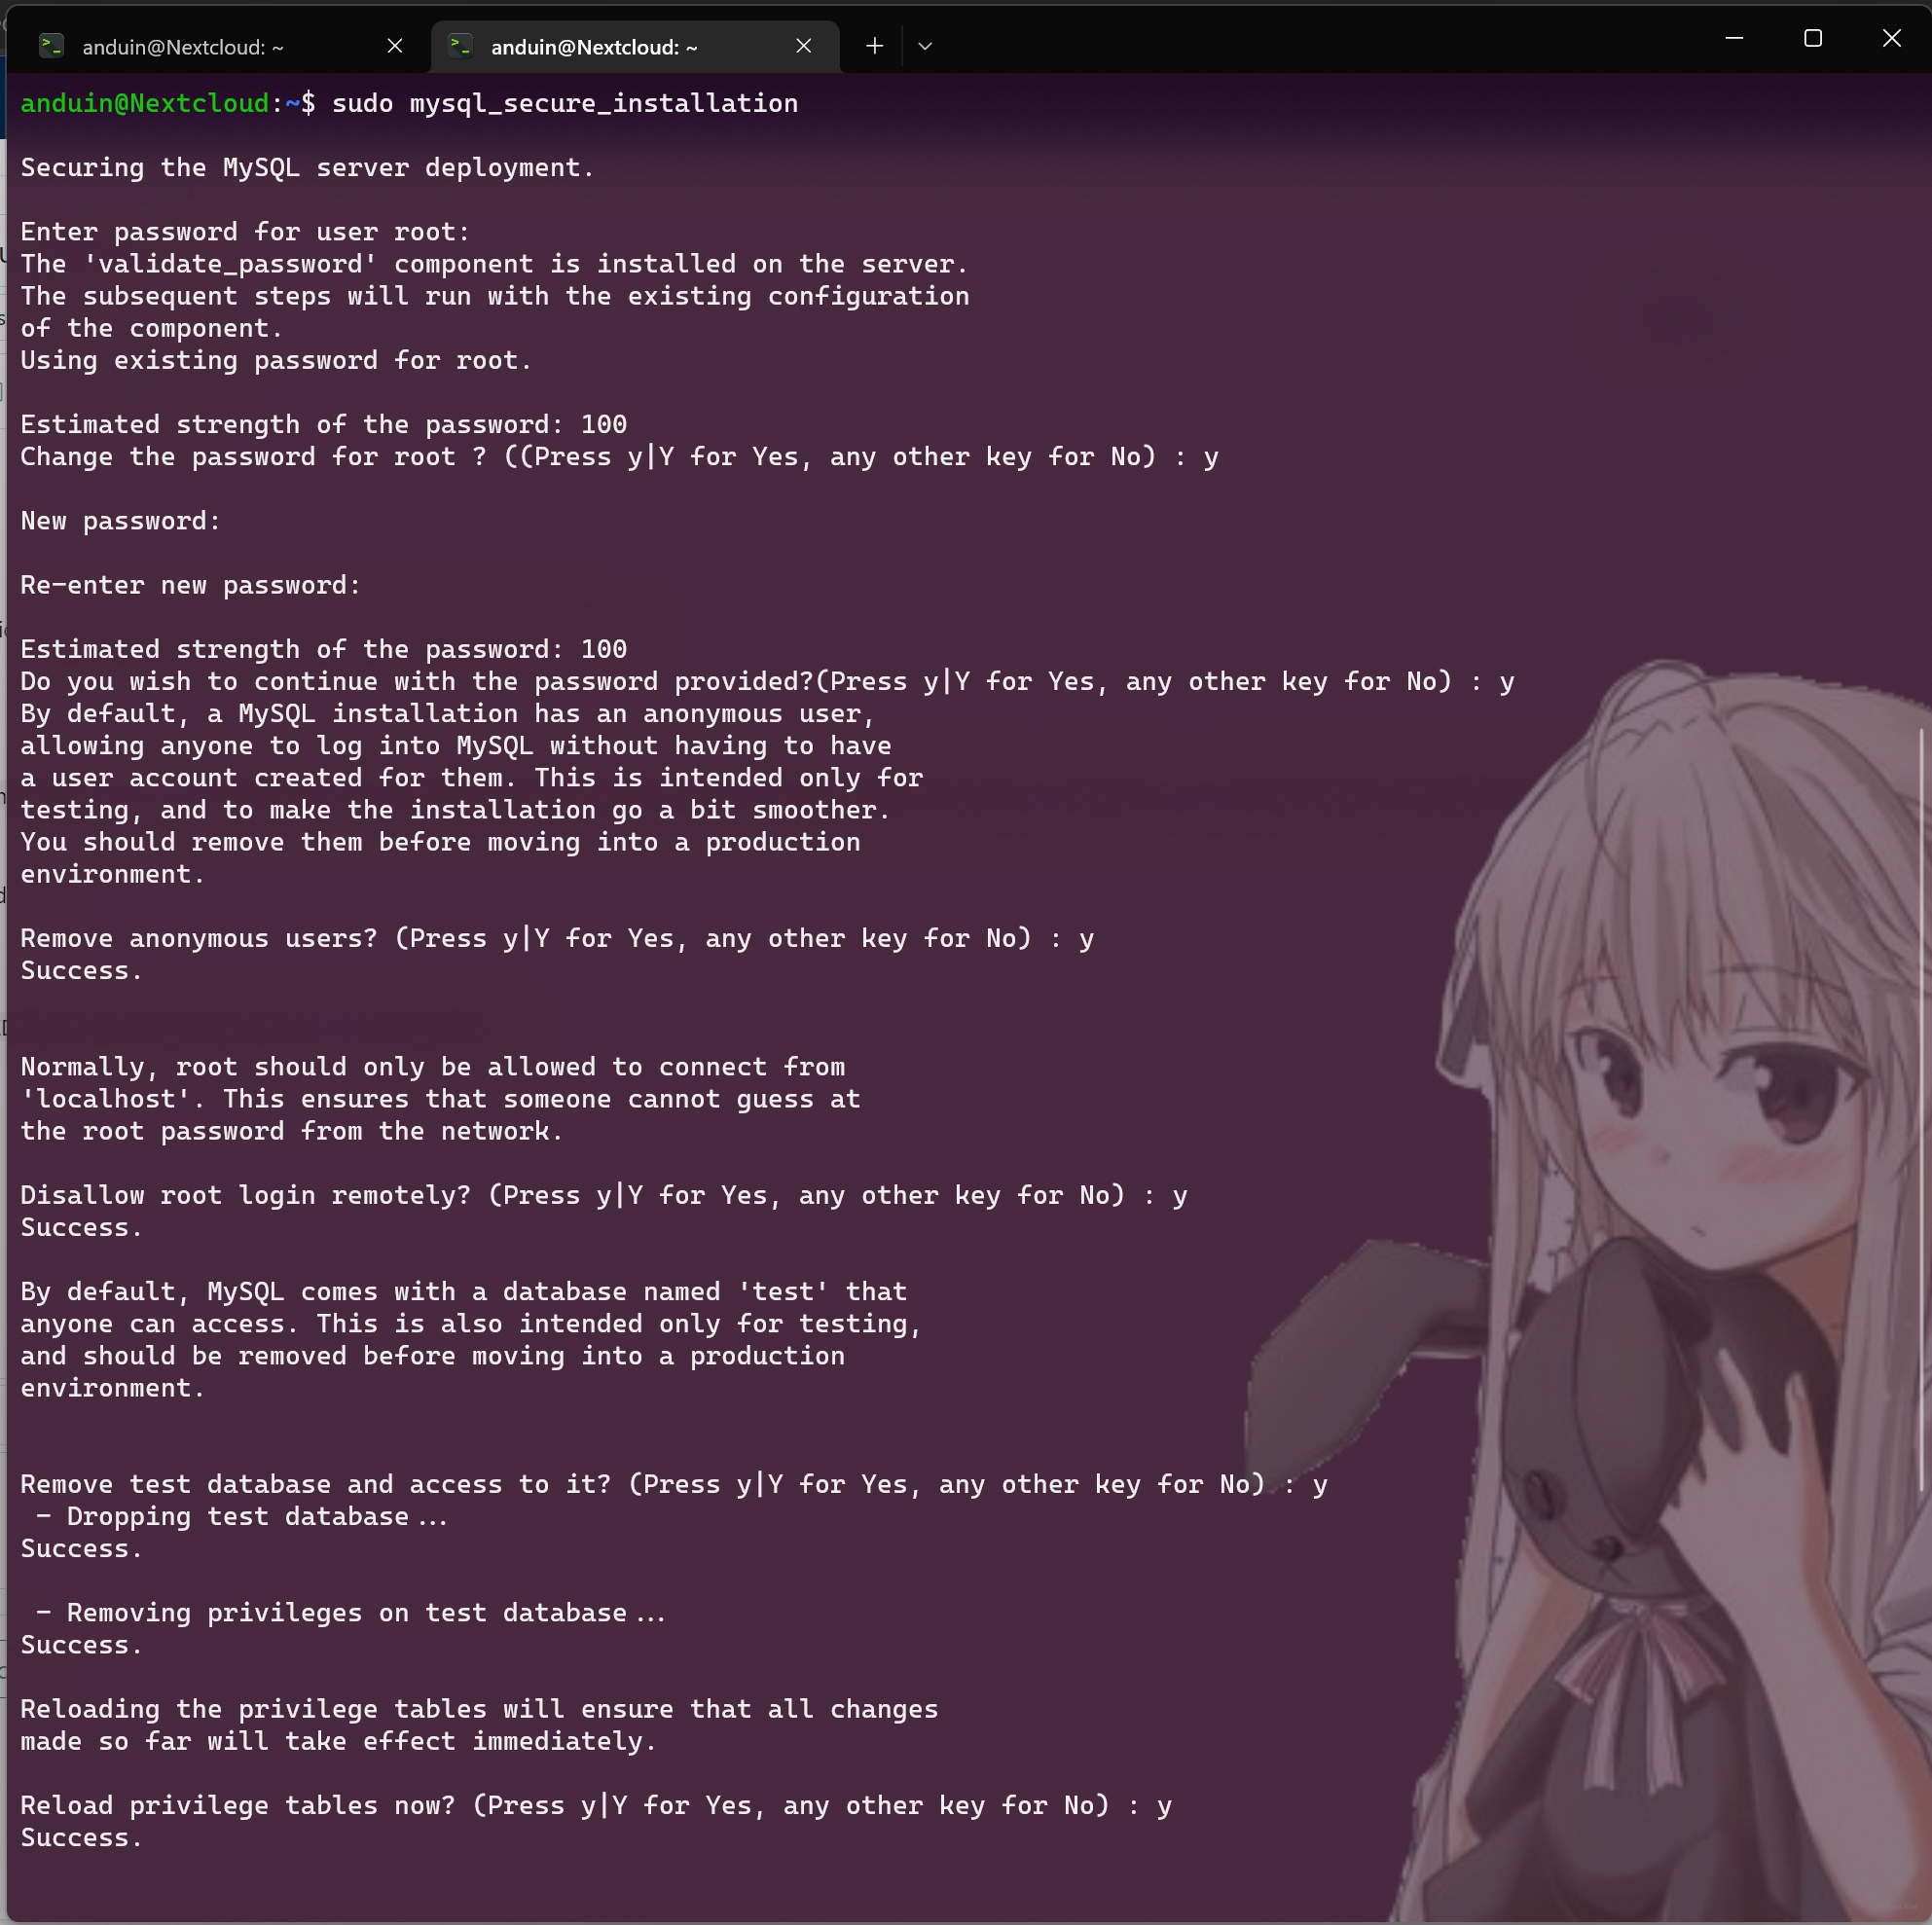
We need to set a password for the MySQL admin user with the command:
sudo mysql_secure_installation
Give the MySQL admin user a strong/unique password and answer the remaining questions with y (for yes).
You may see error:
Failed! Error: SET PASSWORD has no significance for user 'root'@'localhost' as the authentication method used doesn't store authentication data in the MySQL server. Please consider using ALTER USER instead if you want to change authentication parameters.
And you can run the following command to fix:
sudo mysql
ALTER USER 'root'@'localhost' IDENTIFIED WITH mysql_native_password by 'mynewpassword';
exit;
And then run:
sudo mysql_secure_installation
Now it's time to create database and user. Sign in MySQL first:
sudo mysql -u root -p
Create the new database with the command:
CREATE DATABASE nextcloud;
Create a new user with the command:
CREATE USER 'nextcloud'@'localhost' IDENTIFIED BY 'YOUR_STRONG_PASSWORD';
Where YOUR_STRONG_PASSWORD is a unique and strong password.
Give the new user the necessary permissions with the command:
GRANT ALL PRIVILEGES ON nextcloud.* TO 'nextcloud'@'localhost';
Flush the privileges and exit the console with the commands:
FLUSH PRIVILEGES;
exit;
Step 5 - Download Nextcloud
Download nextcloud archive at:
cd ~
wget https://download.nextcloud.com/server/releases/latest.zip
Unzip it:
unzip latest.zip
Move it to apache root:
sudo mv ./nextcloud/ /var/www/html/
Give the Nextcloud folder the necessary ownership:
sudo mkdir /var/www/.cache
sudo mkdir /var/www/.cache/samba
sudo chown -R www-data:www-data /var/www/html/nextcloud
sudo chown -R www-data:www-data /var/www/.cache
Step 6 - Configure Apache
Set up configuration:
Where the ServerName is your domain name!
echo '<VirtualHost *:80>
        DocumentRoot "/var/www/html/nextcloud"
        ServerName next.aiurs.co

        <Directory /var/www/html/nextcloud/>
                Require all granted
                Options FollowSymlinks MultiViews
                AllowOverride All

                <IfModule mod_dav.c>
                        Dav off
                </IfModule>

                SetEnv HOME /var/www/html/nextcloud
                SetEnv HTTP_HOME /var/www/html/nextcloud
                Satisfy Any

        </Directory>

</VirtualHost>' | sudo tee /etc/apache2/sites-available/nextcloud.conf
Enable the new site with the command:
sudo a2ensite nextcloud
Enable the necessary Apache modules:
sudo a2enmod rewrite headers dir mime env setenvif ssl
Finally, change the PHP memory limit:
sudo sed -i '/^memory_limit =/s/=.*/= 8192M/' /etc/php/8.1/apache2/php.ini
sudo sed -i '/^upload_max_filesize =/s/=.*/= 16G/' /etc/php/8.1/apache2/php.ini
sudo sed -i '/^post_max_size =/s/=.*/= 16G/' /etc/php/8.1/apache2/php.ini
sudo sed -i '/^output_buffering =/s/=.*/= 0/' /etc/php/8.1/apache2/php.ini
Note: If your version of PHP is a different release than 8.1, you’ll need to alter the above command accordingly.
And you need to allow large files uploading.
Use your favorite editor to edit /etc/php/{version}/apache2/php.ini. Search for:
opcache.interned_strings_buffer=16
Restart Apache:
sudo systemctl restart apache2
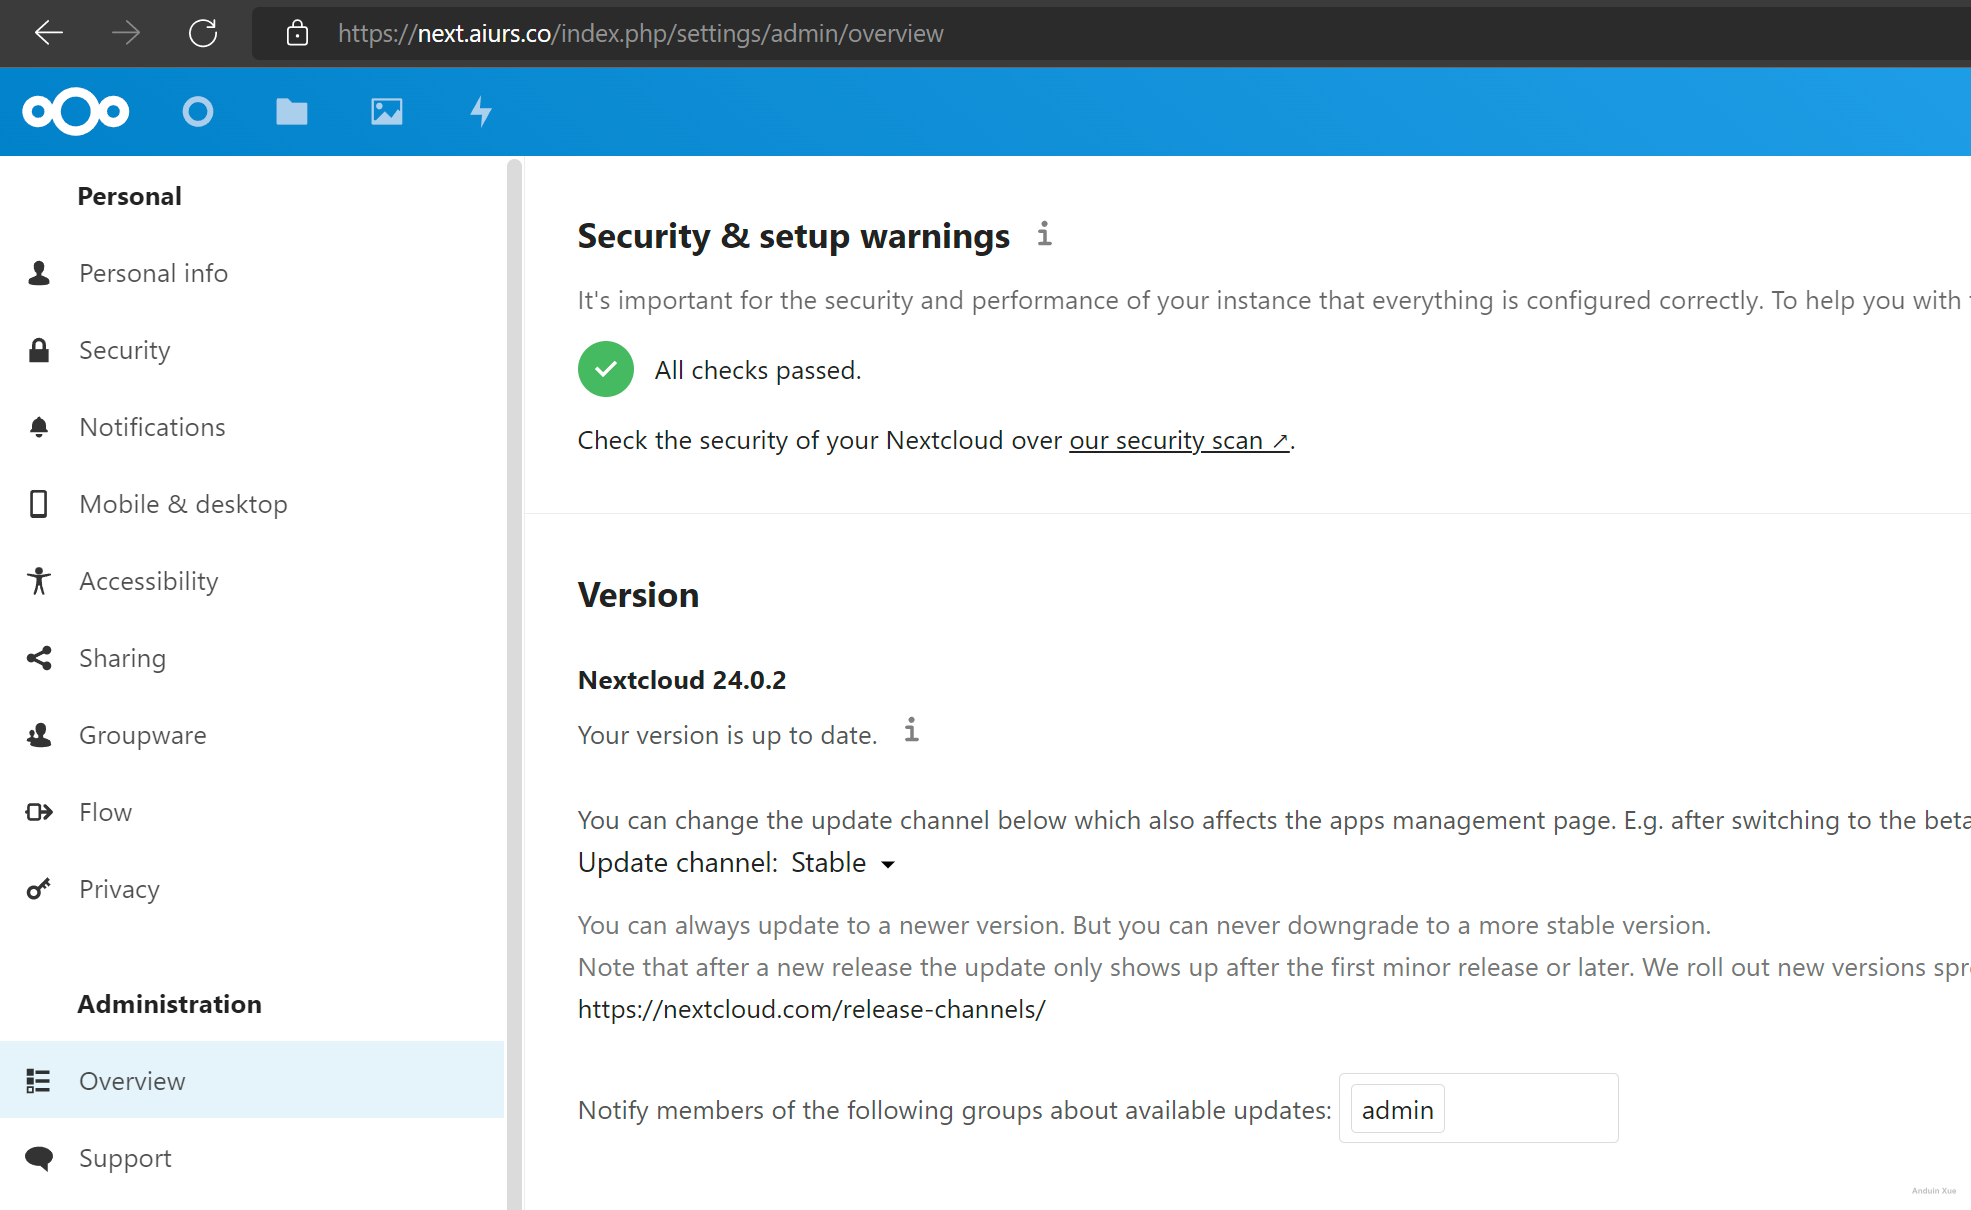
Step 7 - First start Nextcloud server
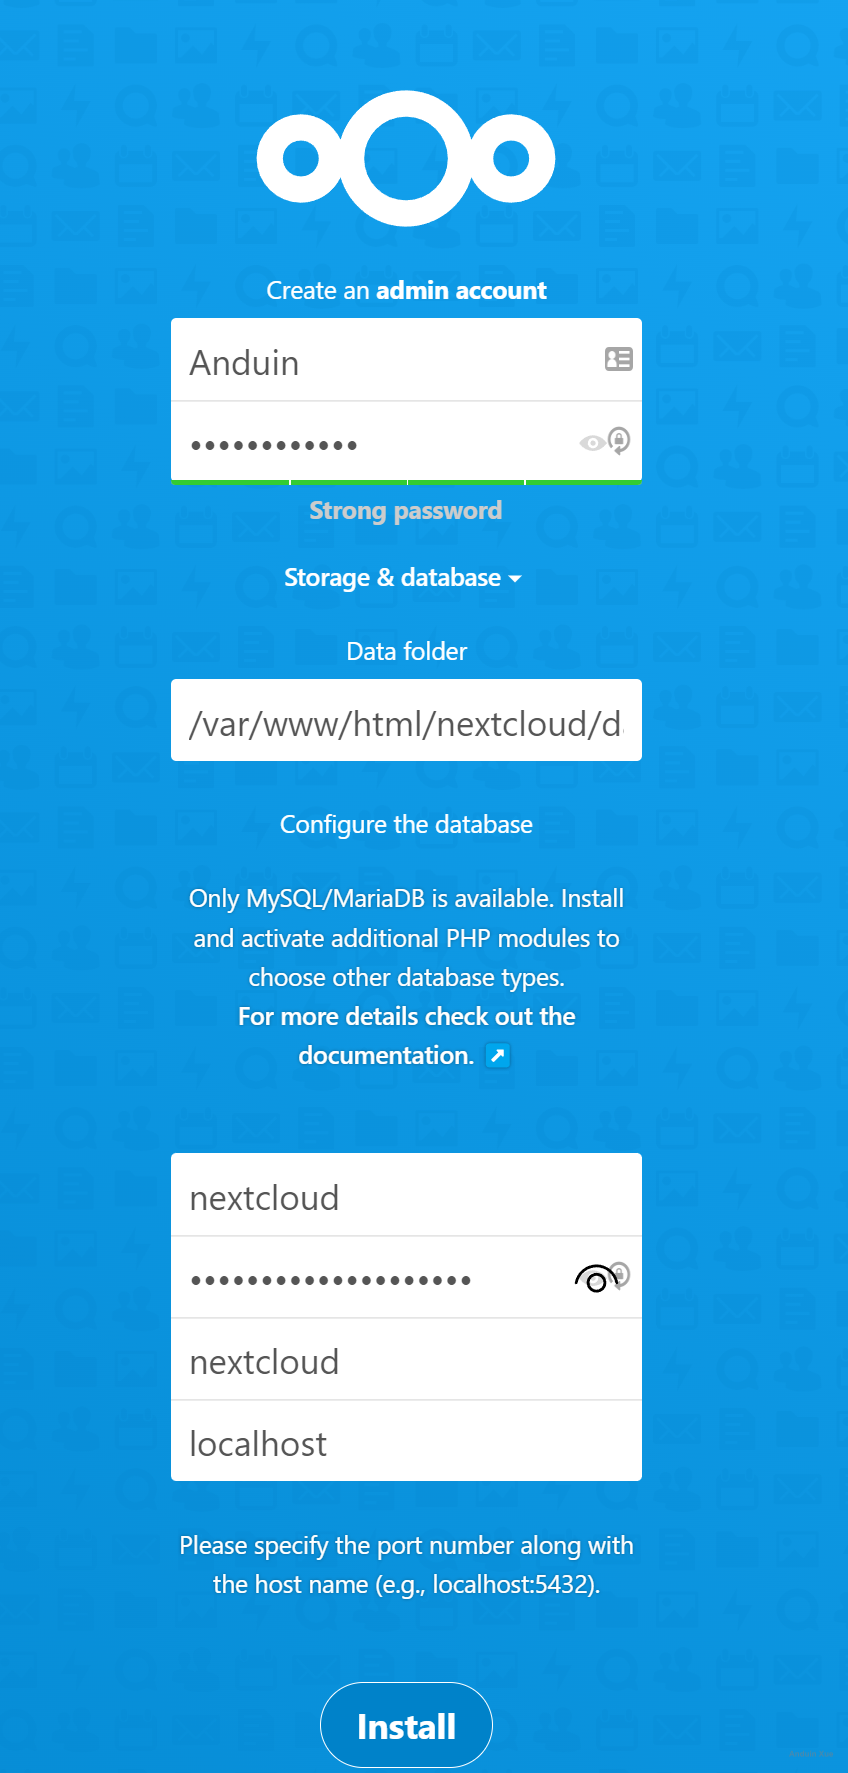
Now open the browser to open your server.
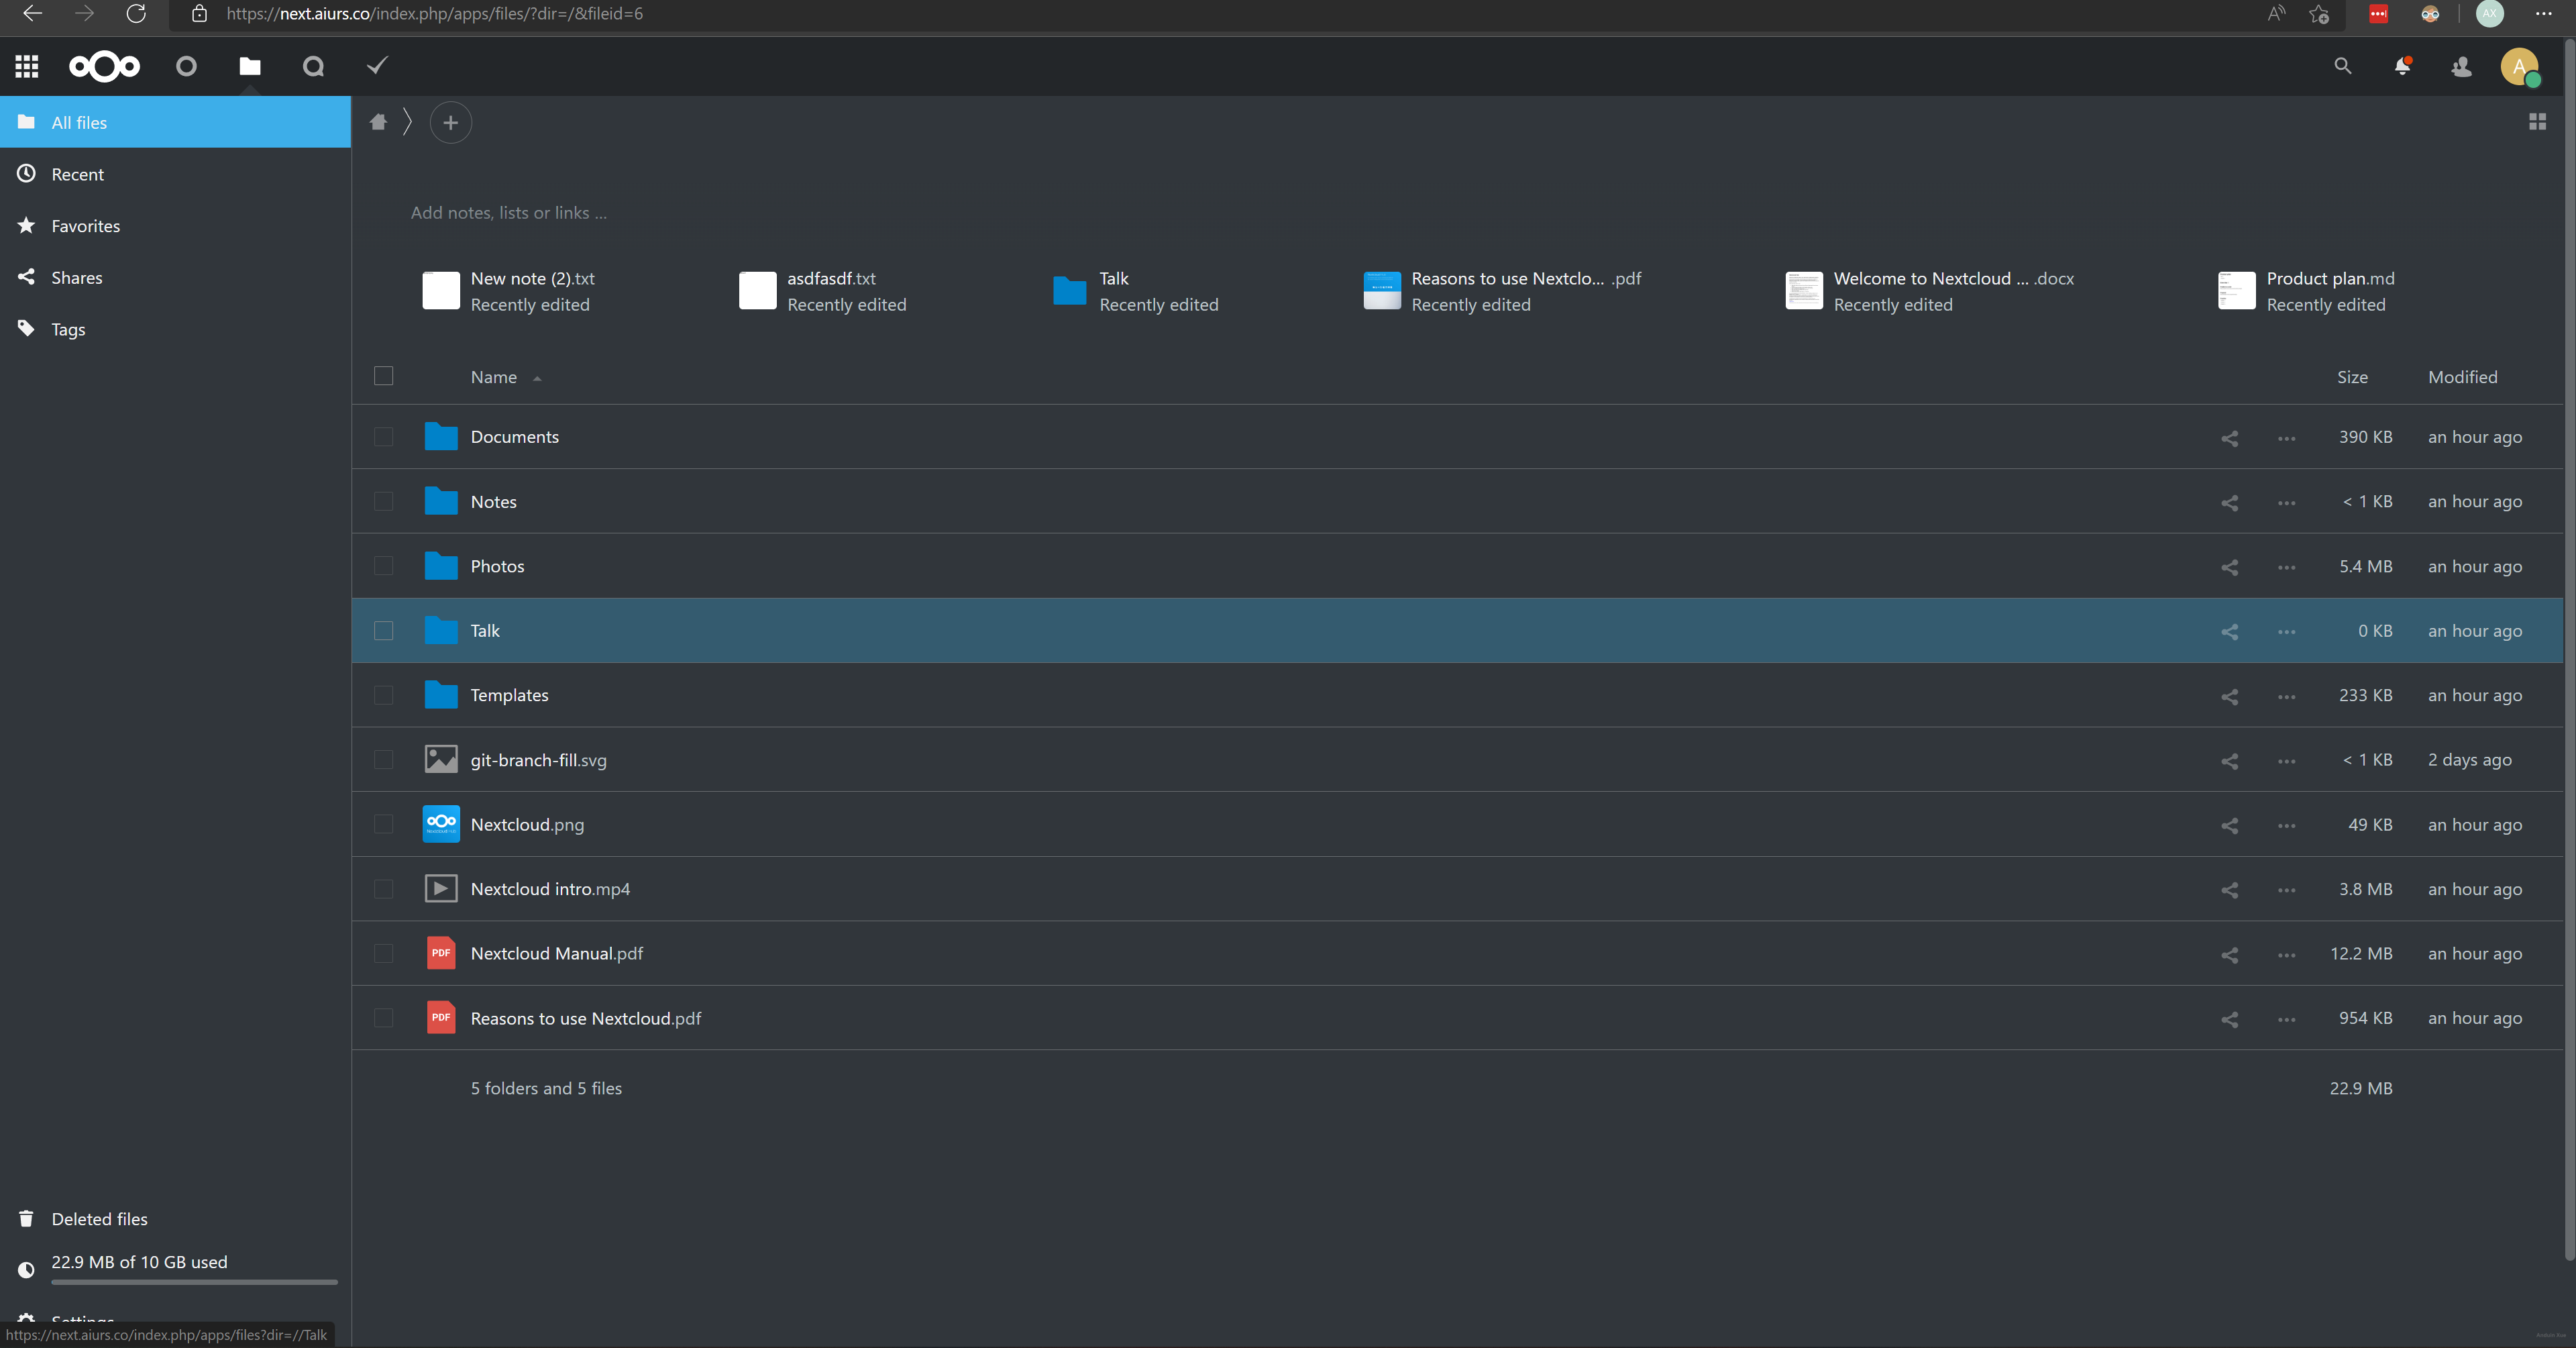
Finish basic configuration.
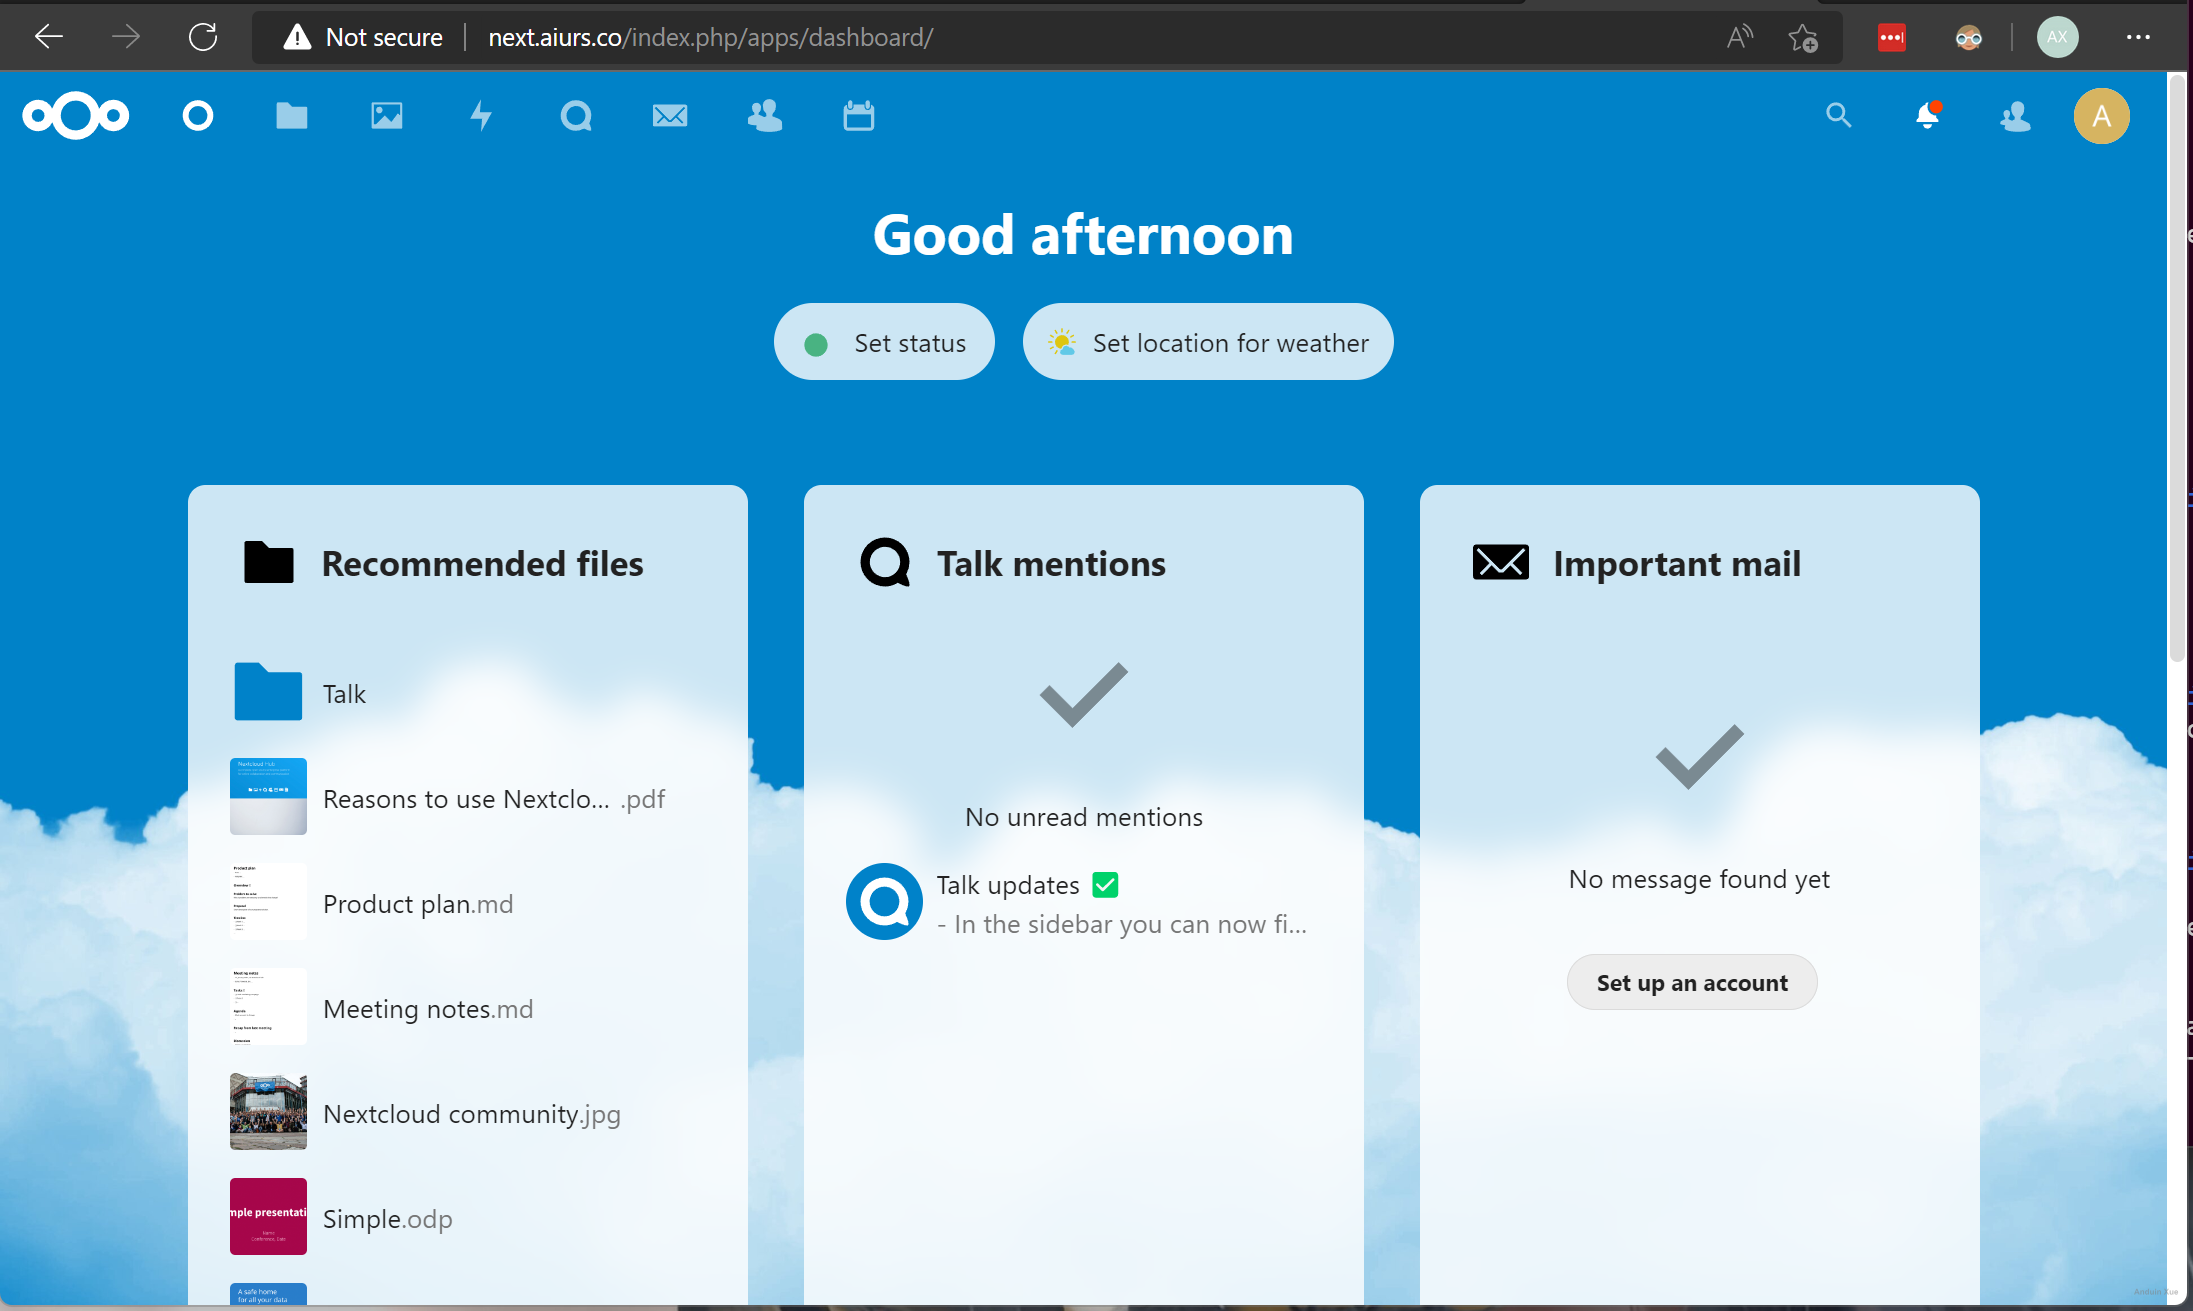
And then you can go to dashboard.
Setup default quota here:
https://next.aiurs.co/index.php/settings/users/admin
Where next.aiurs.co is your domain name.
Step 8 - Enable HTTPS
sudo apt install certbot python3-certbot-apache
And run this to get a cert:
sudo certbot --apache
After getting a cert, you can try to open your server with HTTPS:
https://domain
But you still need to configure HSTS for it.
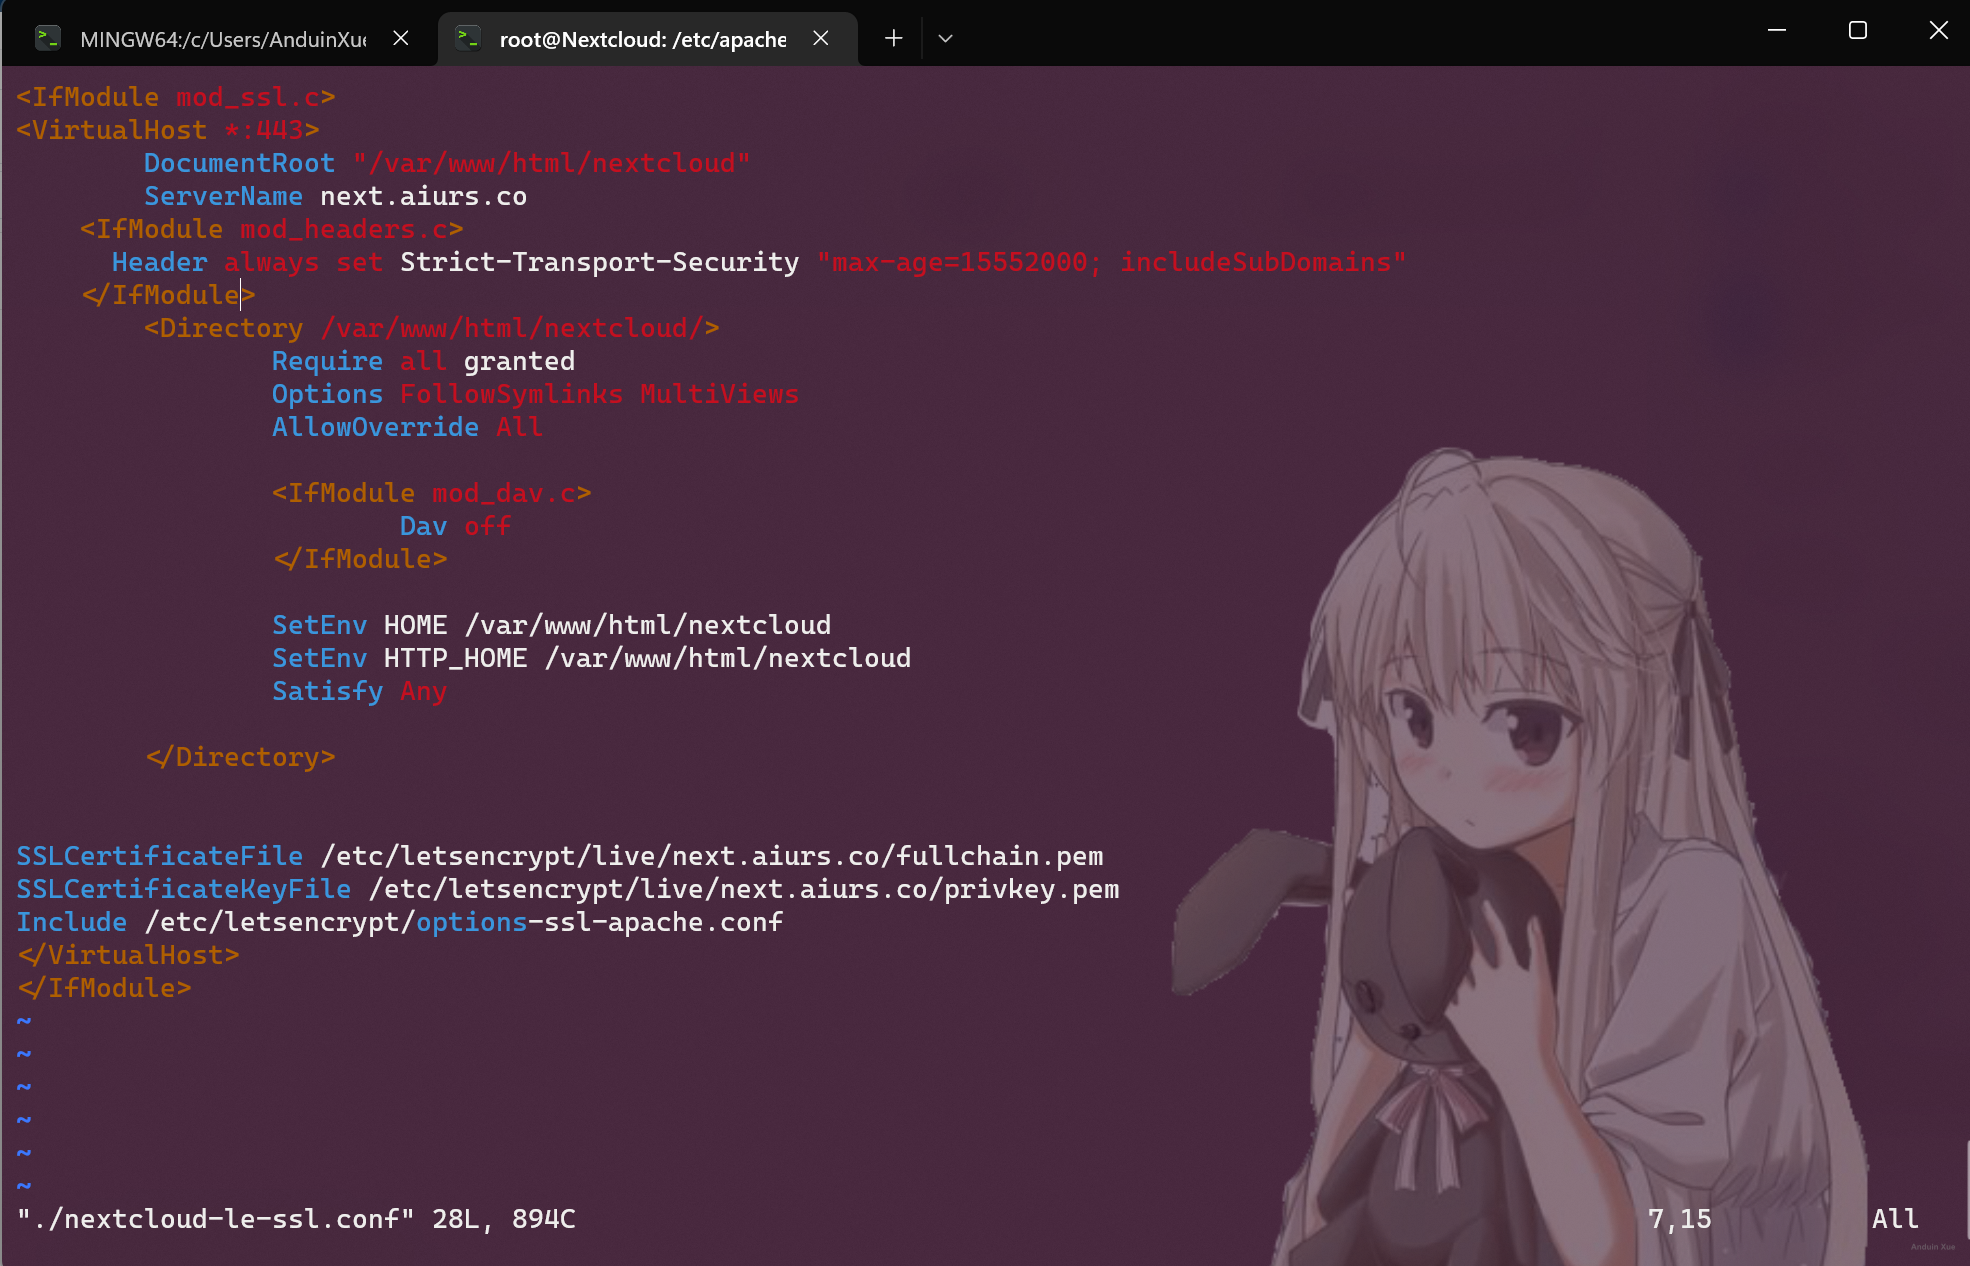
Use vim to edit: /etc/apache2/sites-available/nextcloud-le-ssl.conf. Add the following part to the server:
<VirtualHost *:443>
  ServerName cloud.nextcloud.com

    <IfModule mod_headers.c>
      Header always set Strict-Transport-Security "max-age=15552000; includeSubDomains"
    </IfModule>

 </VirtualHost>
So it finally looks like this:
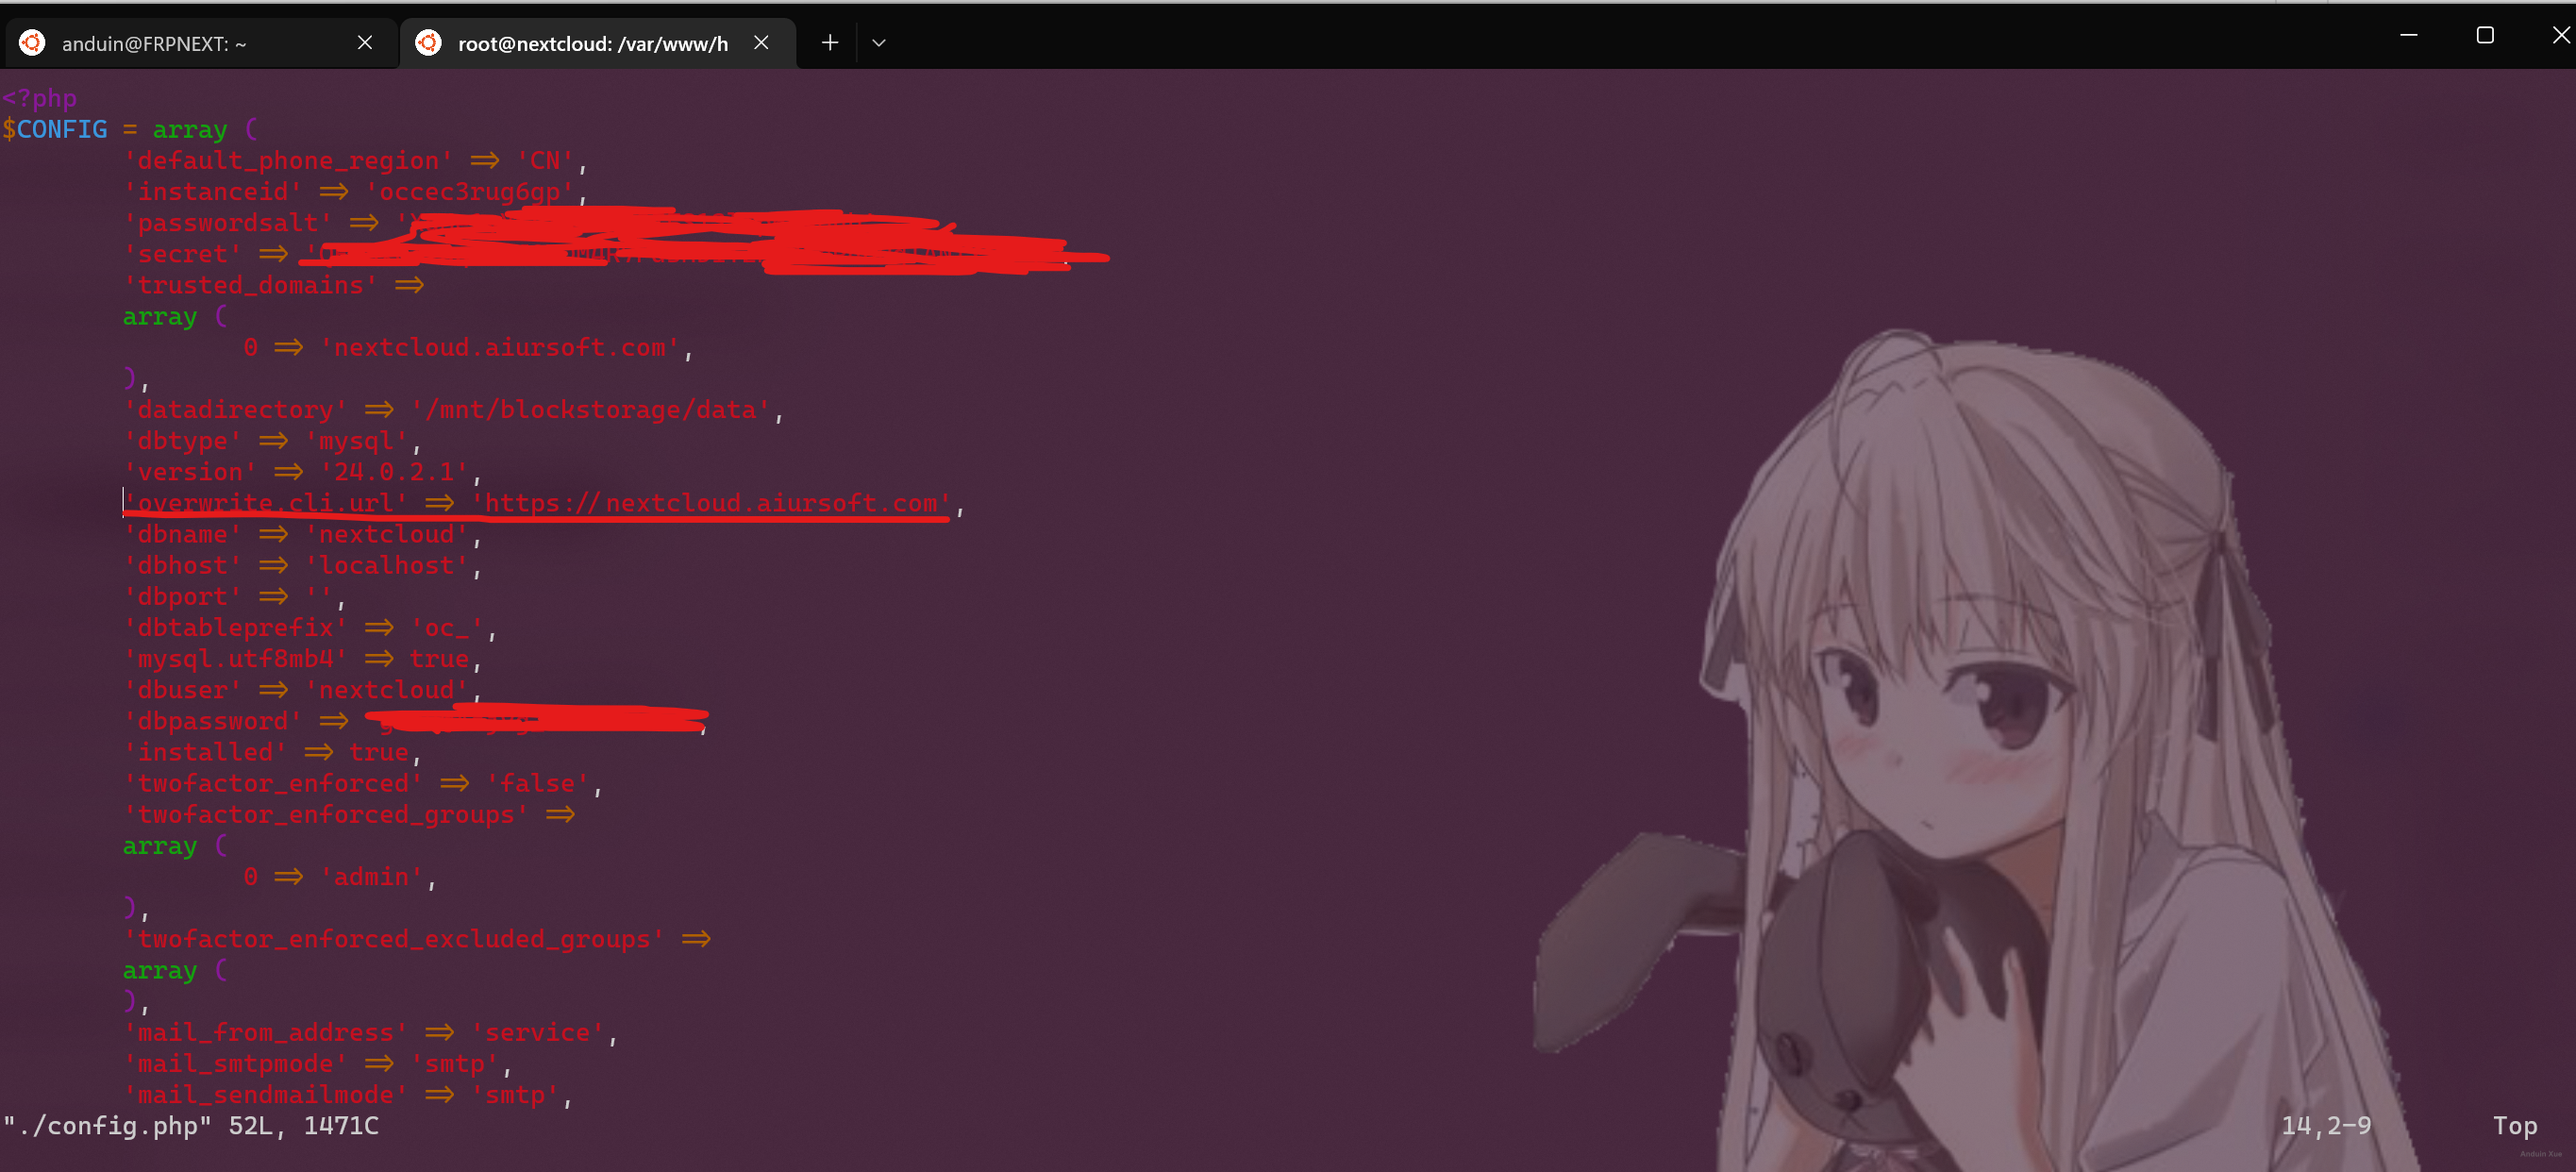
And don't forget to update the config.php file to use HTTPS.
sudo vim /var/www/html/nextcloud/config/config.php
And add or modify the property: overwrite.cli.url to https://yourdomain.com
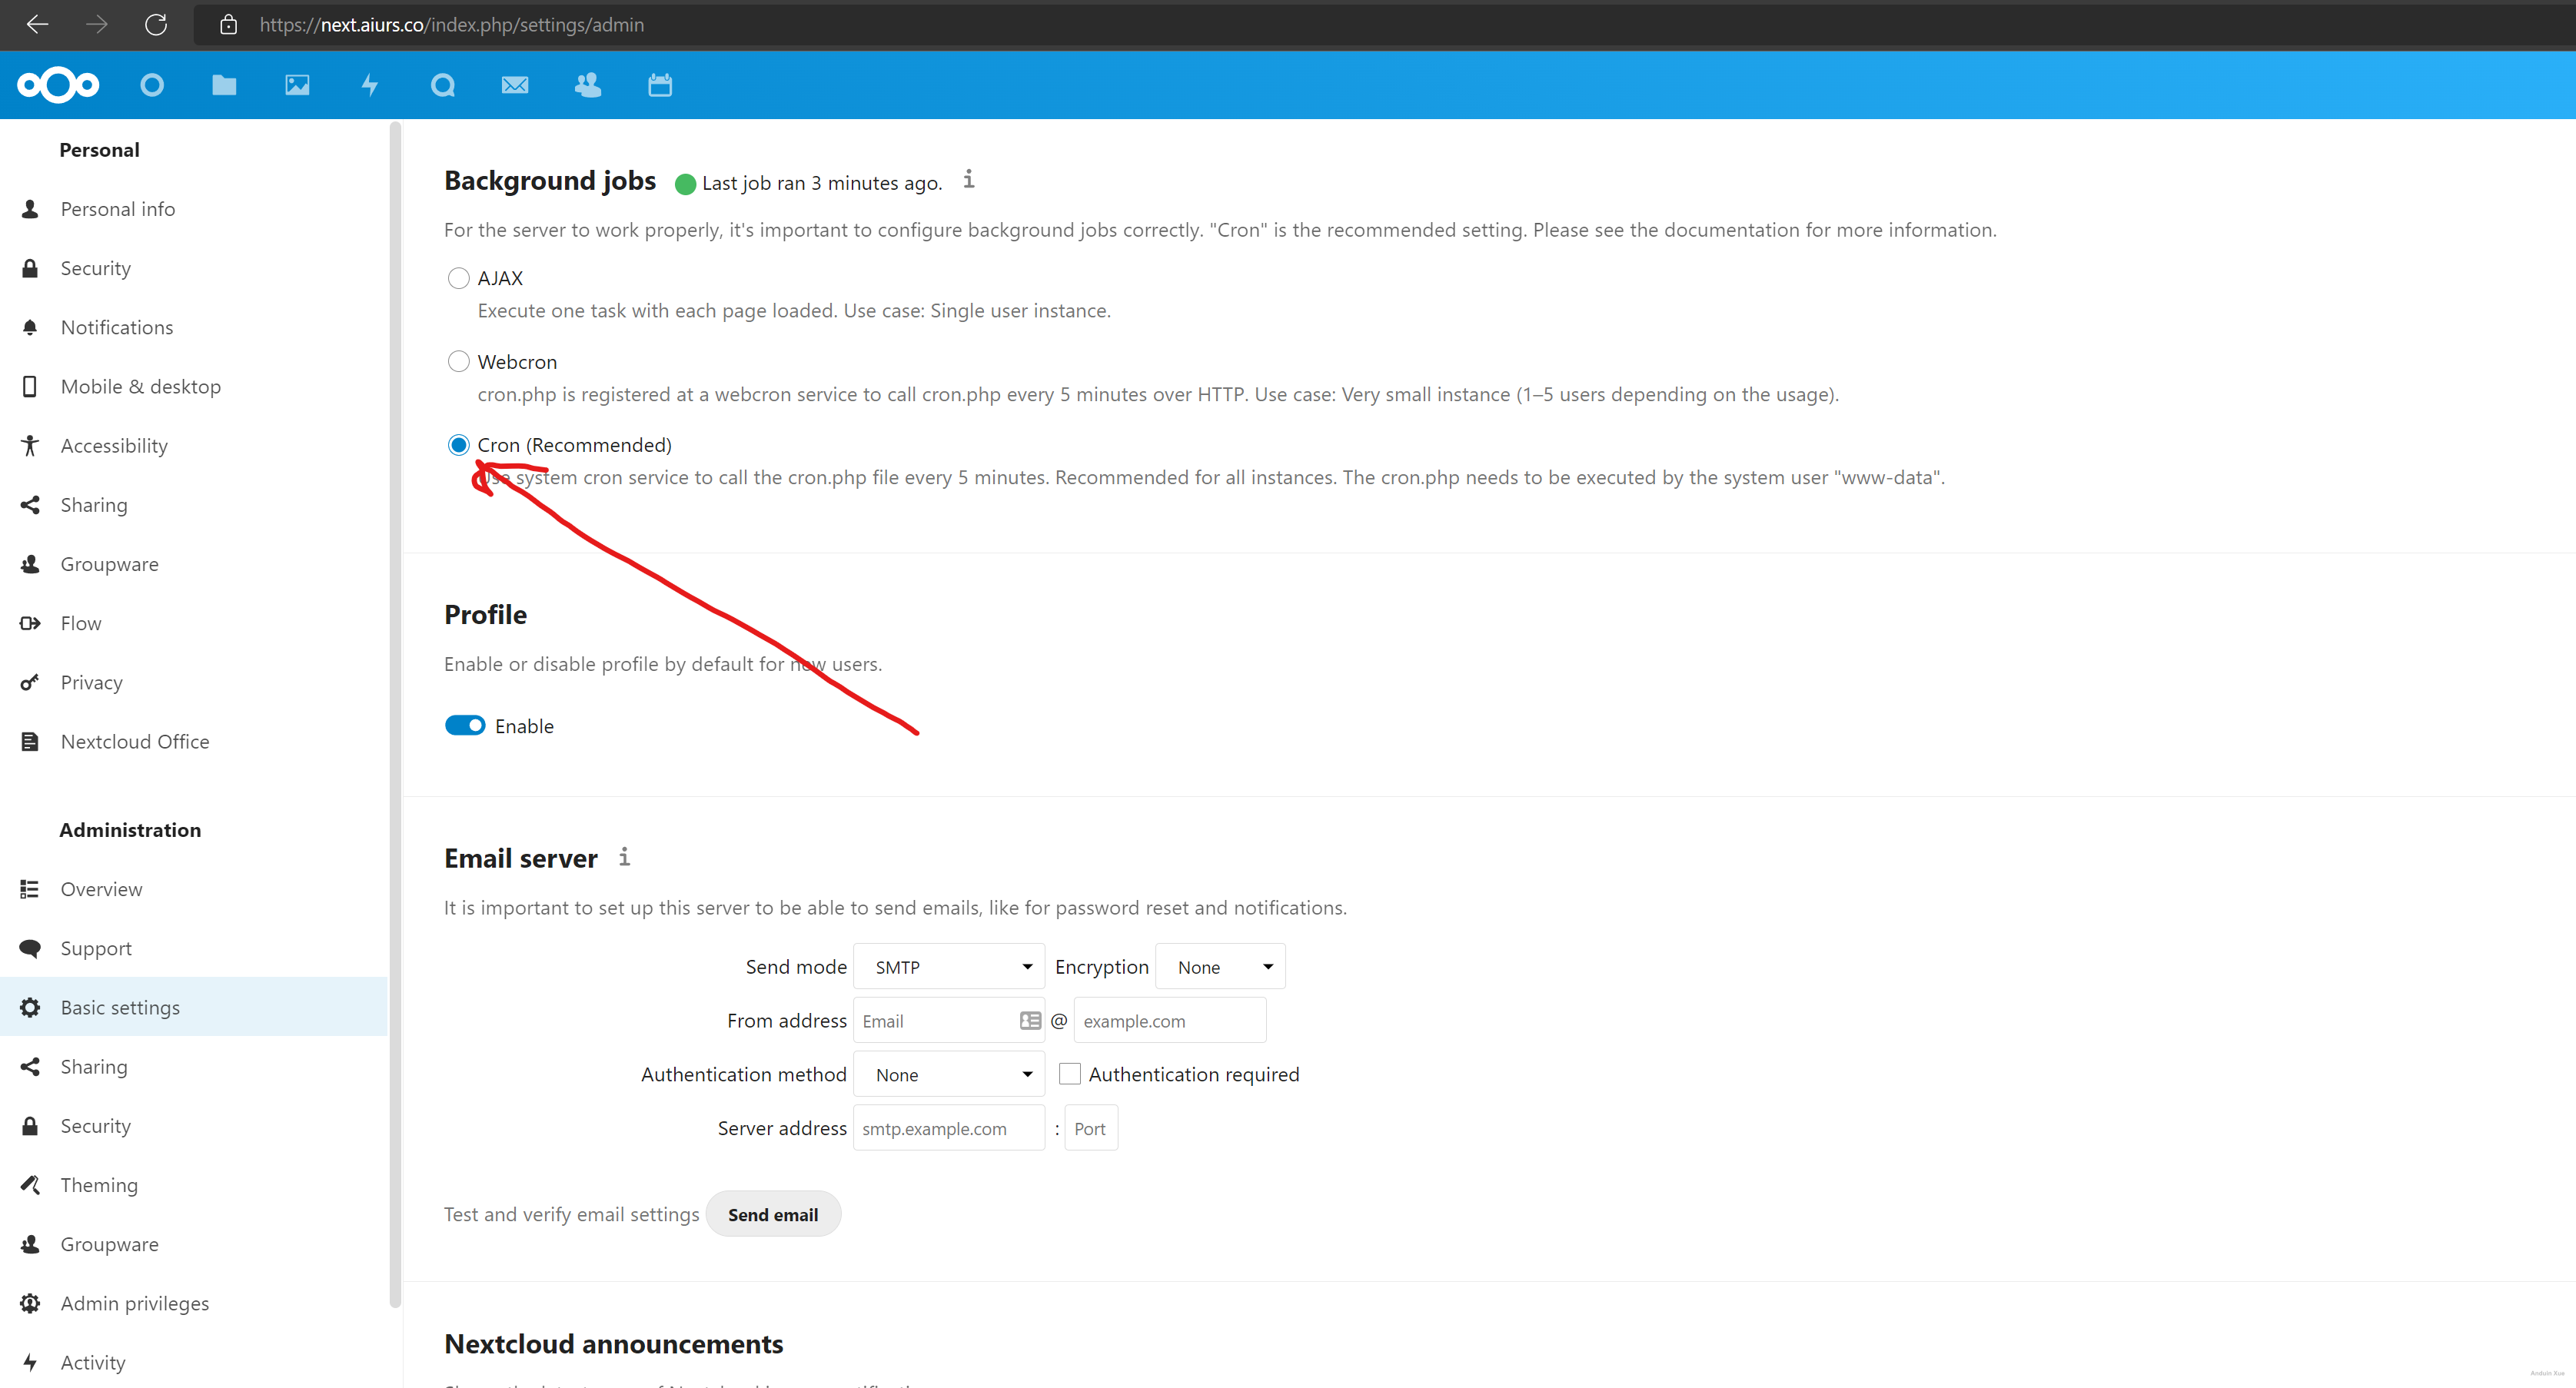
Step 9 - Configure background jobs
Now you need to set up background job settings.
Login the admin account in the web portal. Change to cron mode first.
And then run the following command:
sudo crontab -u www-data -e
Add this to the end of the file:
*/5 * * * * php -f /var/www/html/nextcloud/cron.php
Step 10 - Install some plugins
I personally recommand the following plugins:
- Two-Factor TOTP Provider
- Tasks
- Notes
- External sites
- Custom menu
- Announcement center
- Registration
- Breeze Dark
- Passwords
Step 11 Attach a bigger HDD for data
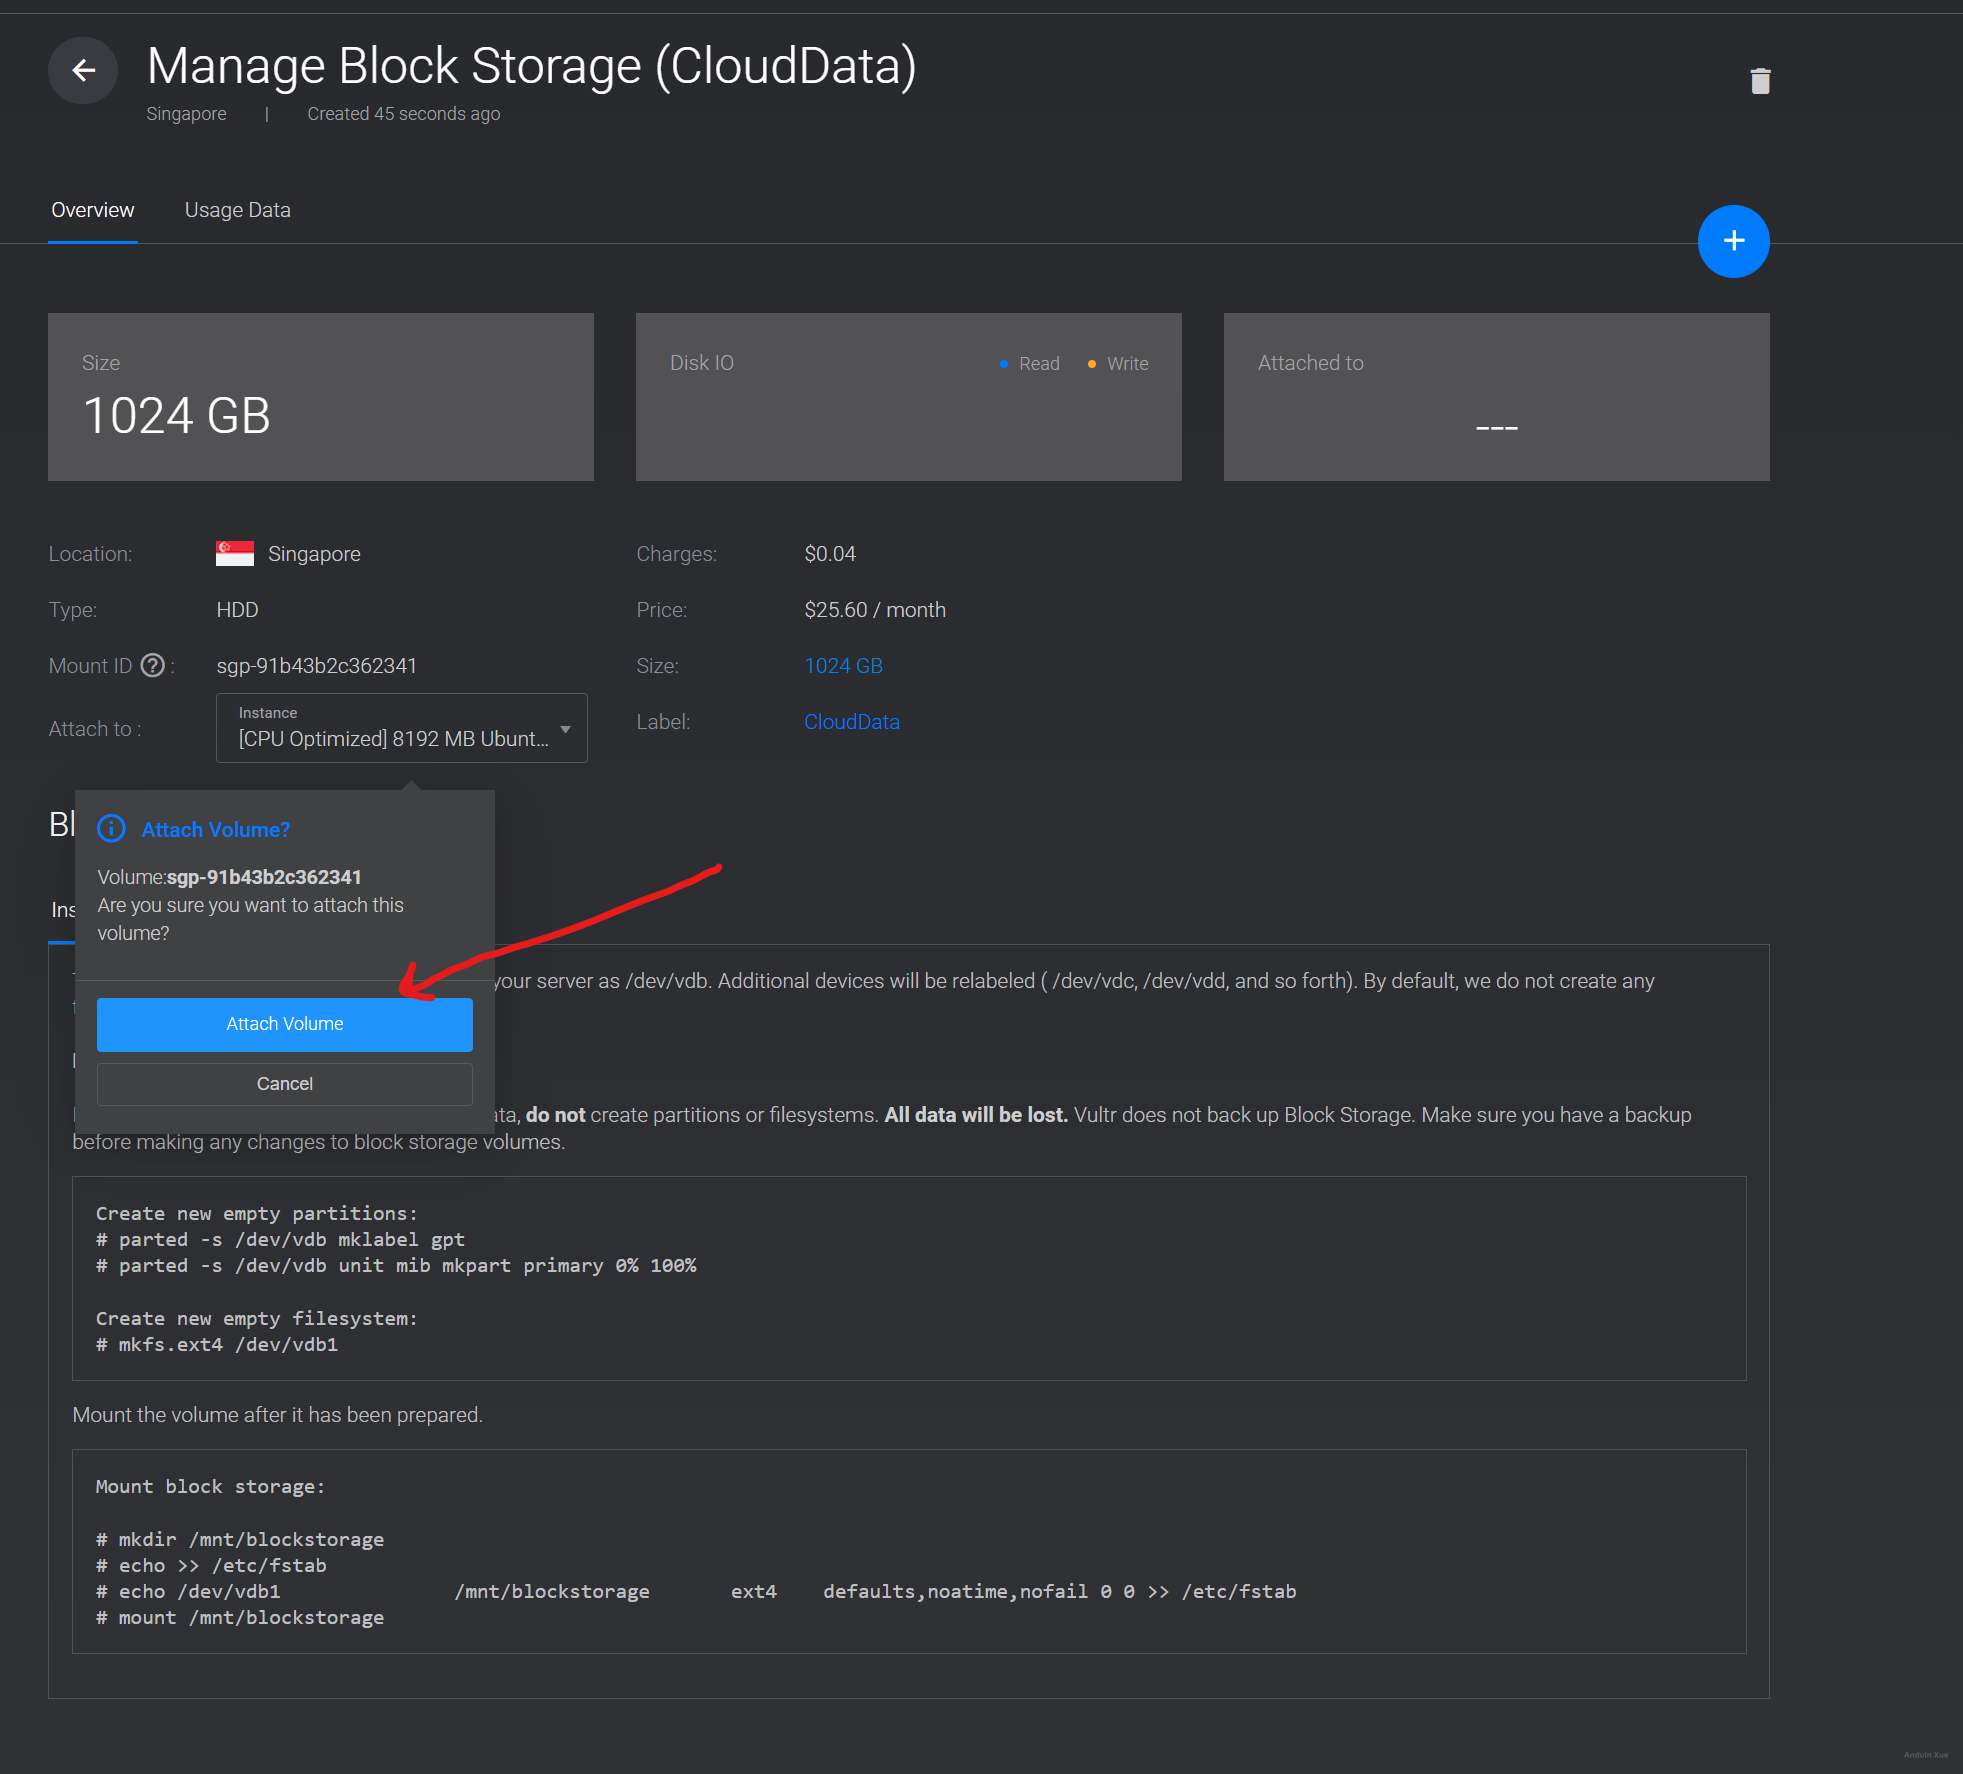
First, buy a large disk.
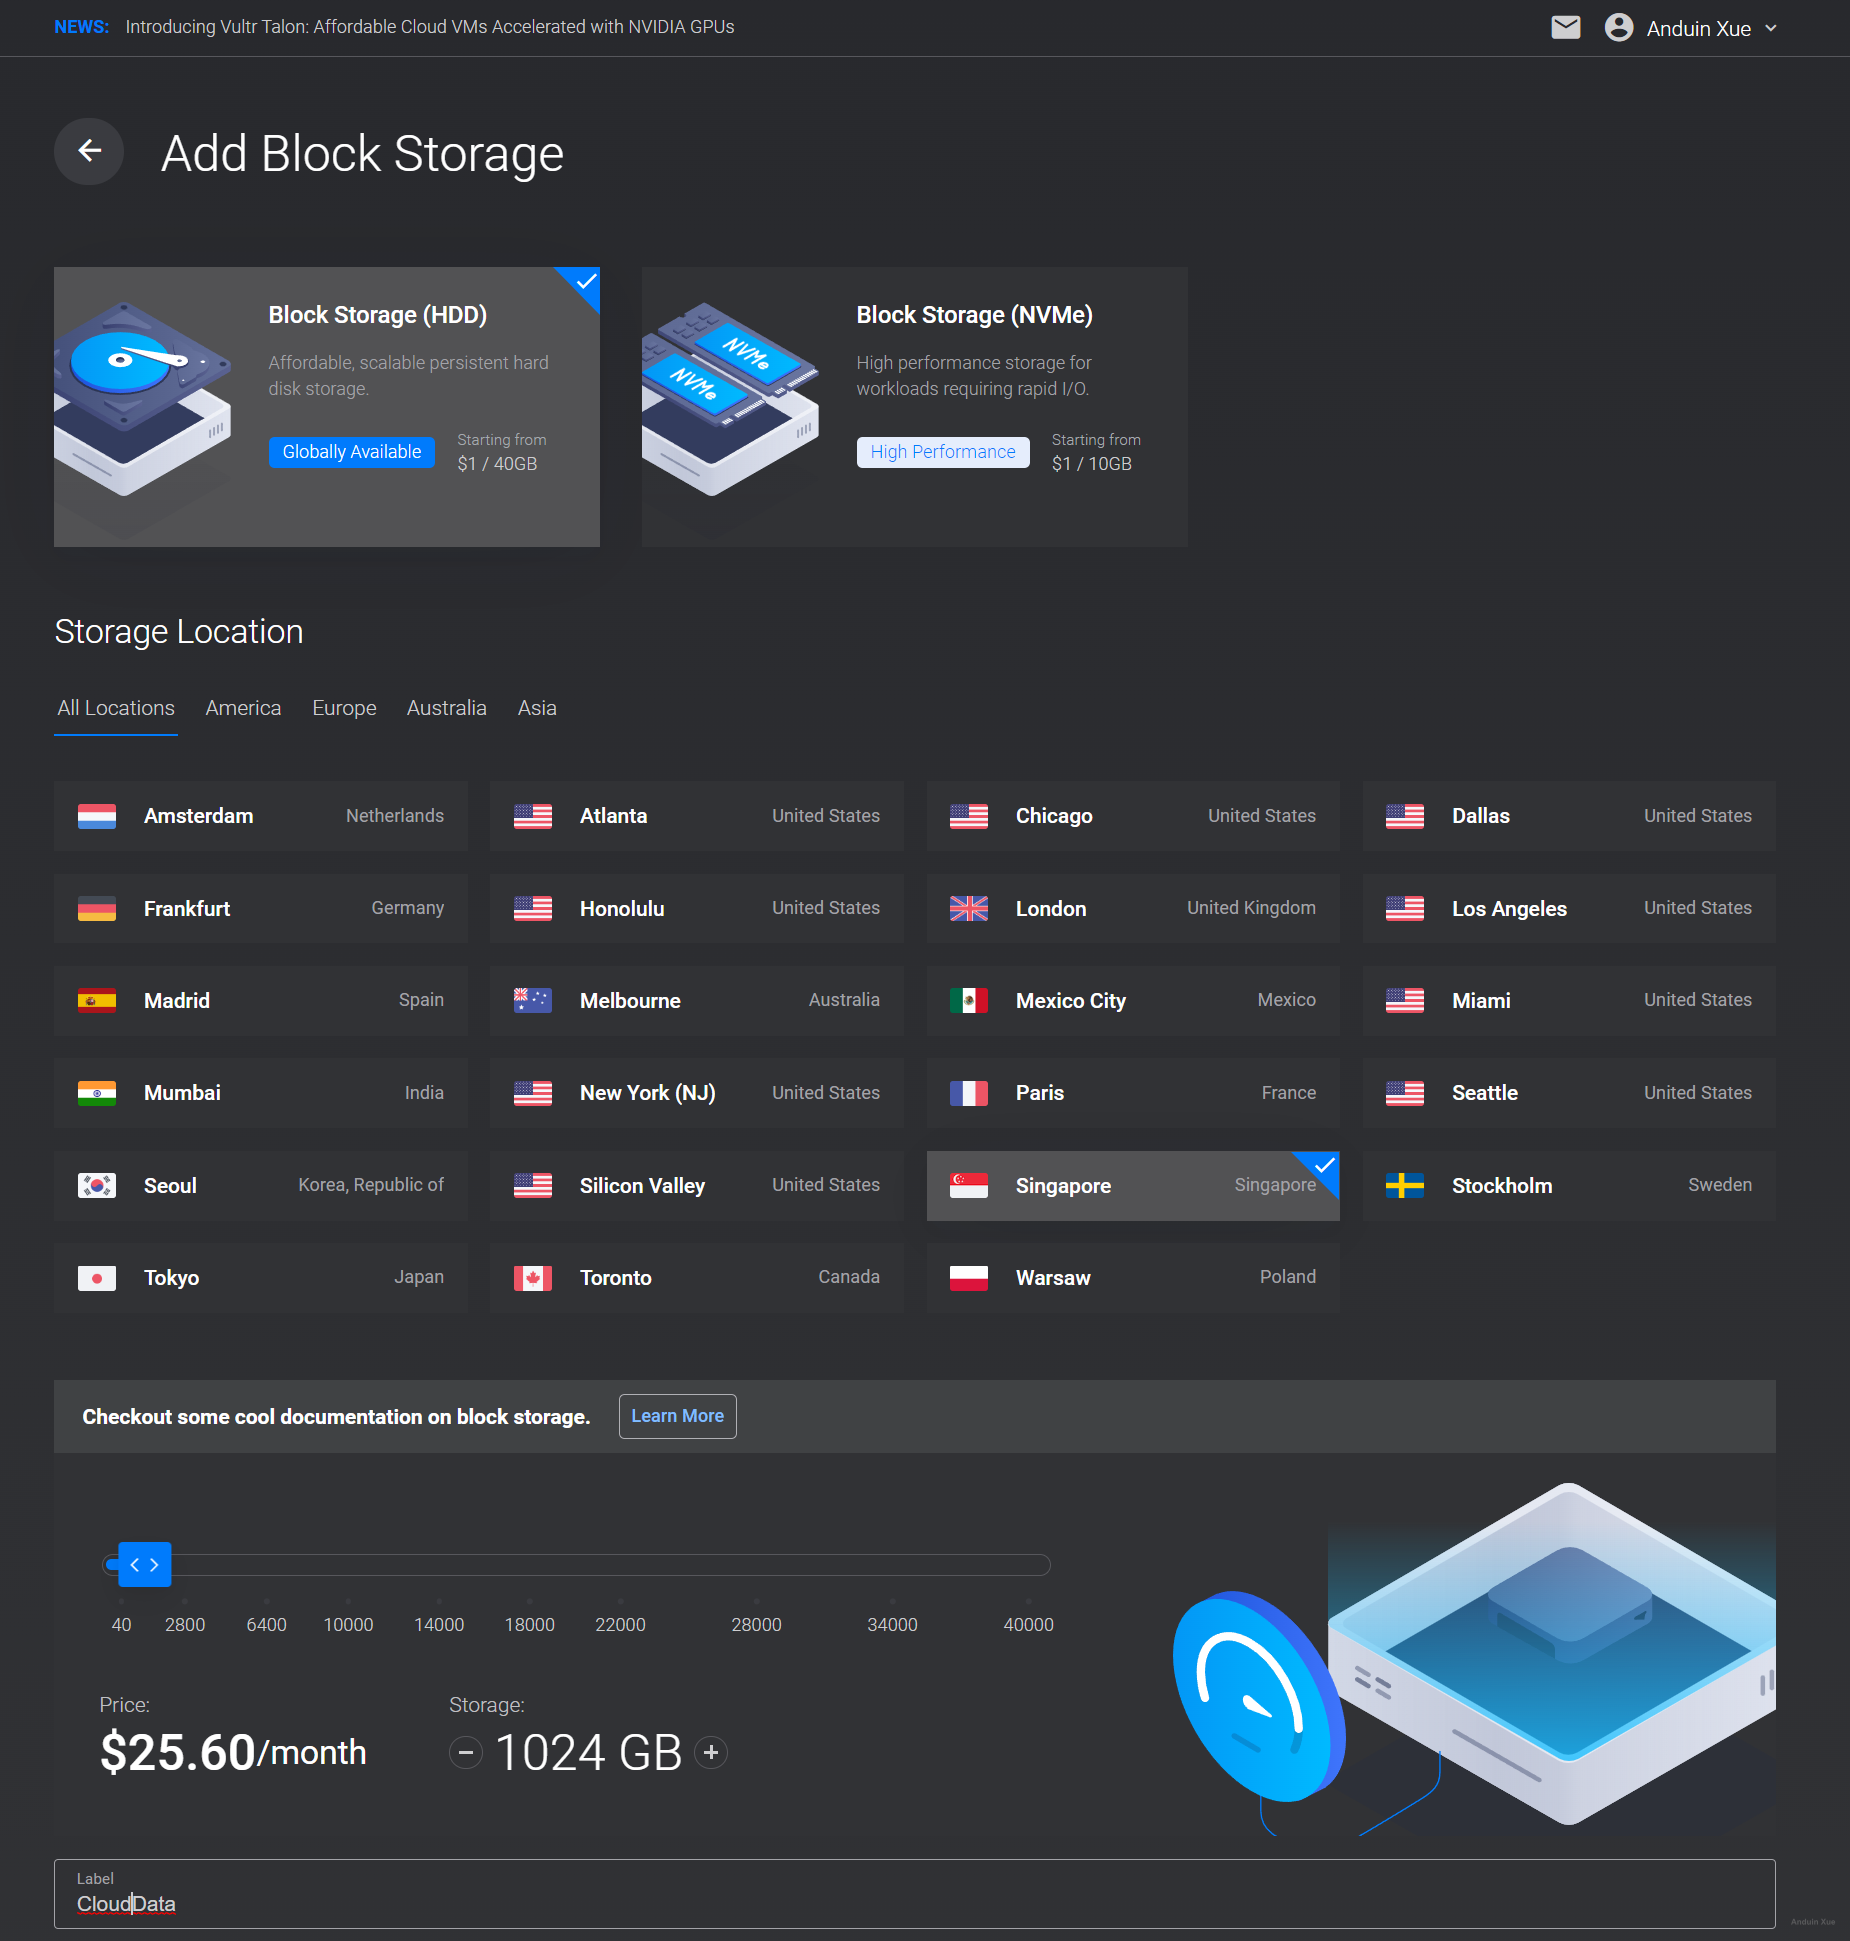
Then attach it to the server.
Run command sudo fdisk -l to locate the disk:
sudo fdisk -l
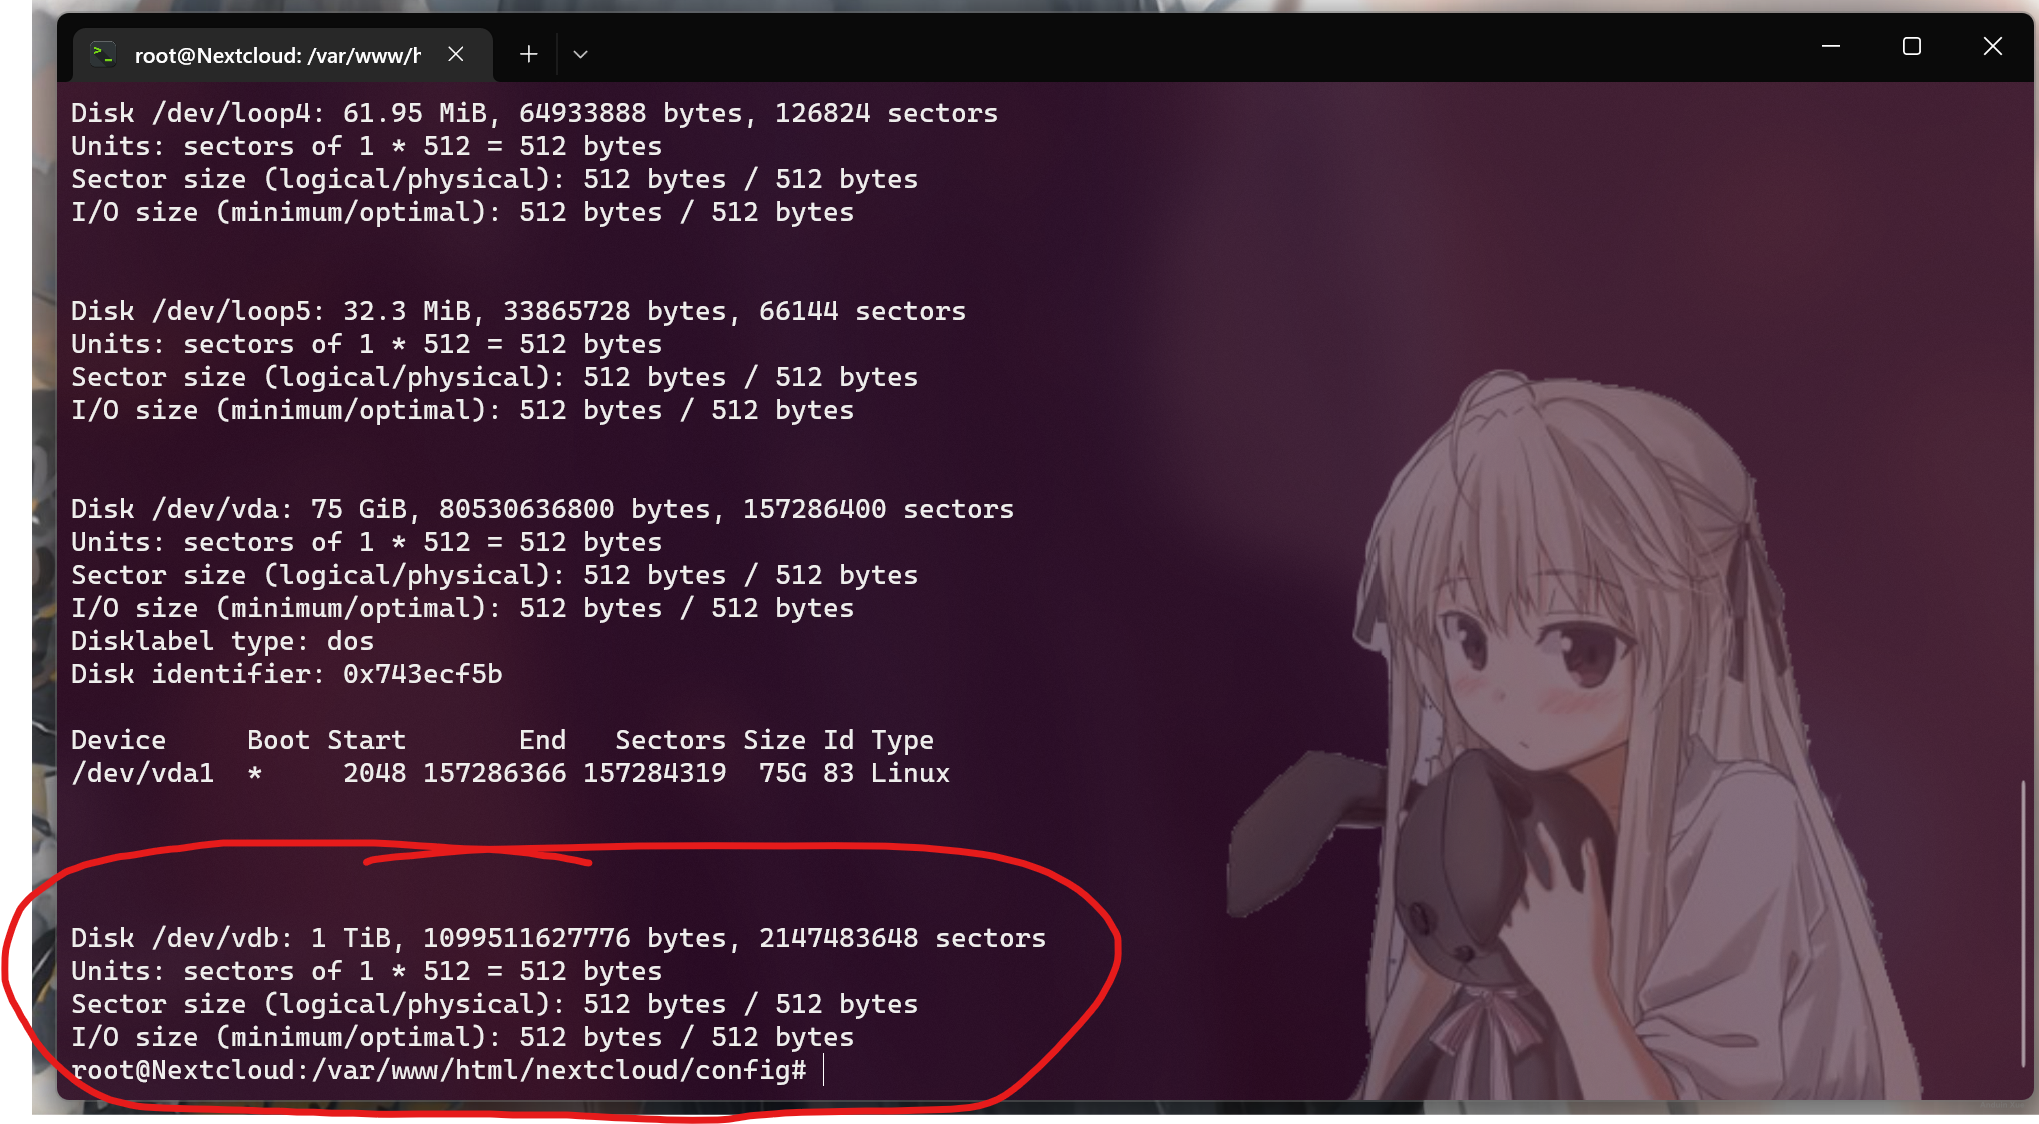
Now we can create a new partition vdb1 in it.
sudo fdisk /dev/vdb
Tips:
- n – Create partition
- p – print partition table
- g - reset as GPT partition table
- d – delete a partition
- q – exit without saving the changes
- w – write the changes and exit.
After creating, we can format it.
mkfs.ext4 /dev/vdb1
Mount block storage:
sudo mkdir /mnt/blockstorage
sudo echo >> /etc/fstab
sudo echo /dev/vdb1               /mnt/blockstorage       ext4    defaults,noatime,nofail 0 0 >> /etc/fstab
sudo mount /mnt/blockstorage
mkdir /mnt/blockstorage/data
You can verify the mappings:
sudo lsblk
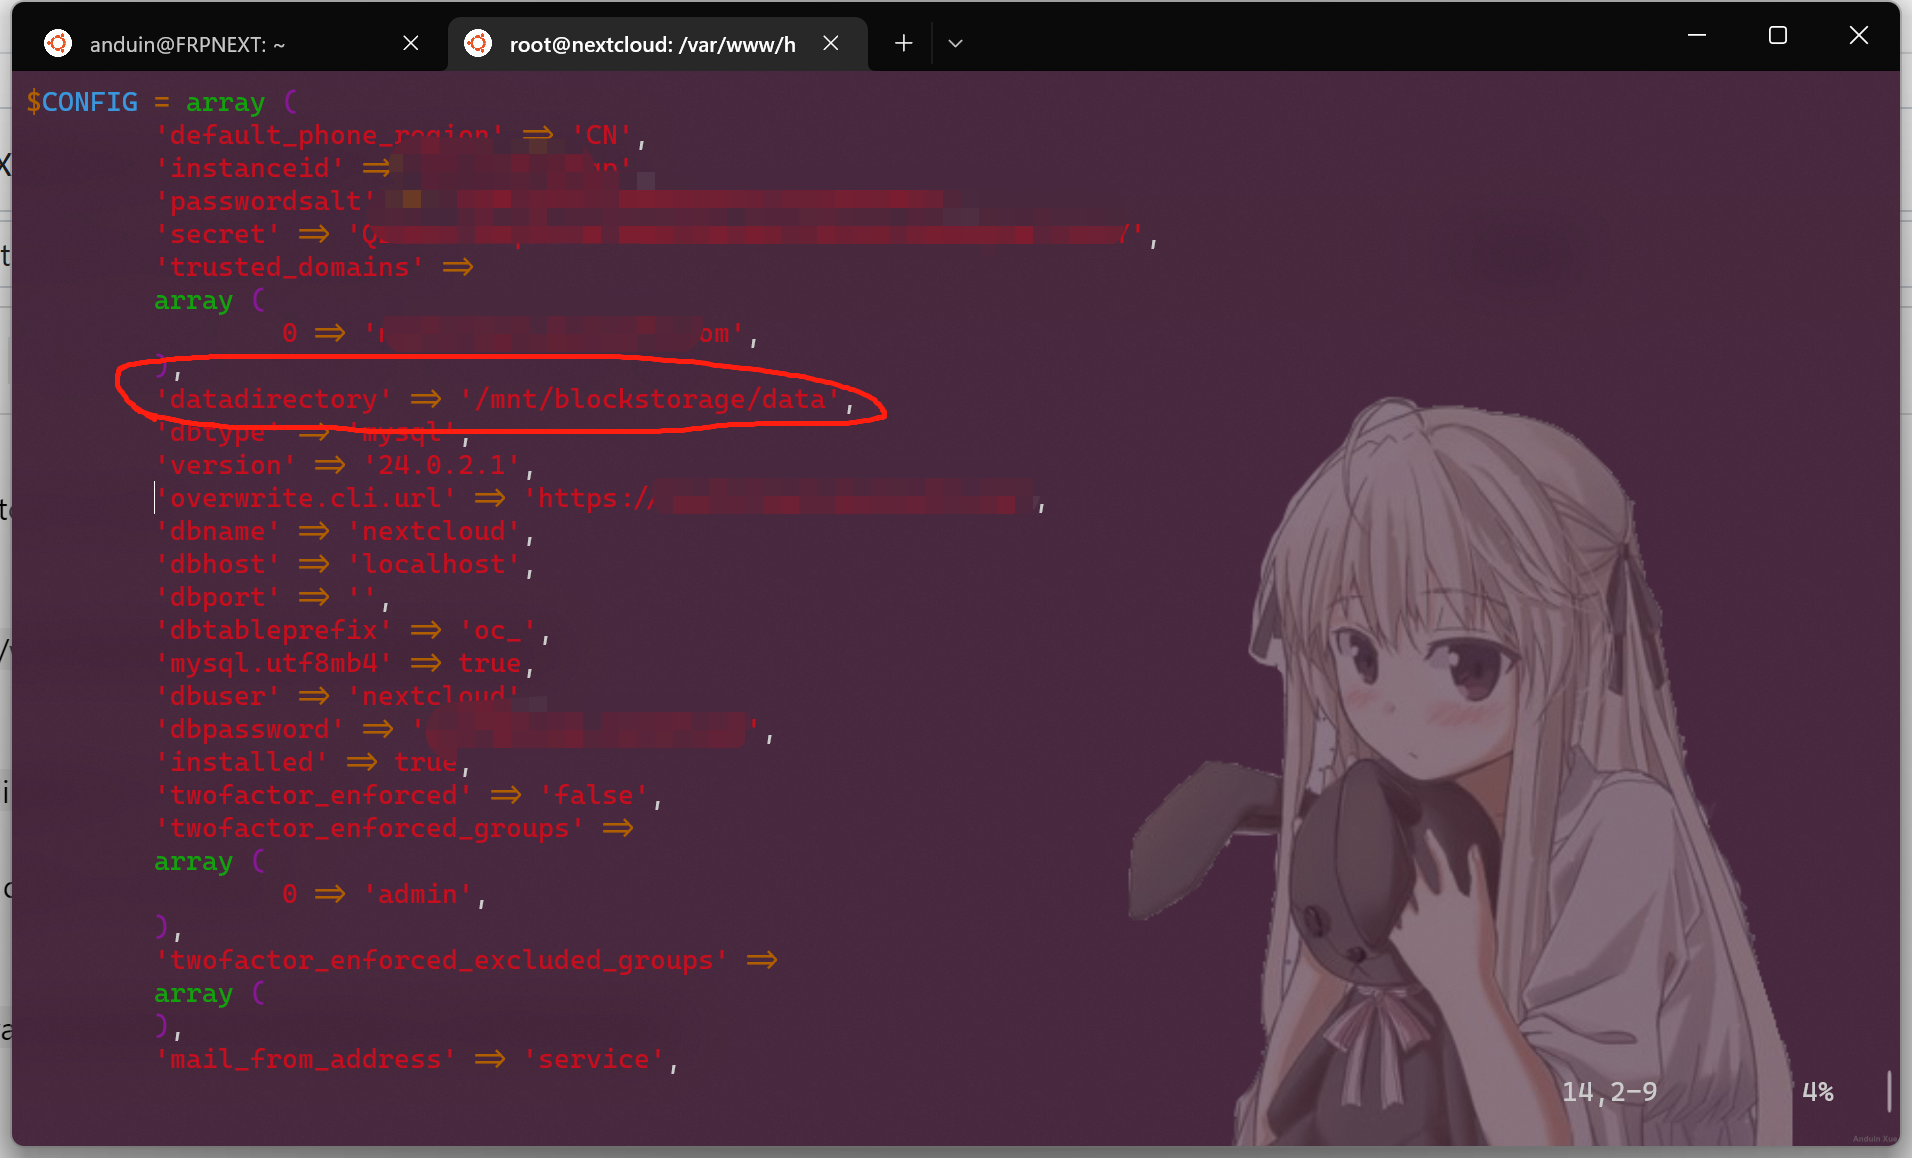
Now edit Nextcloud config:
sudo vim /var/www/html/nextcloud/config/config.php
Modify datadirectory to our new path.
Copy existing data to new location.
sudo cp -rv /var/www/html/nextcloud/data /mnt/blockstorage/
Don't forget to setup permissions:
sudo chown -R www-data:www-data /mnt/blockstorage/data
Make sure necessary data are copied:

You can check the entry in /etc/fstab to make sure your cloud still work after rebooting.
sudo cat /etc/fstab
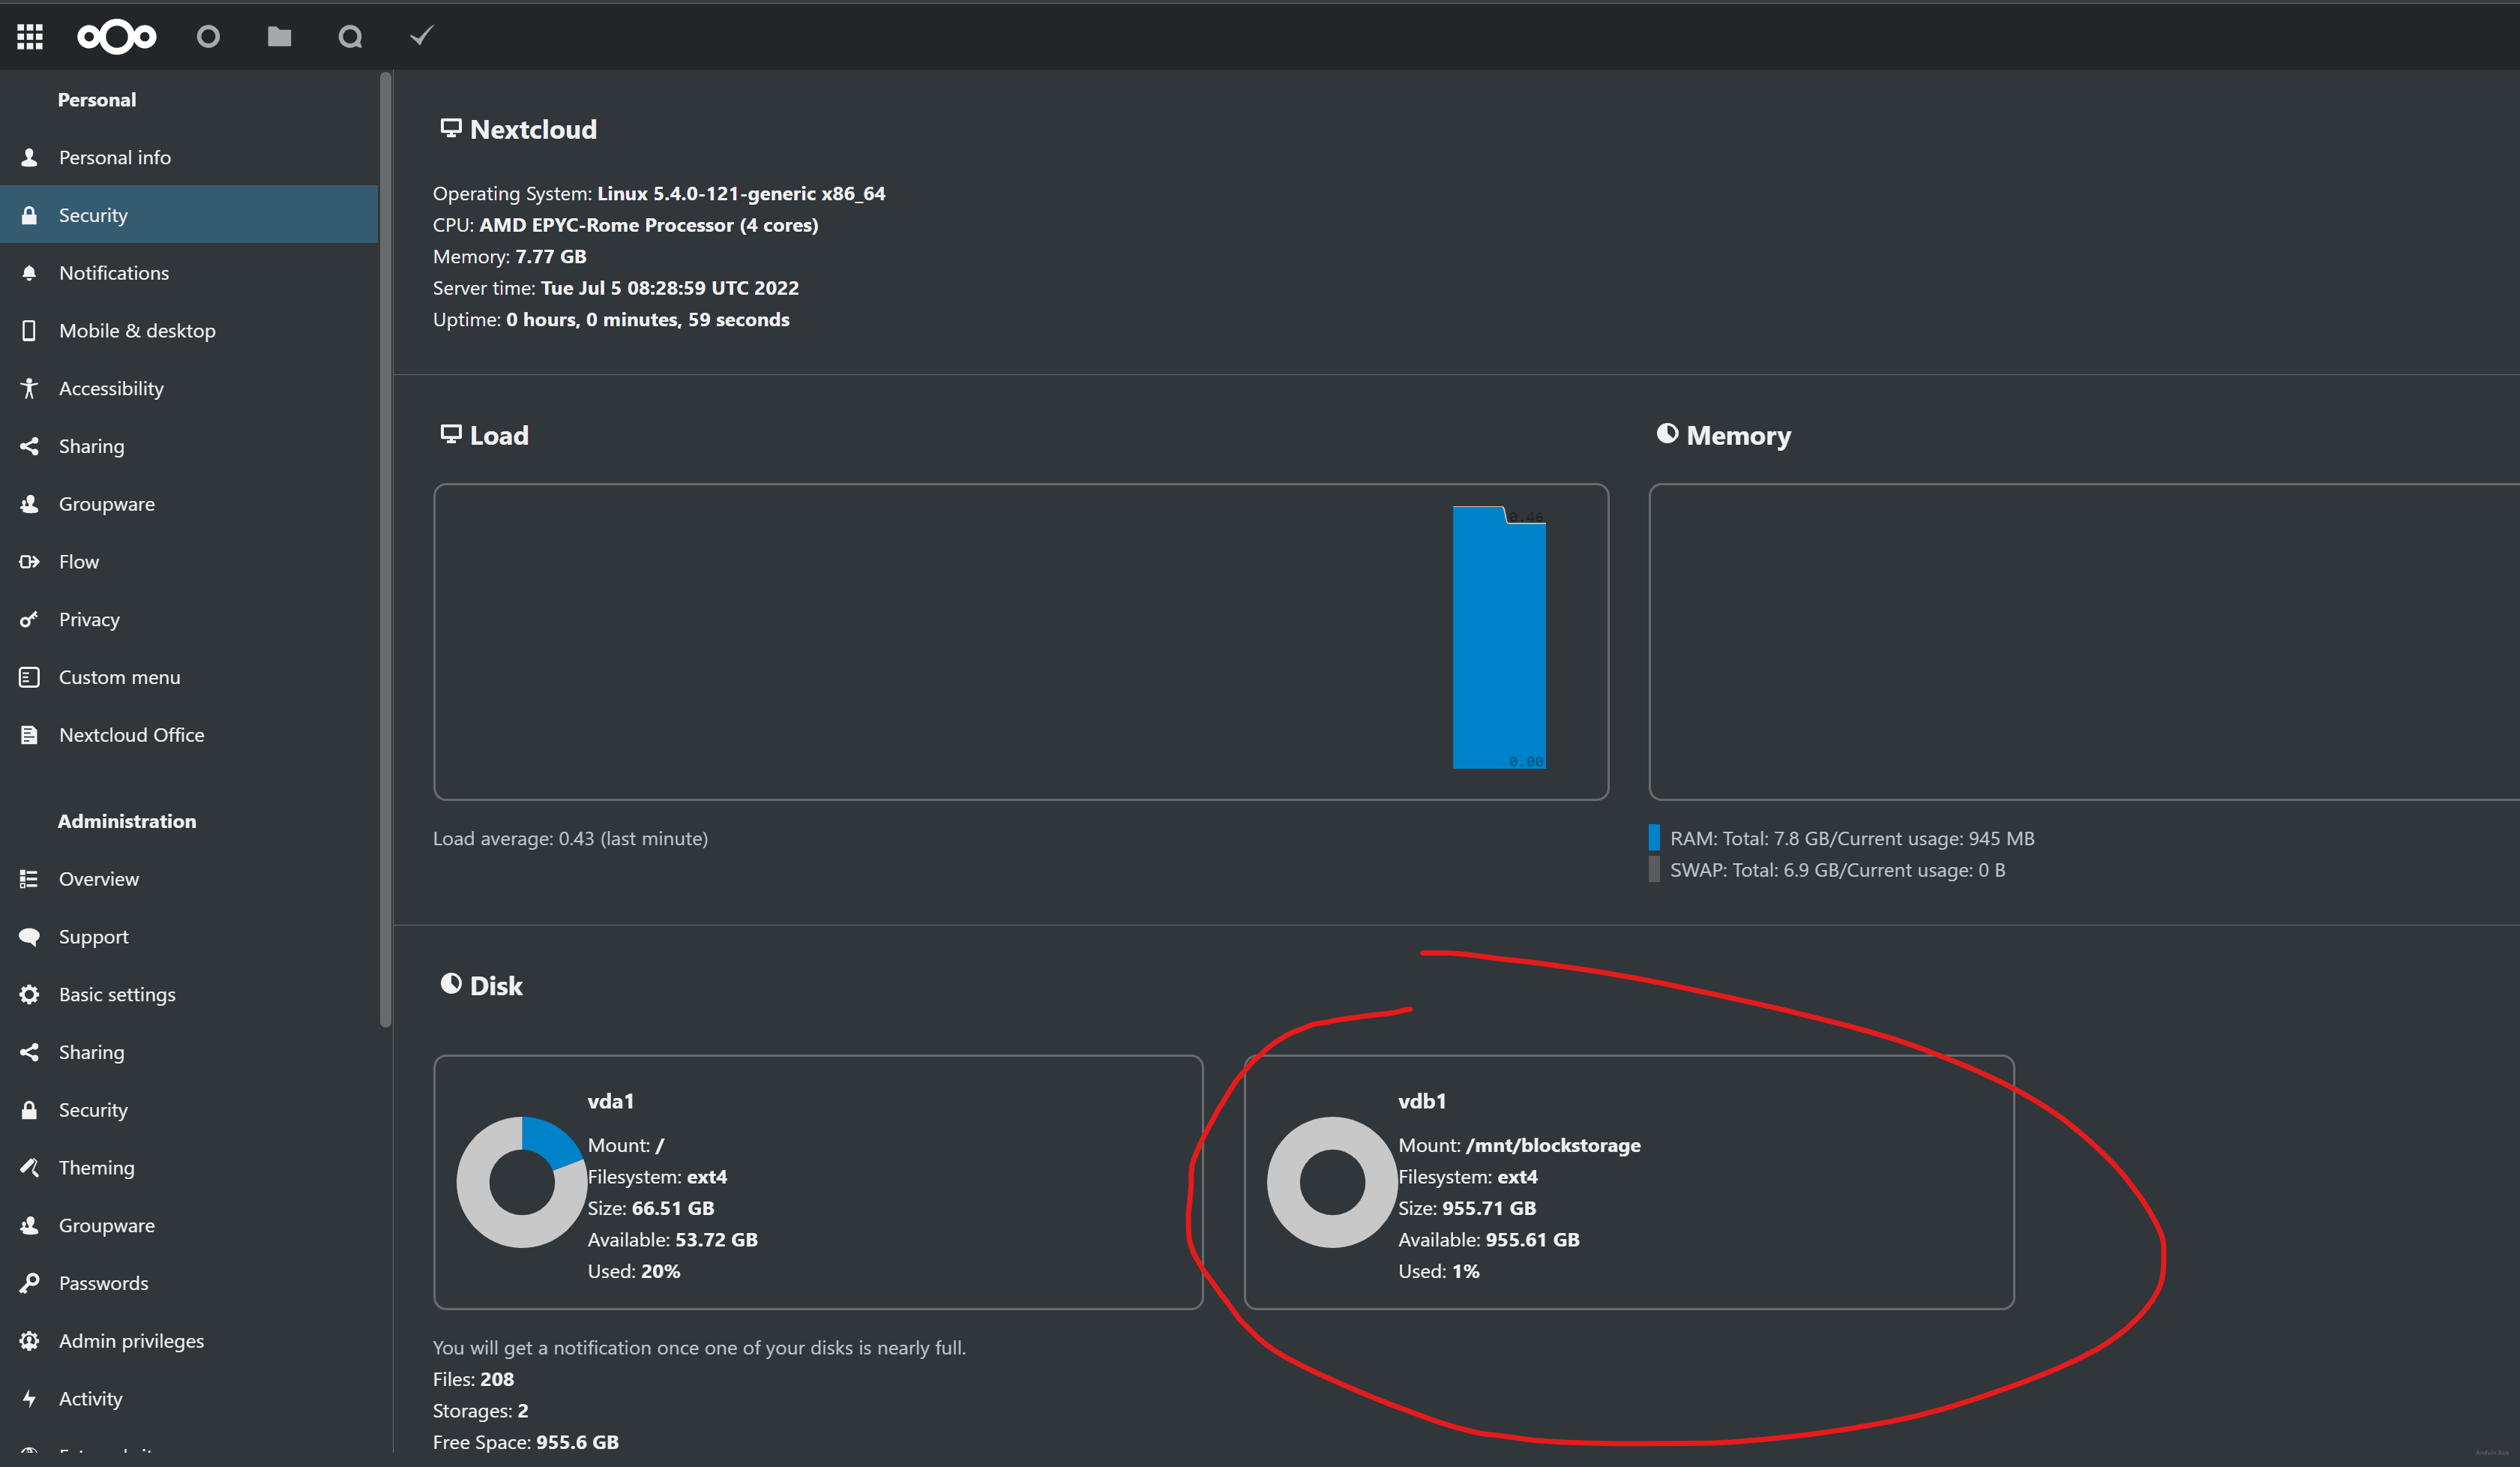
Now your server should have really large space.
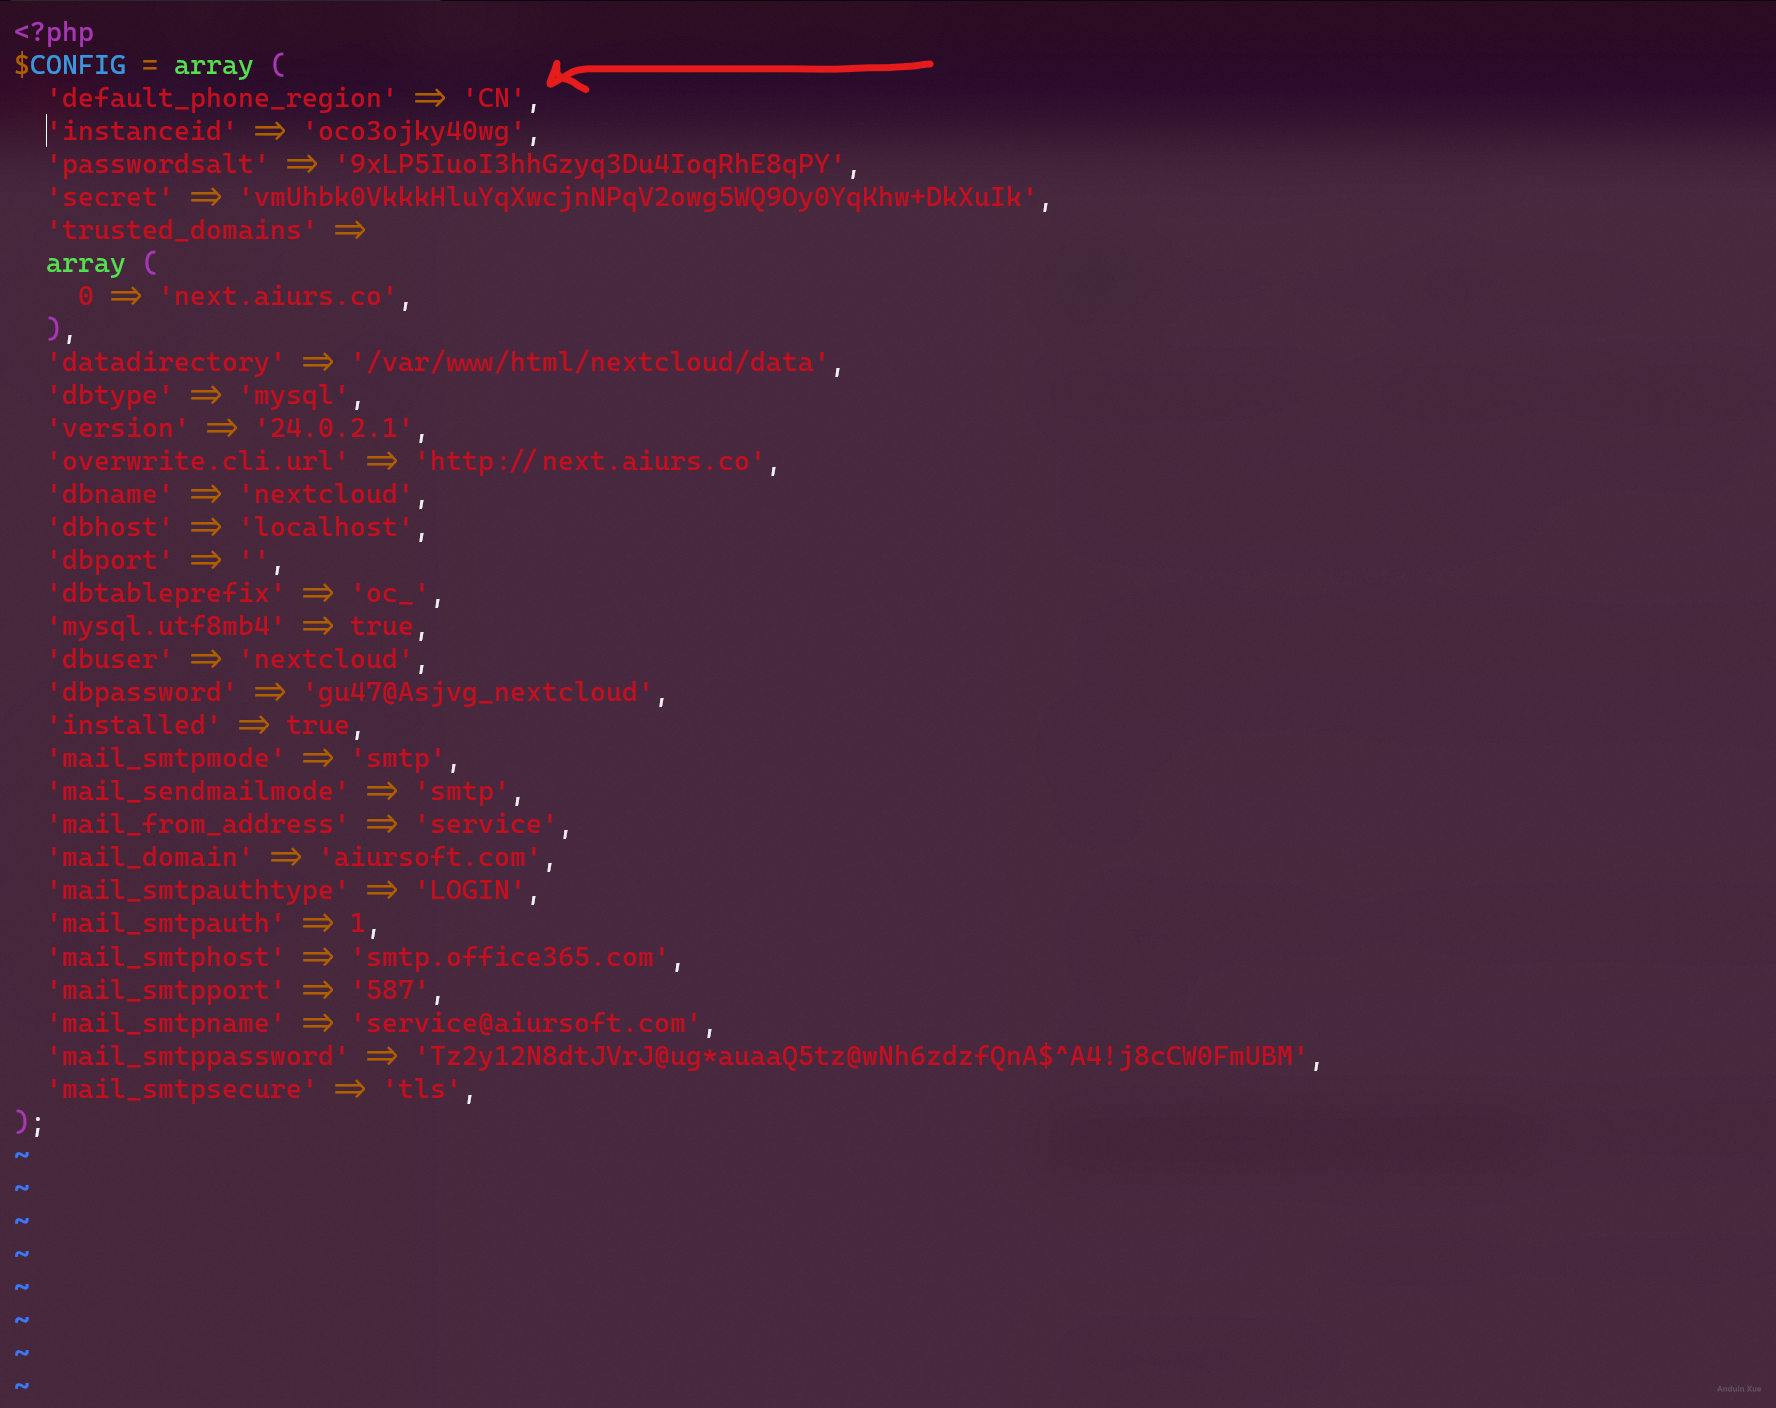
Step 12 - Finish region settings
Open:
sudo vim /var/www/html/nextcloud/config/config.php
Add
'default_phone_region' => 'CN',
You may also want to update some preview settings:
Add
  'enable_previews' => true,
  'enabledPreviewProviders' =>
  array (
    0 => 'OC\\Preview\\Movie',
    1 => 'OC\\Preview\\PNG',
    2 => 'OC\\Preview\\JPEG',
    3 => 'OC\\Preview\\GIF',
    4 => 'OC\\Preview\\BMP',
    5 => 'OC\\Preview\\XBitmap',
    6 => 'OC\\Preview\\MP3',
    7 => 'OC\\Preview\\MP4',
    8 => 'OC\\Preview\\TXT',
    9 => 'OC\\Preview\\MarkDown',
    10 => 'OC\\Preview\\PDF',
  ),
Step 13 - Finish Email settings
Go to the admin panel, basic settings tab. Modify the email settings to a valid Email server.
https://next.aiurs.co/index.php/settings/admin
Step 14 - Finish Redis settings
First install the following tools:
sudo apt purge redis-server
sudo apt install php-apcu redis-server php-redis
Edit the redis config:
sed -i "s/port 6379/port 0/" /etc/redis/redis.conf
sed -i s/\#\ unixsocket/\unixsocket/g /etc/redis/redis.conf
sed -i "s/unixsocketperm 700/unixsocketperm 770/" /etc/redis/redis.conf
sed -i "s/# maxclients 10000/maxclients 512/" /etc/redis/redis.conf
And add the redis user to www-data group:
sudo usermod -a -G redis www-data
And edit the php-acpu settings:
sudo vim /etc/php/{version}/mods-available/apcu.ini
Append the following content to the end:
apc.enable_cli=1
Now reboot everything.
sudo systemctl restart redis redis-server apache2
Now edit the Nextcloud configuration file:
sudo vim /var/www/html/nextcloud/config/config.php
Append the following properties.
  'memcache.local' => '\OC\Memcache\APCu',
  'memcache.distributed' => '\OC\Memcache\Redis',
  'memcache.locking' => '\OC\Memcache\Redis',
  'redis' =>
  array (
    'host' => '/var/run/redis/redis-server.sock',
    'port' => 0,
    'timeout' => 0.0,
  )
After that, make sure the settings still works:
sudo -u www-data php -f /var/www/html/nextcloud/occ
Reboot server now:
sudo systemctl restart apache2
Now go back to admin panel to see if the caching warning disappeared.
Step 15 - Setup backup
Backing up your server is very necessary. In case of some changes caused server stopping.
Before starting, you need to mount a new removable disk as /mnt/backup, or simply create that folder with mkdir /mnt/backup.
And, prepare a backup script like backup.sh:
# Create backups folder.
sudo mkdir /mnt/NextcloudBackup/backups

# Remove the oldest backup.
sudo rm "/mnt/NextcloudBackup/backups/$(ls /mnt/NextcloudBackup/backups/ | grep nextcloud-dirbkp | head -n 1)" -rvf

# Sync the nextcloud dir.
sudo rsync -Aavx /var/www/html/nextcloud/ /mnt/NextcloudBackup/backups/nextcloud-dirbkp_`date +"%Y%m%d"`/

# Sync data folder.
sudo rsync -Aavx /mnt/datastorage /mnt/NextcloudBackup/dir/

# Export database as SQL.
sudo mysqldump --single-transaction -h localhost -u root --password=db_root_password nextcloud > /home/anduin/temp.bak

# Copy the database SQL backup.
sudo mv /home/anduin/temp.bak /mnt/NextcloudBackup/database/nextcloud-sqlbkp_`date +"%Y%m%d"`.bak
You can use crontab -e to mark that script to run automatically.
Everytime you run that script, it will copy the following items:
- Nextcloud app path.
- Nextcloud data path. (In my example, it is
/mnt/datastorage - Nextcloud database.
And you can move those backups to anywhere you want!
Step 16 - Setting up a reverse proxy? (Optional)
In some cases, you might need a reverse proxy to proxy your nextcloud instance. This is not suggested.
However, if it is needed, here are some suggestions.
First, add the proxy IP address to your configuration file config.php:
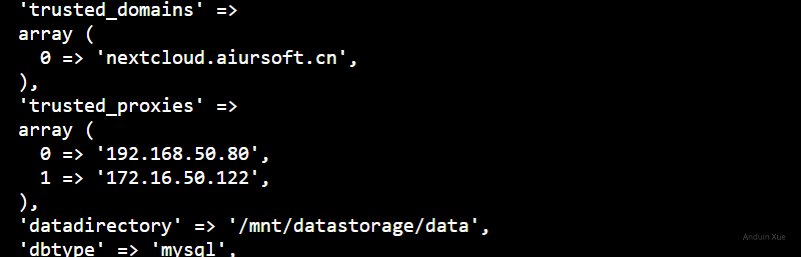
  'trusted_domains' =>
  array (
    0 => 'nextcloud.aiursoft.cn',
  ),
  'trusted_proxies' =>
  array (
    0 => '192.168.50.80',
    1 => '172.16.50.122',
  ),
And as for the proxy server, I'm using caddy.
Here is my configuration:
nextcloud.aiursoft.cn {
  reverse_proxy http://nextcloud {
    header_up Host nextcloud.aiursoft.cn
  }
  redir /.well-known/carddav /remote.php/carddav 301
  redir /.well-known/caldav /remote.php/caldav 301
}
And you should see no issue:
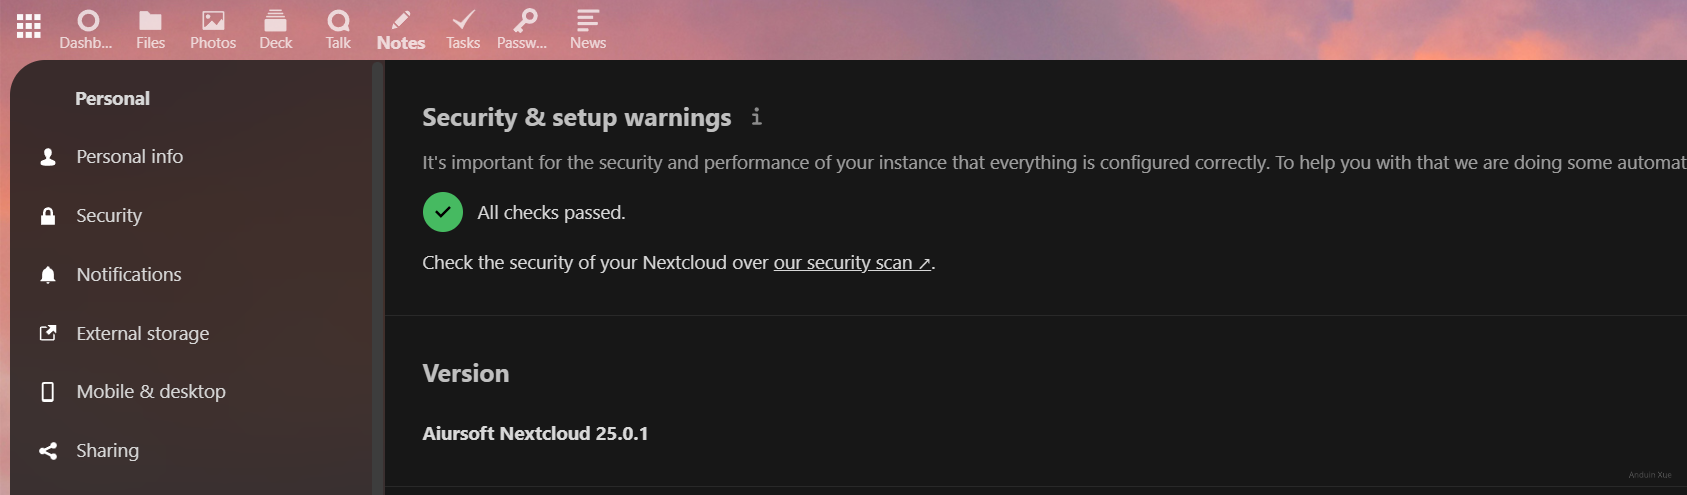
Step 17 - Setting up GPU
If you installed the recognize app, you need to set up GPU.
You can follow the instructions here:
And you will see this:

This blog post provides a comprehensive guide on installing Nextcloud on a Ubuntu 20.04/22.04 server. The author has done an excellent job of breaking down the process into 17 detailed steps, complete with images and code snippets to make it easy for readers to follow along. The core idea of the post is to help users set up their own private cloud storage solution using Nextcloud on a Ubuntu server.
One of the major highlights of this post is the level of detail provided in each step. The author has ensured that readers have a clear understanding of what needs to be done and why it is important. For example, the author has not only explained how to set up a reverse proxy but also provided a brief explanation of why it might be needed and why it is not recommended.
The blog post could be improved by providing more information on the prerequisites needed before starting the installation process. For example, it would be helpful to know the minimum hardware and software requirements for running Nextcloud on a Ubuntu server. Additionally, the author could provide a brief introduction to Nextcloud, its features, and benefits to give readers a better understanding of why they might want to use this solution.
In terms of potential errors, there do not appear to be any major logical or factual errors in the post. However, it would be helpful if the author could provide some troubleshooting tips or common issues that users might face during the installation process and how to resolve them.
Overall, this blog post is an excellent resource for anyone looking to set up Nextcloud on a Ubuntu server. The author has done a commendable job of providing a clear, step-by-step guide that is easy to follow. With some minor improvements, this post could become an even more valuable resource for readers.
good